Category: Home Renovation
Considering Home Renovation Training? A Guide to Interior Painting
September 14, 2021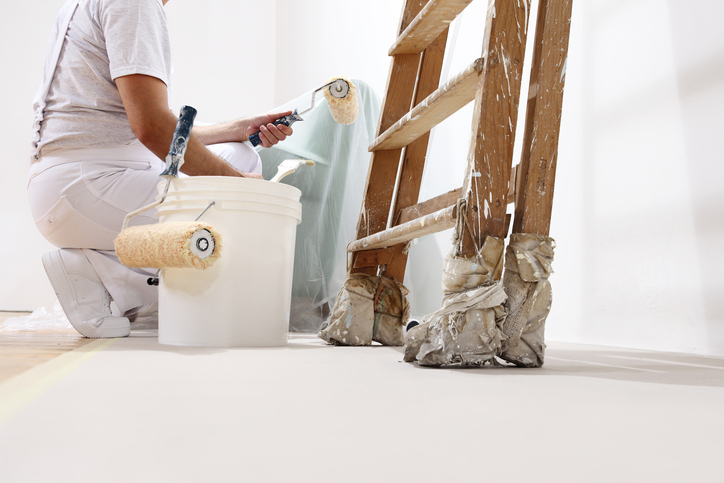
Interior painting might seem simple at first. After all, it’s just putting paint on walls, right? However, as many home renovation professionals and DIY painters already know, there are many factors to consider for achieving a successful interior paint job. If you’re considering a career as a home renovation technician, having a solid understanding of the interior painting process, in addition to knowing a few important tips and tricks will help you to improve the quality of your interior painting job.
Below you’ll discover a guide to painting home interiors – helping you tackle any such project with confidence and ease!
The First Step Professionals With Home Renovation Training Take: Assessment and Prep
Rather than jumping right into painting, there are a few important preliminary steps that every professional with home renovation training will want to take. The first is to assess the condition of the walls themselves. Are there imperfections, holes, or spots of unevenness? If that’s the case, it’s important to sand the walls first using an abrasive paper. Removing rough spots and patches of drywall compound will ensure that the paint goes on evenly, and also makes it easier to apply a new coat of paint.
After sanding, you’ll also want to look closely at the existing paint and the type of walls to determine which primer to use. Primer should always be applied before coloured paint, as it ensures that the colour of the paint will be as vibrant as possible, removing the possibility of dark spots or areas of thin application. If you’re painting paneled walls, you’ll want to use an oil-based primer – but if the walls are drywall, a water-based primer will do a great job of masking any blemishes.
Next, you can tape the trim using painter’s tape. One trick is to use a putty knife to press the tape down, as this will prevent any bleeds from occurring. Lastly, you’ll want to cover the surrounding furniture and floors with canvas cloth, as the use of canvas prevents the possibility of leakages. Once you’ve completed these steps, you’re ready to start painting!
Painting the Interior Walls
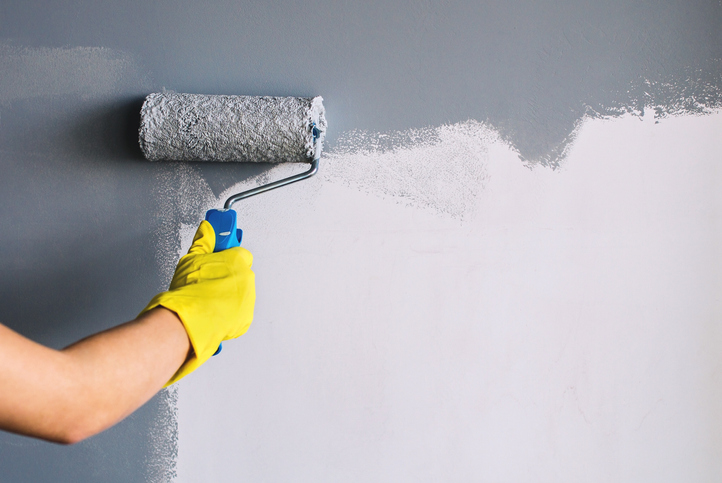
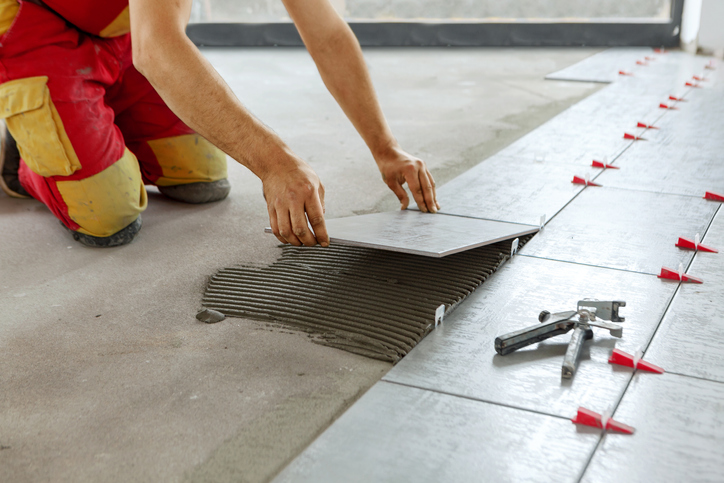
After you become a home renovation technician, there are a few things to keep in mind when it comes to applying the first layer of interior paint. You’ll want to make sure that you’re using the right painting materials, including a paint roller and a smaller paintbrush to fill in the edges. When using a roller, it’s important to avoid roller lap marks, which can be done by applying the paint in overlapping strokes. Make sure to paint the entire wall completely, as lap marks are more likely to appear when paint is applied over dry paint. Lastly, remember to apply two coats of paint to the walls, as this helps ensure that the paint appears even and consistent in colour.
Finishing Touches and Clean Up
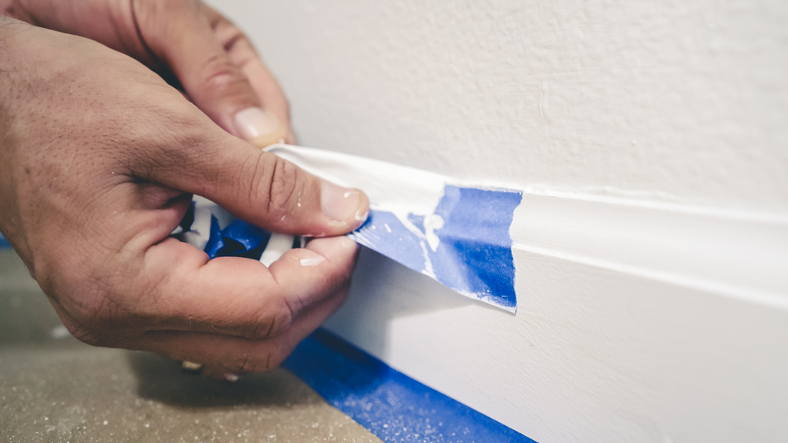
Once the paint has been thoroughly applied to the interior, it’s time to think about finishing touches and clean up. After the paint is dry, you can examine your work to determine whether there are any imperfections. These will be likely to appear in the corners and areas of trim, and are typically fixable with primer or another layer of paint. When it comes to fixing imperfections, a smaller brush can be used to carefully target the area in question. Once complete, you can begin carefully removing the painter’s tape from the trim, and storing the canvas cloths for future projects.
When you follow this guide, you’ll be ready to succeed in any interior painting project. After launching your career as a home renovation technician, remember these helpful tips!
Ready to launch a rewarding career by training at a home renovation school?
Get the skills you need to succeed with a program at the North American Trade Schools.
As a home renovation technician, you’ll be responsible for taking homes to the next level by handling a variety of projects, including painting, carpentry, plumbing and more. Whether it’s your own home or you’re completing a project for a client, it will be important to stock up on the proper tools to get the job done right.
Home renovation can be tricky at times. By equipping yourself with the tools you need, you’ll be able to successfully complete any project while keeping in line with building codes and safety regulations. In addition to safety gear such as a hard hat, safety glasses, respirator, and gloves, you’ll need at least five different types of tools including electrical tools, hand tools, carpentry tools, plumbing tools, and painting tools. Below, discover more details about each of these tool types!
1. You’ll Need an Assortment of Hand Tools
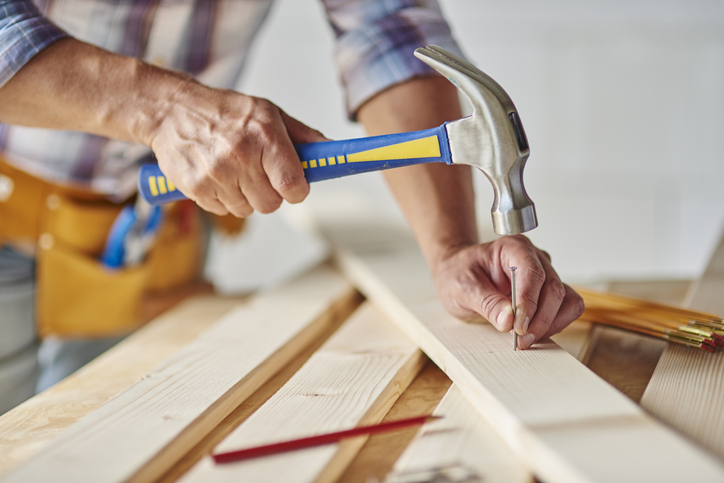
After completing your home renovation training, it will be important to carry a few different hand tools at all times. First, you’ll want a tape measure to ensure that you’re working with the right dimensions. You’ll also want a screwdriver (preferably a multi-bit one), and a variety of screws to go along with it. Additionally, it’s important to carry a few different hammers with you at all times. A carpenter’s hammer is convenient when it comes to woodworking projects, and a sledgehammer is essential when completing the demolition stage. Lastly, you’ll want to have some pliers on hand, as these will help you to fix and place wires and other smaller objects.
2. Carpentry Tools Will Help You Cut and Frame
When conducting carpentry projects, there are a few different tools that will enable you to complete the job in a clean and efficient manner. During your career, it will be beneficial to have a saw on hand at all times. In addition to a handsaw, consider investing in a motorized circular saw–as this will speed up the wood cutting process. Saw horses are also essential tools when it comes to staying safe while cutting plywood or lumber. If you’re working on a framing project, you might want to bring along a rafter square, as this will help you to determine the right layout. Finally, it will be impossible to know whether you’re cutting or fitting two pieces together without a level–so be sure to always have one on hand!
3. Plumbing Tools Are Helpful to Have on the Job
Once you become a home renovation technician you’ll probably have to navigate a few plumbing projects–especially when working on a home’s kitchen or bathroom. In order to successfully complete any plumbing job, you’ll want to have a: pipe cutter, sandpaper, and propane torch in your tool box. A pipe cutter will enable you to work with different pipes and shape them to the right size, while both sandpaper and propane torch are used to make new connections between pipes. In the case of leaks, it’s also helpful to carry some duct tape with you–as this can be used to quickly and safely seal any holes to prevent water damage from occurring.

4. Those in Home Renovation Training Can Expect to Use Electrical Tools
Every home renovation technician needs a few different electrical tools. The most important electric tool to have on hand is a cordless drill. This will help you to avoid the pain of using an extension cord when drilling needs come up on various projects. Additionally, if you’re working with wires, using a circuit tester allows you to ensure that no wires are live. This lets you quickly ascertain safely before moving forward with a project.
5. Finish the Job Up with Painting Tools
Painting is typically the last step in the home renovation process. While you don’t need too many heavy duty tools to give a surface a fresh coat of paint, there are a few handy tools that will make your life easier. First, you’ll want an assortment of tarps to put on the ground to catch any drops of paint that fall. You’ll want a sanding block to smooth out smaller surface areas. If you want to ensure a quality paint job, it’s also important to carry a set of high-quality rollers and paint brushes. One final tip: when it comes to painting corners and tight spaces, having a short-handled brush and an angled brush on hand is always useful.
Now you know what key tools you’ll need to have on hand to succeed as a home renovation technician. Depending on the project, you may want to carry some or all of these tools with you at all times!
Ready to enroll in home renovation technician school?
Launch your career with a program at the North American Trade Schools.

While businesses across Canada have felt the effects of the COVID-19 pandemic, one industry has bounced back faster than expected. The home renovation industry has been surging over the past year, with the main driver of this boom being the pandemic itself. With Canadians forced to spend more time at home due to travel restrictions and lockdown orders, they’ve had the opportunity to focus on what might be improved within their homes.
If you’re considering a career as a home renovation technician, your skills will be in demand in the coming years as Canadians continue to invest in home renovation projects. Read on to discover more about the trends dominating Canada’s home renovation industry, and the impact that this growth may have on your future career.
Professionals with Home Renovation Training Have Been in Demand Since the Pandemic
Even before the pandemic hit, home renovations were hitting record highs across Canada. With the initial arrival of COVID-19, many home renovation projects were put on pause as Canadians cut their spending in anticipation of an economic downturn. However, as the months dragged on, more and more Canadians either opted to move ahead with their renovations or decided to begin new projects that they hadn’t considered prior to the pandemic.

If you want to become a home renovation technician, it’s important to note that about one in two Canadians are either planning to or have already completed a home renovation during the pandemic. Today, the home renovation industry is experiencing a major resurgence, and the prolonged uncertainty surrounding the pandemic has only made growth in this industry more certain.
Why Canadians Want to Begin their Renovations Now
The COVID-19 pandemic imposed more restrictions on the free movement of Canadians than ever before. Many professionals found themselves working from home, their children attending school online, and their vacations cancelled. However, for those with home renovation training, these new obstacles provide more opportunities for revenue.
Homeowners are placing increasing importance on creating a home that they want to spend more time in–whether that means upgrading their home office, putting in a new patio, or adding an extra wing to their home for recreation. In fact, 80% of Canadians cited comfort as the main reason for undergoing a home renovation. Canadians want their homes to be as livable as possible, and with the extra time that the pandemic has afforded them, they’re able to sit down and think about the renovations they want to invest in.

The Benefits of Home Renovations
While the pandemic placed greater value on the home space, this isn’t the only reason that Canadians are investing in home renovations. Many are also looking to make home improvements as a means to increase their property values. More and more Canadians are investing in real estate due to the current affordability of the market, and many see home renovations as a great way to increase the value of their homes while real estate is cheaper. With a home upgrade, property owners are sure to see greater profits in the future, making home renovations more valuable than ever before. If you’re considering getting into the home renovation business, the time has never been better to begin your training!
Looking for the right home renovation school?
North American Trade Schools has the program for you!
An Intro to Staircase Installation for Students in Home Renovation Technician School
April 22, 2021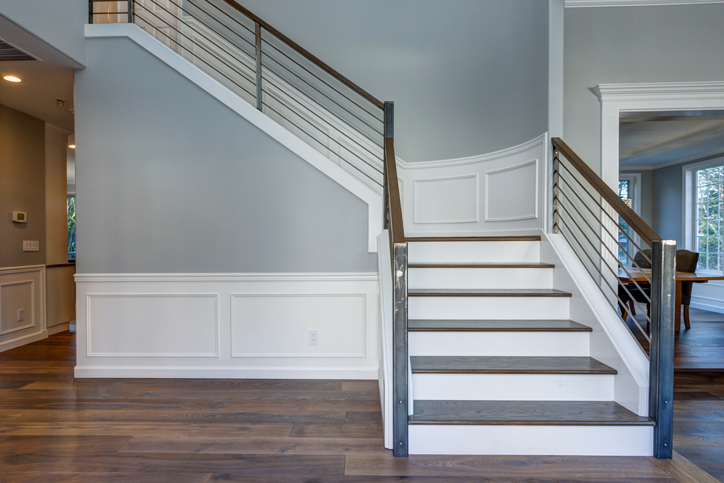
Staircases serve an important function in any home with more than just one floor. Stairs are necessary for moving from one level of the home to another, and they’re often heavily trafficked as a result. When renovating a house, there are many important factors to take into consideration before installing a staircase. Designs can take a variety of shapes and sizes, and there are advantages and disadvantages to the different types of staircases, as well as the materials used. If you’re interested in a career as a home renovation technician, read on to discover what you’ll need to know before installing a staircase.
Useful Staircase Terminology for those with Home Renovation Training to Know
There are a few different terms that are useful to know if you’re embarking on a staircase installation project. First, a riser refers to the section between two stairs. A riser’s height is typically in between 5 and 8 inches. A tread is the term used to describe the horizontal section of a staircase where a person steps—the width of which can vary, depending on the user’s preferences. Headroom refers to the space between a stair and the ceiling above. Building codes will dictate the requirements for the headroom’s height, but it’s usually around 6’8”.

The stringer supports the treads and risers. Finally, the handrail—also known as the railing—is the beam that runs parallel to the staircase to provide balance for those using the stairs. Together, all of these components make up the staircase. If you’re in home renovation technician school, read on to discover how these components can be used in different ways to create a variety of staircase types.
An Overview of Staircase Types
The simplest type of staircase to construct is a straight stairs design. These stairs only need to be connected at the top and the bottom, without requiring additional support in the middle. If there are less than 16 risers, it’s also not necessary to install a landing along with the stairs— making construction relatively straightforward. Another common type of staircase is an L-shaped staircase. Within an L-shaped staircase, a landing marks a change in direction between two sets of stairs, often creating a 90 degree angle. L-shaped stairs are great for installation in the corners of a room, but the work to build them can often be more strenuous for home renovation pros.
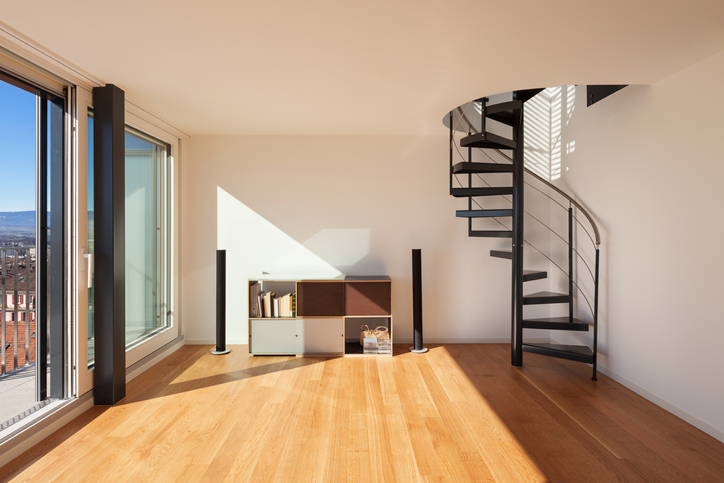
Although spiral stairs are less conventional, those with home renovation training may be required to install this type of design at some point in their career. Spiral stairs are more compact, and consist of treads attached to a central pole, radiating out in a helical arc. While these stairs require more careful attention from users when ascending or descending, their interesting design makes them a great option for a modern home.
Use These Materials When Constructing Staircases
When selecting the material you’ll use for a staircase, it’s important to keep in mind: how much the stairs will be used, who will be using the stairs, and what kind of aesthetic you’re going for. Wood is a popular option for use in a staircase. While it’s trickier to install, it can be a great option for high-traffic areas as it’s often more durable. If strength and durability is the goal, concrete or natural stone can be used to construct a staircase—although these materials are most often reserved for staircases on the exterior of the home. Lastly, steel or metal can also be used in the construction of staircases, as these materials are both lightweight and low maintenance.
Want to become a home renovation technician?
Launch your career with the North American Trade Schools today!
Look Out for These Common Roofing Problems if You’re Entering a Home Inspector Career
February 16, 2021
Home inspection describes a consulting service where industry professionals analyze the safety conditions of a home—helping buyers make informed decisions before purchasing or living in their chosen home.
A big part of home inspection includes assessing the roof for any signs of damage. Conducting a thorough visual inspection of the roof can reveal potential concerns and areas in need of repair to promote the safety of the home’s inhabitants. Those interested in home inspection can receive proper training, learning practical skills to ensure safe living conditions. Here’s a brief overview of what home inspectors can look for when investigating roofing problems.
Checking Gutters and Soffits When Inspecting Roofs
When searching for any roofing problems, home inspectors rely heavily on visual inspection. One of the most obvious signs of a roofing problem includes a sagging roof—which can indicate deterioration, improper installation, or difficulty supporting its weight. Acting quickly to replace a sagging roof is of utmost importance, preventing the chances of it collapsing.
Other problems can include dirty or clogged soffits (the bottom of house eaves or rafters). Dirty or clogged soffits can mess with attic ventilation, blocking airflow and promoting mould growth on the roof’s framing. Home inspectors will also want to check for any rusted gutters, which can lead to unwanted leaks. It’s also important to look for a well-installed gutter apron, typically used to stop water flows from rotting other parts of the roof (like the soffits or roof sheathing). If water stains are visible below the gutter, then gutter aprons should be installed for added protection.
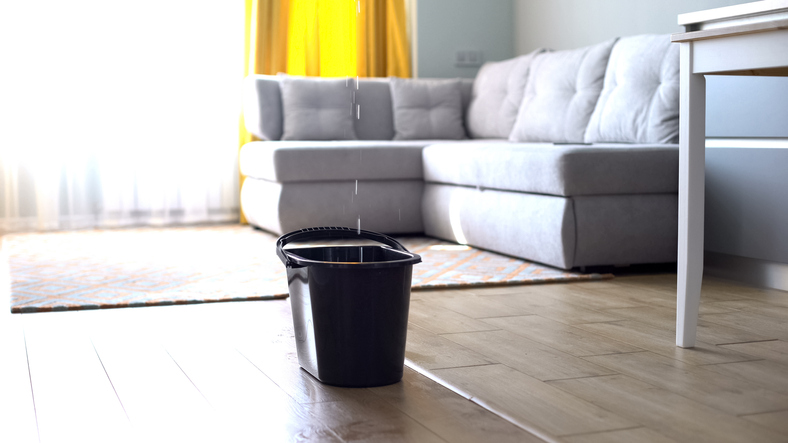
Spotting Signs of a Leaky Roof after Your Home Inspector Training
Water damage can be a clear indication of a roofing problem. If the home’s ceiling or interior walls feature any water stains, then a leaky roof is likely the culprit. Addressing this problem quickly is extremely important, as doing so can prevent further problems from developing—like growing mould or damaging insulation. This can occur around bathroom fans as well, possibly indicating a leak from roof vents. It should also be noted that if mould is spotted on the exterior walls, a leaky roof should be considered as a probable cause.
Those with a home inspector career can also keep an eye out for any roofing problems when assessing the insulation. For example, a leaky roof can be responsible for interfering with the house’s insulation, affecting heating and cooling systems.
Inspecting Roof Shingles and Flashing for Signs of a Roofing Problem
Home inspectors will want to carefully look at the state of roof shingles and flashing in order to properly assess the living conditions of a house. Roof shingles are overlapping elements used to cover roofs, adding further protection. Inspectors should look out for any damaged or missing shingles, both of which increase the chances of leaky roofs. Roof shingles can also appear mismatched or uneven, allowing water to penetrate more easily.
Those who have started their home inspection training will know about roof flashing, used to protect areas where the roof intersects with other walls or structures (like chimneys). Flashing is important when inspecting water flow, preventing water from crashing and seeping into the sidewalls. If the flashing is loose or rusted, then this layer of protection is rendered inefficient—potentially rotting the roof’s sheathing and framing or leading to the growth of more mould.
Do you want to become a home inspector?
Contact NATS for more information!
Taking Home Renovation Training? Here’s How to Handle Mold Discovered on a Reno
February 02, 2021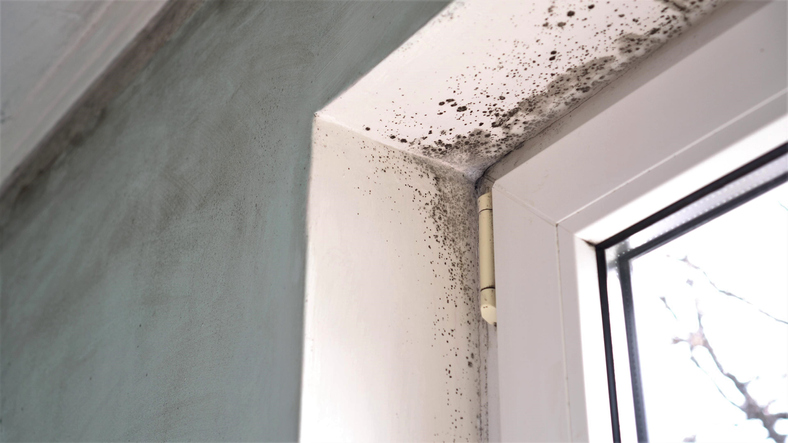
During a home renovation project, it’s not uncommon to discover a few “fun” surprises. Ripping up a floor or tearing down a wall is not only an opportunity to give a home a new look—it’s also a chance to make sure there’s no mold hidden out of sight and causing harm.
When mold is discovered, it’s important to address it right away. Left untreated, mold can become a serious health hazard to those who have it in their homes. In fact, it’s known for causing respiratory problems, immune disorders, allergies, and more. If you’re interested in becoming a home renovation technician, here are some tips on identifying and dealing with a mold situation, and how to prevent mold from occurring in the future.
If You Have Home Renovation Training, Here’s Where Mold Is Likely to Occur
Mold is most likely to grow in places where there is excess moisture. When renovating a home, make sure to check carefully for any leaks, condensation, or general moisture within the walls or floors, as these spots will be prone to mold growth. After your home renovation training, be sure to thoroughly examine a home for water damage or condensation during the renovation process, because where there’s moisture, there could be mold.
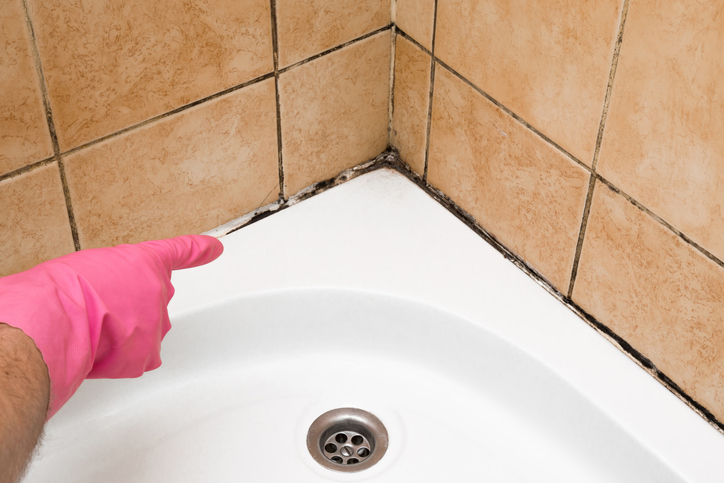
You Found Some Mold: Now What?
So you’ve discovered mold—what’s next? Whatever the quantity, mold should always be removed. While a little bit of mold might not pose a threat, there are certain types of mold that can be dangerous to our health, so it’s good practice to deal with mold as soon as it’s identified. Upon encountering mold, determine how much mold there is and what colour the mold is. If there are large spots of mold (bigger than your hand), the removal process may be more intense, and it might be best to call in a mold professional. Additionally, if the mold is black in colour, this could indicate the presence of black mold, which is toxic and should be removed by a professional remediation company.
Preventing Mold from Reappearing During Your Home Renovation Career
If you want to become a home renovation technician, remember that it’s a good idea to be prepared to encounter mold while on the job. Make sure to have protective equipment on hand, such as goggles, gloves, and an N-95 or P-100 respirator.
Of course, what’s even better than removing mold is preventing mold from occurring in the first place. Mold is sneaky, and preventing any possibility of re-growth is essential, especially while renovating a home. You wouldn’t want to put in a new floor over an area that has a chance of developing mold again. In order to remove the possibility of mold resurgence, make sure that the area is completely dry. A dehumidifier can be helpful here. Additionally, consider sealing off the area with a sealant such as shellac before continuing with the renovation, which will discourage mold growth.
Are you ready to enroll in home renovation technician school?
Explore the program options available at the North American Trade School today.
Trends and Features for Home Renovation School Students to Watch in 2021
December 15, 2020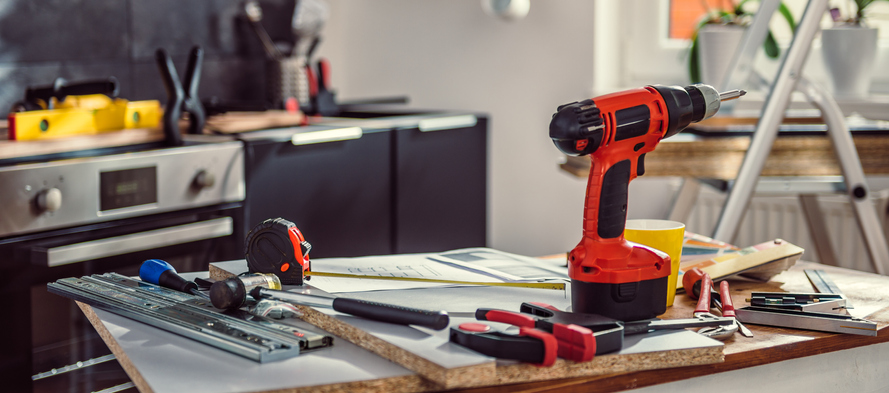 A brand new home renovation project is an exciting way to start fresh and make new changes, especially with 2021 right around the corner. This year has been full of challenges and surprises, but it gave us a chance to rethink how our personal living spaces work for us—especially now that many people have to work in them as well.
As a home renovation technician, you’ll be able to help make people’s dream homes come true. With valuable skills that range from carpentry and wood (re)finishing to painting and plumbing, you will be better prepared to tackle many future home renovation projects with ease and confidence. So, here’s a quick look at the rising trends and features in home renovation set to get big in 2021.
Creating Calm but Productive Spaces Through Multi-Functional Zen Design
Those doing their home renovation training can expect many different trends to take off in the new year. With the stress of 2020, there’s now an increasing need for calm and comfortable spaces that help us get more done. Typically this means optimizing living spaces so that they serve more than one function while still maintaining a nice and interconnected aesthetic throughout the home. Having a well-designed environment that supports the new work-from-home lifestyle is a key feature that many will look for in 2021.
Multi-functional designs are a great way to create productive spaces–incorporating innovative and adaptable ideas to solve tight storage or address at-home workspace needs. These new changes are often paired with a zen-inspired aesthetic, emphasized by neutral or earth-toned colour palettes and simple minimalistic designs. For instance, rooms would feature more natural light, with window treatments adopting a subtle, down-to-earth style. Accent pieces would come in warm colours, like golden yellow or sage green, and would typically be made with natural materials to give off a warm and inviting feeling.

Adding Depth and Character to Rooms by Including Textured Elements
Textured elements in home renovations are becoming increasingly popular, so students in home renovation schools might not be surprised to see the trend for wood details and woven-style accessories continue in 2021. Various elements can feature these types of textures—ranging from walls and flooring to lighting fixtures and cabinets. This can also be applied to statement pieces that tie the whole aesthetic together, showcasing textile wall art, stoneware pieces, or even canvas paintings.
Alternative materials include wicker, rattan, or bamboo—which are slowly making their way to indoor spaces as well as outdoor ones. These materials are popular for their durability, but they’re also eye-catching due to their unique textures. Having them around would definitely bring a light and airy feel to home renovations.

Using Your Home Renovation Training to Create Eco-Friendly Spaces
Home renovation trends for 2021 will strongly favour eco-friendly and sustainable designs and features. Some of these design features include reclaimed wood, which is now becoming an aesthetic choice as well as an eco-conscious decision—used in ceiling beams or countertops, among other places, to add a rustic and homey look to any room. Green walls, also known as vertical gardens, are set to keep trending. The addition of low-maintenance houseplants can effectively change the atmosphere of a room, especially since some plants can naturally help clean the air around us.
Are you interested in attending a home renovation college?
Contact NATS for more information!
Common Bathroom Remodeling Mistakes: A Look For Those in Home Renovation Training
November 20, 2020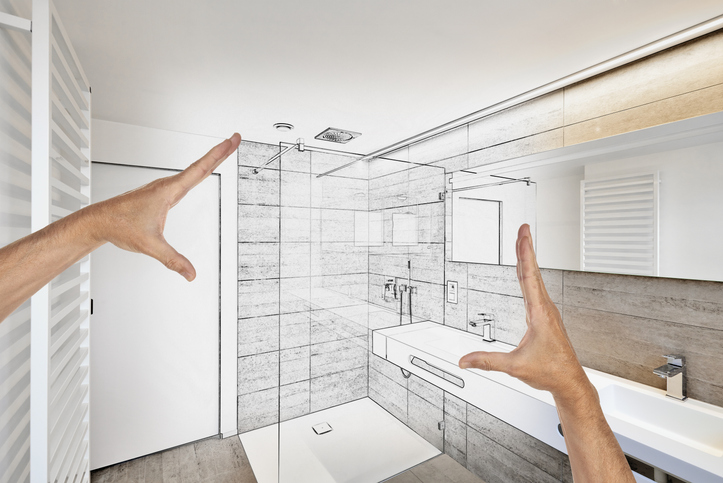
Remodeling a bathroom is a big endeavor in any home. Putting in a new bathroom can get expensive when taking into account the plumbing fixtures, ventilation, electrical wiring, and furnishings needed to create a quality space. If you’re remodeling a bathroom, it’s important to have a plan in place to ensure that the design is not only functional, but that the client will be satisfied with the result. When making renovation plans, be sure to be aware of these common mistakes so that you can both avoid a remodeling catastrophe and create a bathroom you’re proud of.
Those With Home Renovation Training Should Prioritize the Layout
When planning to remodel a bathroom, make sure you’re accounting for the many things that could affect the layout and function of the room. Failing to account for existing infrastructure, placing fixtures inefficiently, or making measuring mistakes can all lead to a bathroom remodel disaster. Plan ahead by figuring out where plumbing points will go and ensuring they work with the walls and features already in place. As those with home renovation training might know, moving these points can be expensive, and this will save both time and money.

Additionally, take the time to measure out the space for fixtures like bathtubs, vanities, toilets, and showers. Make sure that these fixtures have enough space between them to move around comfortably in the space, while still being able to clean between and around the fixtures. When measuring, consider the way that drawers will open, and make sure not to put the toilet in direct view of the opening door, because who wants to see that? Establishing a clear layout before beginning your remodeling project will help you to avoid unnecessary and hard-to-fix mistakes later in the process.
Don’t Skimp on Lighting
Lighting can make or break a bathroom. Too much overhead light can create shadowing, and lights that are too bright could work to make the bathroom less relaxing. Consider using multiple different lighting sources to create a layered design. Wall lights near the mirror make for optimal lighting when looking in the mirror, and LED strips are a good option for a softer light. If the lights are wired so that they can be turned on individually, everyone using the bathroom can be satisfied with the lighting by adjusting it to their liking.
Plan for Ventilation
If you’re in home renovation school, you’re probably aware that the bathroom requires more ventilation than most other rooms in a home. If the bathroom doesn’t have a window, a fan is required by code, but investing in a good vent is always a good idea. A fan will prevent condensation, damage to paint, and combat the growth of mold spores. Think about equipping the bathroom with a fan that has a timer switch to ensure that it’s being put to good use.
Mismatching Materials? Maybe Not
While it might be tempting to add splashes of colour to a bathroom by mixing and matching materials and textures, this will prevent the finished product from having a sophisticated, cohesive feel. Try to use a maximum of two different kinds of tiles, woods, or metals, and make sure to choose materials that are meant for a bathroom. Because of the temperature changes and higher than average moisture levels that bathrooms face, installing materials not made for the bathroom could lead to mildew or warping. By avoiding these mistakes, you’ll be ready to build a bathroom that’s both functional and appealing.
Do you want to become a home renovation technician?
Check out the North American Trade School’s program options.
How Has COVID Impacted Home Renovation Trends? Here’s a Look for Students in Home Renovation Training
October 27, 2020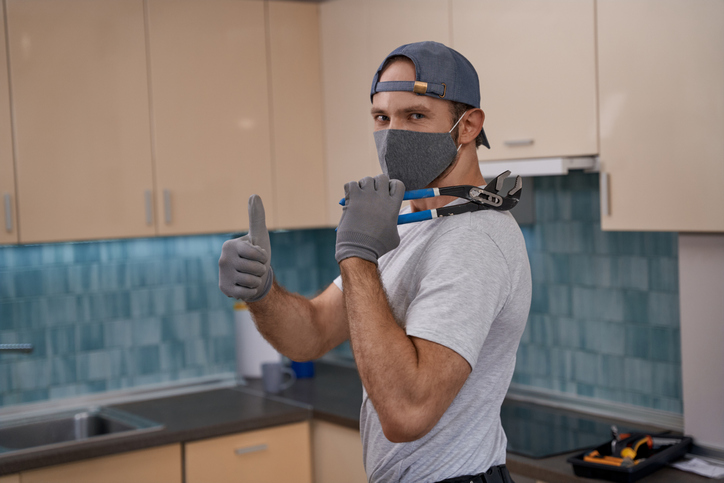 The global pandemic has shifted many of our behaviours, including the amount of time people are spending at home. Due to social distancing and isolation rules, people are forced to stay within the confines of their houses more than ever before, leading many to examine their surroundings with a more scrutinizing eye.
Whether it’s due to boredom, lots of unused vacation budget to burn, or from a genuine dissatisfaction with their surroundings, people seem to be engaging in a lot more home renos since the pandemic hit. To learn more about what kinds of renos they’re opting for, let’s check it out!
The Shift from Open Concept to Closed-off Living Spaces
Ever since the pandemic began boxing families in together to an unnatural degree, many people have been expressing an interest in moving into new construct homes. According to a recent survey, requests for these new builds are overwhelmingly for designs that have more rooms with closed doors—a move away from the open concept home with a combined kitchen, dining area, and living room. The design trend is clearly connected to the need to spread family members out into more areas of the house so that everyone can work or study from home in privacy and peace.
The Home Office Reno
As a result of the work from home shift, many design and reno pros are receiving requests to help homeowners create more private spaces for work and study. Basements, guestrooms, pool sheds, and other spaces are being converted into home offices, learning rooms, or play areas for those with smaller children. Existing rooms are also being converted to accommodate the new normal, with corners of bedrooms and dining rooms as examples of home areas being fashioned into small, functional workspaces.

The Need to Create “Staycation” Spaces
With no clear end to the pandemic in sight, one trend noted by experts is a transformation of the home into the ultimate staycation spot. People who decide to spend on these luxury changes are often sitting on cash they’d saved up for a vacation, choosing to spend it on home improvements instead. Unlike the functional home office reno, the objective with the “staycation” home reno is to make some part of the home feel more luxurious to provide the feeling of relaxation one might expect on a vacation.

Pros seasoned in home renovation technician training can put their combined electrical, plumbing, and carpentry chops to work to help these homeowners realize their visions. One of the most common pandemic staycation splurges observed by reno pros is the full backyard overhaul to include more luxe outdoor seating and dining spaces, with lots of new decks, patios, pools, and hot tubs getting installed. Home cinema and game room requests are other examples of pandemic bonus-room spends.
The Long-Haul Reno Requested of Pros with Home Renovation Training Backgrounds
Some designers have noticed a trend in homeowners who’ve already made major purchases—such as a pool installation or complete patio re-design—placing advanced requests for ongoing improvements to their new space. As the seasons change, many people want to keep enjoying their outdoor spots by adding a few extra creature comforts. As a result, those with home renovation training backgrounds are using their know-how to meet lots of requests for outdoor fire pits and cozy patio fireplaces as homeowners look to extend the use of their outdoor spaces.
Homeowners are also putting advance requests in for ponds, entertainment rooms, outdoor gaming areas, and other projects they can look forward to—a clear move to make the home a more entertaining and enjoyable area for the family to spend time in, with the pandemic remaining unpredictable in how it might impact our habits in the days ahead.
Are you interested in learning more about the skilled techniques for accomplishing home projects through home renovation school?
Contact North American Trade Schools today for more information on its exciting diploma program!
3 Things Everyone in Home Renovation College Should Know About Home Remodeling for People with Disabilities
July 30, 2020
When someone has a disability and wants to live comfortably in their own home, it must be repurposed to accommodate their needs. Remodeling a home with accessibility in mind can be tricky, but there are ways it can be done. When prioritizing the needs of those with disabilities, you’ll need the right tools and an eye for design. Whether physical or cognitive, you can get creative with how you remodel homes and make a positive difference in their quality of life.
While different people will have different needs for improving their home’s accessibility, these are some general tips that can help guide you along with these types of projects. Here are three things you should know about home remodeling for people with disabilities.
Make Sure the House Is as Easy as Possible to Navigate
For any remodeling project with disability in mind, the top priority must be to ensure those living in the home can have optimal mobility within it. This means you must make it so that they can navigate all areas of the home with ease. For example, you can install a stair lift on flights of stairs, so that those with mobility difficulties can sit on the lift as it moves up and down. You’ll also want to make sure the home’s flooring is smooth and wheelchair-friendly, and that the kitchen is also re-designed for accessibility. Furthermore, make sure all doors in the home are wide enough for them to easily enter and exit (though this may be a time-intensive part of the project), and that doorknobs are low enough for those in a wheelchair to open them.

When You Become a Home Renovation Technician, Focus on the Outside Too
If you’re remodeling the home of someone with a disability after your home renovation technician training, keep in mind that the accessibility of both the interior and exterior of the home should be accounted for. Therefore, think about how outdoor areas such as the backyard can be remodeled, such as widening doorways. You can work on paths so they can be more friendly for those with reduced mobility, or you can try to make the ground more level so that those in a wheelchair can go outside without risk of falling. One of the easiest ways to make the exterior more accessible is to add ramps in the front and the back, so those living in the home can easily move in and out.

The Bathroom Is Also a High-Priority Area in the House, Especially for Safety
Perhaps one of the most crucial areas of the home to remodel is the bathroom, as not doing so can create safety hazards for the person living in it. After you become a home renovation technician, the most important parts of a bathroom to repurpose are: the doorways (to ensure they are wide enough for easy access), sinks and countertops (so that they’re low enough to be used by those in a wheelchair), bathtub (a roll-in or walk-in bath is likely your best bet) and the shower (installing a walk-in shower is ideal for safety and mobility reasons). Another feature you can add to the bathroom is grab bars, which improve accessibility for those living in the home, since they can grab onto them whenever necessary—for example, on the sides of the toilet.


