Tag: home inspector career
3 Signs of Non-Performance to Look for After Launching Your Home Inspector Career
January 25, 2022
Home inspection comes with a long checklist for evaluating the condition and safety of a home and putting a home buyer’s mind at ease before they make their big purchase. For an aspiring home inspector, performing an evaluation of a property’s plumbing, electrical, mechanical and structural competency is of vital importance and can determine whether a property passes the inspection or not.
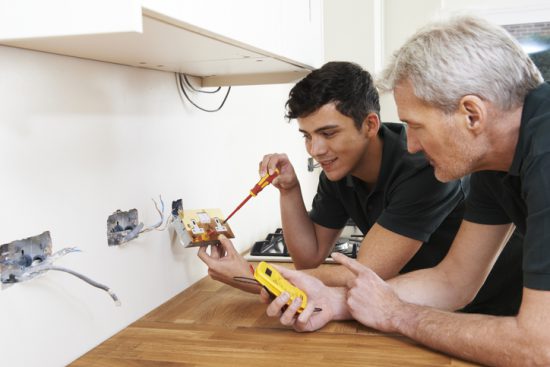
At the North American Trade Schools (NATS), we provide an aspiring home inspector with hands-on training in the materials used in the construction of each house system and what to look for during a home inspection. Read on to discover the three signs of non-performance to look out for when you start your career!
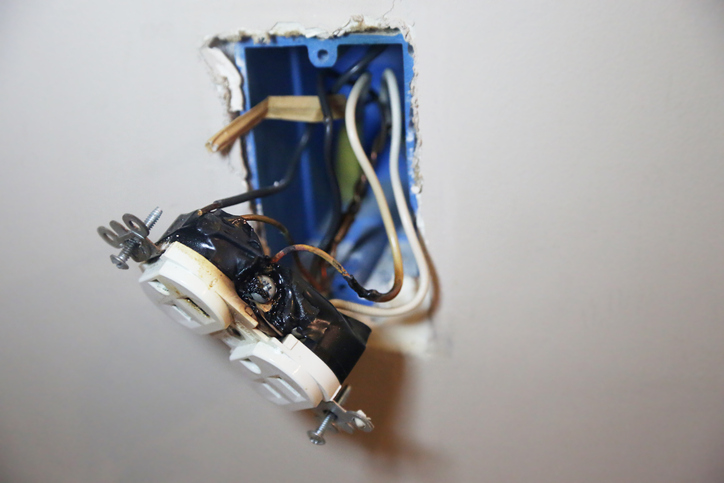
1. Inspect Electrical Problems After Your Home Inspector Training
Electrical problems sometimes go unnoticed by a home buyer, and it is up to a home inspector to assess the electrical system of the house. A house with working electricity does not mean that all electrical components are up to standard. As a home inspector, you’ll have to look at electrical issues that are considered fire hazards, which include worn out electrical wiring, overloaded electrical circuits and exposed wiring. After your home inspector training at NATS, you’ll be prepared to inspect and determine the safety of electrical systems and check for faulty or missing GFCI electrical outlets, which need to be placed in all garages, laundry rooms, washrooms and any area that may get damp around the house.
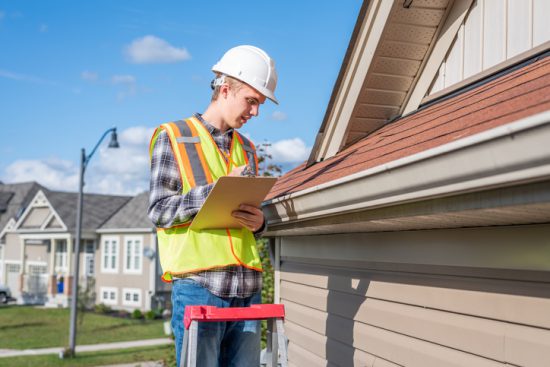
2. Roofing Problems Are a Major Concern
Roofs can usually last 15 to 50 years before they start to deteriorate–depending on the material used, the weather conditions and ventilation. Therefore, a thorough roof inspection is of major importance when you become a home inspector. It will help prevent any serious issues from occurring, like pest infestation or water leaks through ceilings, and can save a homeowner time and money on major repairs down the line. You’ll be prepared to inspect roofs after completing our Home Inspection Program and identify when a roof needs repairs or replacement. Some of the signs to look out for during your inspection include cracks and rust on flashing, moisture in the attic or ceiling, loose or missing shingles and unevenness or soft areas.
3. Water Leaks Due to Plumbing Issues
Plumbing issues can be hard to identify and require a professional home inspector to thoroughly investigate the plumbing system around the property. The home inspector will be able to assess any issues or damages caused by the plumbing system installed inside the house by checking for minor leaks and rusted pipes. If you discover leaks of clogging in the pipes, you should investigate whether the plumbing around the house has polybutylene piping, broken or rusted pipes, high water pressure, galvanized pipes or sediment build-up. That way, you can make an informed recommendation on whether to repair or replace a home’s plumbing system.
Interested in starting a home inspector career?
Contact NATS for more information!
Signs of Retaining Wall Damage to Look Out for After Home Inspector Training
December 28, 2021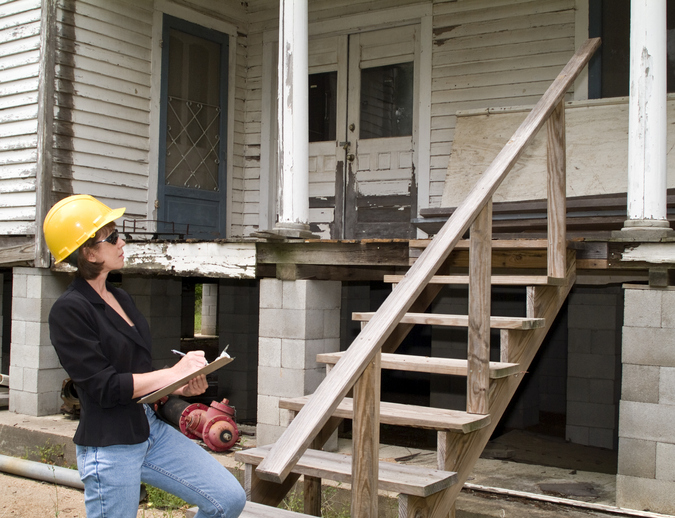
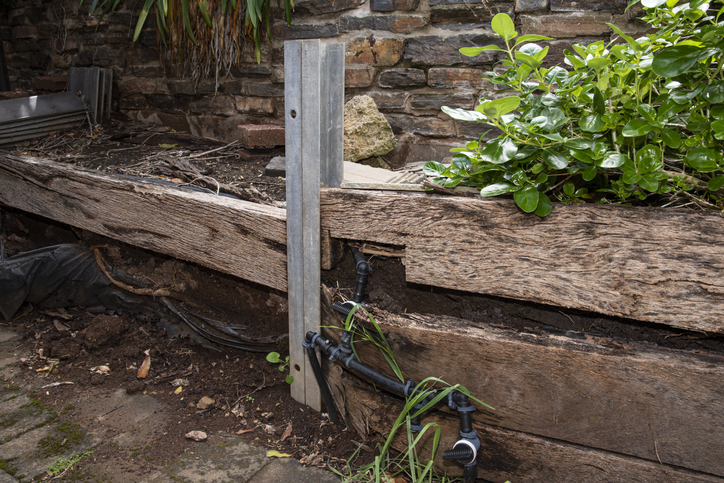
As a home inspector, you’ll be able to identify any issues facing a house buyer as you help them to make informed decisions about their prospective home. One issue home buyers usually face is the issue of retaining walls, and as a home inspector, it will be up to you to look out for the signs of retaining wall damage. Retaining walls are designed to support soil from drifting downwards–which if ignored, will create extensive damage in landscaping and lead to costly repairs.
At North American Trade Schools (NATS), we provide you with training in the skilled field of home inspection. Our training programs equip students with the most current theoretical and practical training required to become successful in the field. Read on to discover what signs to look out for in retaining wall damage when you become a home inspector.
Watch Out for Bowing or Cracking
As a home inspector, you’ll be able to identify common retaining wall damages when inspecting a property. Some of these signs may include cracking, bowing, leaning, bulging, and buckling. Identifying these problems requires the proper hands-on training, which NATS can provide through our home inspector training program, in which you’ll learn under experienced instructors and inside real world labs that simulate a working environment.
Our training program will prepare you to identify these signs of retaining wall damage and provide you with the expertise to advise home buyers on when it’s time to retrofit the wall with anchor bolts to prevent the wall from collapsing.
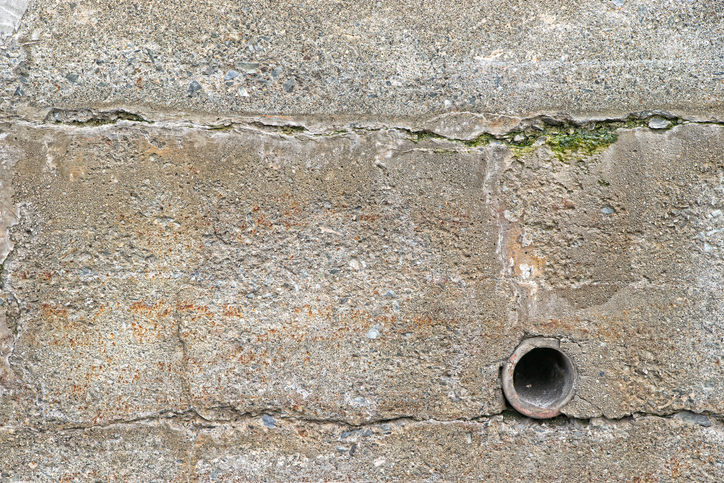
Become a Home Inspector and Identify Poor Drainage That Saves Home Buyers Money
One of the main signs of retaining wall damage is poor drainage. Weep holes are small holes that facilitate the flow of water after rain, and if these holes are clogged due to draining aggregate or improperly graded soil, they result in poor drainage. The hydrostatic pressure that builds up behind the retaining wall will end up saturating the soil, and the retaining wall itself will eventually break, as it won’t be able to handle such a heavy load build-up. When you become a home inspector after graduating from a training program, you’ll be able to predict and assess any issues that may arise with the retaining walls.
Poor Quality and Lack of Reinforcement is a Bad Combination for Retaining Walls
When you choose a career as a home inspector, you should always have the home buyer’s best interest at heart. By making careful assessments and recommendations, you can save your client a lot of money in the long run. Sometimes, retaining wall damage can occur due to improper use of materials, a lack of reinforcements, or both.
When the retaining wall is built using cheap methods to cut corners, such as the use of a poor concrete mix or improper steel reinforcement, the wall will be unable to handle the expected load it was designed for.
When you attend the home inspection program at NATS, you will become an expert in identifying faults due to old age, deferred maintenance, weather damage, and poor workmanship. At the same time, knowing how to remedy these problems will help to distinguish your skills in the field of construction and home maintenance.
Interested in starting a home inspector career?
Contact NATS for more information!
Why Customer Service Is so Important for Professionals in a Home Inspector Career
November 30, 2021
It’s hard for a business to stall in growth when the customer service is outstanding. Providing excellent customer service is one of the best ways to both attract and retain customers. Consumers are generally busy, and want their needs met with ease so they can move on to the next project on their list. When you treat each customer with the value and respect they deserve, they are happy to pay for your services.
Home inspections often come during stressful times while moving or renovating homes–creating a snowball effect of projects and to-do lists for the customer. Remaining professionalism and reaching compromises–even with the most stressed out and difficult customers–may help you retain their business. No matter the situation, customer service that exceeds expectations is essential for a successful home inspection business. Read on to learn the benefits of a great customer service plan.
Better Understand the Local Market
When you take the time to learn about the local market, you can better serve your customers while growing your home inspector career. To develop an effective, solid plan of action with each client, you need to determine how the local real estate market is operating.
It’s best practice to spend some time to figure out what types of clients are buying and selling in your area. Gaining insight on these individuals will help you better serve your existing clients–making sure their homes attract the right buyer by ticking all of the boxes. Taking a look around the local market will also help you become familiar with common problems that are found in each neighborhood so you can properly prepare. Going this extra mile in your customer service will relinquish any unnecessary worries your clients may have–creating a smooth overall experience.
Retain Clients When You Become a Home Inspector
A huge benefit of excellent customer service is an increased client retention rate. Generally, the cost of acquiring new customers is more than the cost of nurturing existing relationships–making client retention a great priority to have. Real estate agents are often mutually beneficial clients, as they are constantly viewing homes that may need inspections and would benefit from an ongoing relationship with you when you become a home inspector.
The best way to retain these customers is by displaying great customer service. When a client knows that they are truly getting the service they are paying for, and feel valued and respected in the process, they will keep coming back.
Focus on fostering these relationships with existing clients by making sure they’re fully satisfied with every step of the project, and asking how you can better serve them. Keep an open line of communication with your client list, follow up with them throughout the process, and always make sure they feel valued with your time and commitment to them individually.

Serve People First for Success
Serve people first, and your business second. A successful business never loses sight of being human. Above all the projects and business plans, you are serving other humans who want to feel a personal connection to what they’re paying for, making sure it’s the right purchase for them.
Some businesses lose sight of this personal touch as they strive to be ever more efficient, reliable, fast, and affordable. When it comes down to it, many consumers would gladly pay more for great customer service, knowing that the business cares about their satisfaction and is taking care of their needs.
Lead your projects with your skill and knowledge, and really “wow” the client with your kindness and genuine desire to help them in their journey to a better home. When you display your mastery of home inspection and careful consideration for each client’s needs, you will be giving the highest level of customer service they could ask for.
Interested in starting home inspector training?
Contact NATS for more information!
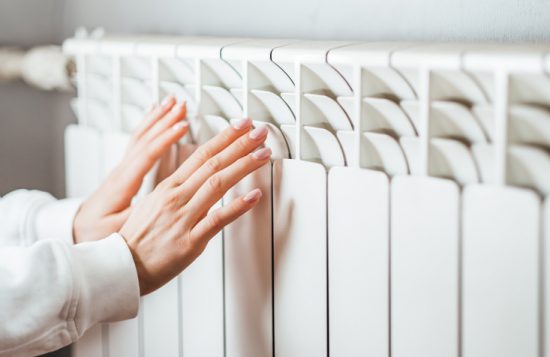
How to Assess Home Heating Systems After You Become a Home Inspector
October 26, 2021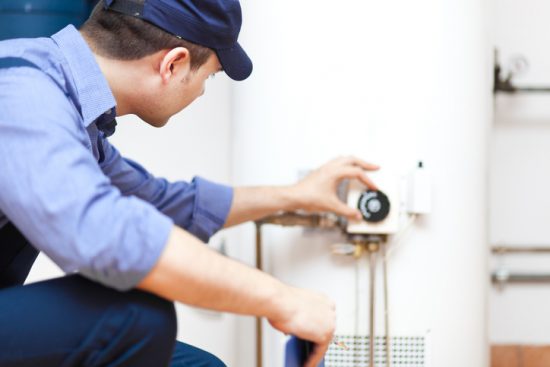
If you’re seeking a career as a home inspector, you’ll be helping buyers to get a good idea of the condition of the house they’re about to purchase. During your home inspection career, one important part of the home you’ll be assessing is the heating, ventilation, and air conditioning (HVAC) system. HVAC systems can be expensive to repair or replace, thus making it important for prospective homeowners to determine whether these systems are in good working order. Below, discover some tips to help you properly evaluate heating and ventilation systems within a home throughout your career as a home inspector.
After Home Inspector Training, Conduct a Visual Assessment First
Once you become a home inspector, the first thing you’ll want to do when beginning to inspect a home’s heating and ventilation system is to perform a visual assessment of the system itself. In most cases, a visual assessment can be very informative about the condition of the system itself. A visual inspection will allow you to flag any superficial problems, in addition to determining the system’s age and general performance. During your visual assessment, check the condition of the air filters–ensuring that they aren’t clogged with debris. Additionally, inspect the internal areas of the system to determine whether there’s a buildup of soot. If there’s an excessive amount of dust and soot, this can negatively impact the efficiency of the system. Lastly, inspect the blower motors and the fan belts, as these components may need to be replaced if they show significant signs of damage.
Perform Test-Starts to See How the System Operates
Once your visual inspection is complete, you can move on to test the performance of the HVAC systems. First, you can test-start the furnace to ensure that the temperature is correctly reflected on the thermostat, and that the furnace is firing properly. This test shows how the furnace is performing–helping future homeowners to know whether the right amount of heat is being delivered into the home. Next, you can check the safety switches within the system to ensure that they’re functioning correctly. Without working safety switches, homeowners are at risk of their heating system expelling pollutants into their air in their home. When these tests demonstrate that the furnace, thermostat, and safety switches are working properly, the heating system can be deemed both healthy and efficient.
Look Out for These Common Issues
As a professional with home inspector training, being familiar with common heating system issues can help you to catch a problem that might otherwise be overlooked. When it comes to heating system components, there are a few that will probably need replacing if an inspection hasn’t been conducted in a while. Air filters, belts, coils, valves, fan motors, compressors exchangers, and fuses are all examples of components which have a shorter lifespan than the system itself. When these are replaced, the longevity of the heating system will typically improve. Another set of issues to look out for are frequent cycling, a lack of heat, or too much heat coming from the furnace. These problems can indicate that the thermostat settings need to be adjusted, that the filters are clogged, or that there is insufficient airflow. During your home inspection career, look out for these issues in order to keep prospective buyers as informed as possible!
Ready to launch your home inspector career?
Get started with a program at the North American Trade Schools today!
Tips for Inspecting Electrical Systems During Your Home Inspector Career
October 01, 2021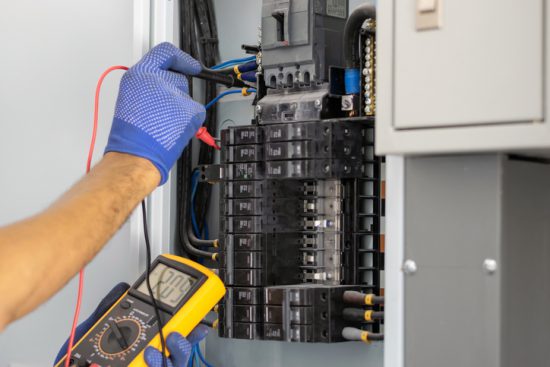
If you’re considering a career as a home inspector, you’ll be responsible for ensuring that a home is suitable for purchase. In this role, one of your duties will be to inspect a home’s electrical system. This inspection involves examining electrical components, systems, and wires to ensure that they meet the electrical safety standards outlined in national codes. This inspection ensures that a home’s electrical components operate safely, and enables future homeowners to save energy and avoid hazards. Below, discover some tips for conducting an electrical system inspection during your career as a home inspector.
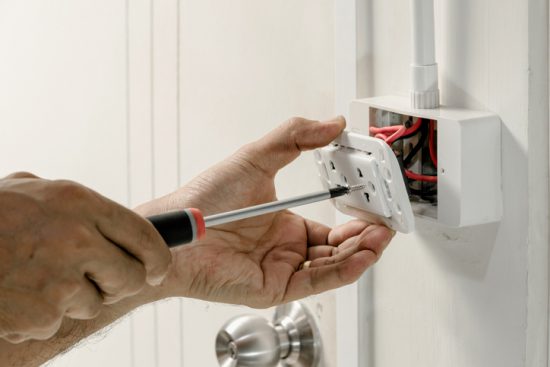
During Your Home Inspector Career, Inspect the Outlets and Light Switches
After completing your home inspector training, you’ll want to examine a home’s outlets to determine whether they’re up to code or need replacing. When examining the outlets as part of your inspection of the electrical system, it’s important to check for the following:
- Whether the outlets or switches are warm to the touch
- Whether they show signs of discolouration
- Whether a strange smell (fishy or burning) is present near the outlets or light switches
- Whether they’re all in working condition
- Whether the plugs fit into the outlets
If any of these problems are present, it might be necessary to inspect an outlet or light switch for damage, or even replace these components altogether.
Inspect the Smoke and Carbon Monoxide Detectors
During any electrical system inspection, it’s also important to inspect a home’s smoke and carbon monoxide detectors. There should be a smoke and carbon monoxide detector installed on at least every floor of a home and outside of every room, and a smoke detector within each bedroom. If there aren’t enough detectors, additional devices may need to be installed to keep the home up to code. Additionally, the smoke alarms and carbon monoxide detectors should be tested to ensure they’re in working condition.
Check the GFCIs and AFCIs
Within a home’s electrical system, GFCIs and AFCIs are responsible for protecting against short circuits and electrical overloads. GFCI breakers and outlets protect against electric faults, while AFCIs protect against electrical arcing faults. Once you become a home inspector, you can test these components to make sure that they’re in working order. You can also check to make sure that the outlets in the home’s bathroom and kitchen are equipped with GFCIs, while AFCIs are used wherever there are circuit breakers.
Examine the Electrical Appliances
A home’s electrical appliances should also be examined during an inspection of the electrical system, especially if the appliances are included with the new homeowners’ purchase. During your inspection, check to make sure the wiring around appliances is clear of any dust and debris or heat sources, as these may impede energy efficiency or increase the risk of fire. Additionally, check the HVAC system to ensure proper ventilation. Lastly, check that all of the appliances in the kitchen are plugged into GFCI outlets, as this is essential for their safe usage.
Ready to launch your home inspector career?
Start training with a program at the North American Trade Schools!
Plumbing Damage: 5 Signs to Look Out for During Your Home Inspector Career
August 10, 2021
Of all the issues that can occur within a home, plumbing system problems are right up there with the most significant. Without a functioning plumbing system, a home may undergo the risk of significant water and pipe damage–yielding costly repairs. If you’re considering a career as a home inspector, it will be your responsibility to identify issues within a house and warn buyers of any potential problems.
One of the areas of a home that you’ll need to examine closely when conducting your inspection is the plumbing system. Even the smallest of potential issues can lead to a hefty bill down the road, so it’s important to catch problems as early as possible. Below, discover five different signs that a home is experiencing plumbing damage.
1. During Your Home Inspector Career, Check Whether the Water Pressure is Weak
Weak water pressure is a telltale sign that there’s some kind of problem with the plumbing system. After you complete your home inspector training, be sure to check the water pressure to determine whether there’s an issue with the distribution of water within the system. Weak water pressure should either be caused by a clog in the pipes, or an issue with the faucet aerator–the mechanism which controls the distribution of water. While it’s often a simple fix, it’s better to determine the source of the problem rather than letting the issue get worse.

2. Determine the Drainage Speed
Another common sign of a plumbing problem is slow drainage speeds. If only one drain is experiencing slow speeds, this means the drain can be unclogged with a drain cleaner, plunger, or another tool. But if every drain is operating at a slower speed, there’s likely a more serious problem at hand. In this case, the main sewer line might be blocked, which often happens if a growing tree root gets in the way of the sewer line’s path.
3. A Bad Odour Might Indicate a Problem
If there’s a strong odour coming from a home’s drains, it’s typically a sign that the drain traps aren’t working properly. Drain traps are made for the purpose of stopping sewer gas from seeping into a home by forming a type of barrier or water plug. They work in tandem with a vent, which transfers sewer odor to the roof and away from the interior. If there is a strong odor present in the home, one of the drain traps might have run dry or one of the lines in the vent has cracked. It can be difficult to pinpoint the source of the leak or crack, but it’s necessary in order to fix the problem and prevent smells in the future.

4. Check the Colour of the Pipes
After you become a home inspector, you’ll want to check the condition of the plumbing pipes. These can typically be found under the sink and in the basement of the home. If the pipes are showing any signs of rust, corrosion or discolouration, this can indicate that there is a leak in the pipe. Leaks can lead to water damage, which can compromise the integrity of a home’s structure and create mold growth. With these potential issues in mind, if any discoloured pipes are identified, they should be replaced before a homeowner moves in.
5. Look for Problems with the Paint
Wondering whether the plumbing system is leaking, but can’t identify the source of the leak? When inspecting a home, it’s important to note that leaks in the plumbing system can manifest in the walls or ceilings of a home. Is the paint brown, blistering, or bubbling? This could be a sign that there is water damage beneath the paint’s surface. In order to prevent the growth of mildew or mold and keep the walls structurally sound, it’s important to fix the leak and repaint the area before the damage worsens.
Are you ready to launch your home inspector career?
Get the skills you need to succeed with a program at the North American Trade Schools!
5 Common Home Issues You’ll Encounter During Your Home Inspector Career
July 13, 2021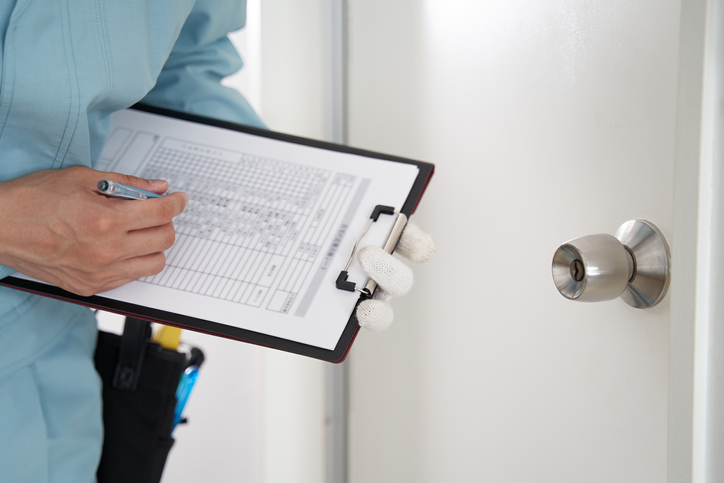
Home inspectors have an important role to play in the process of purchasing a home. These professionals have the knowledge and skills necessary to identify issues in homes that aren’t usually visible to the naked eye. They’ll also communicate with a home’s potential buyers to alert them of any possible problems, enabling them to make an informed decision before moving forward.
If you’re seeking a career as a home inspector, you’ll be visiting homes to conduct a thorough inspection, identifying damaged components, signs of neglect and more. Your success will be enhanced if you familiarize yourself with some common issues you can expect to identify in home inspections throughout your career.
Below, read on to discover five of the most common home issues to be aware of!
1. After You Become a Home Inspector, You May Encounter Damaged Roofing
Roofing damage is one of the most common forms of home damage, making it important to look closely at the roof during your home inspector career. Signs of damage can appear in the shingles, trim, and flashing, and all of these components should be closely expected. Additionally, it’s important to obtain information such as when the roof was last replaced, what the life expectancy of the roof is, and whether any repairs have been done on the roof. The roof may also show signs of leakage, and if any damage is found, the buyers should be notified immediately.

2. Water Damage Issues Are Common
Water damage can often lead to mold growth, structural damage, and leakage, so it’s crucial to address this problem during a home inspection. Check the pipes for cracks, and examine the ceiling, attic, flooring, and basement for any signs of warping, cracking, or water spots. Water damage can also be caused by drainage problems, so ensuring that drainage systems such as roof gutters and downspouts are securely installed is necessary when it comes to preventing future water damage.
3. Check for Electrical Problems
If you want to become a home inspector, you’ll want to note that electricity problems are common in many homes. When conducting an inspection, check a home’s circuit breaker and electrical panel. You’ll want to determine whether there are any components that show signs of wear, or whether the electrical system is outdated. Additionally, inspect the wiring to see whether there are any bad connections that can be identified, and ensure that all wiring is correctly grounded. Lastly, compare the electrical system with relevant electrical codes to make sure there are no violations.
4. In Older Homes, the Foundation Can Present an Issue
Depending on how old a home is, the foundation can often present an issue. A foundation may show signs of cracking, which may be caused by environmental factors, tree roots, a lack of reinforcement, or drainage issues. As a cracked foundation can cause interior leakage and even create shifting within a home, it’s important to look out for potential problems in order to save buyers from safety hazards and hefty expenses down the road.
5. General Maintenance Problems Are Often Discovered
If a home hasn’t been well maintained by its previous owners, there will often be many signs of general neglect which should be identified during a home inspection. The paint (both interior and exterior) might be cracked, the heating and cooling system may need repair, and major appliances such as the oven, refrigerator, and dishwasher may need replacing. While these may seem like cosmetic issues, they can end up costing homeowners a lot more than anticipated down the line.
Ready to begin your home inspector training?

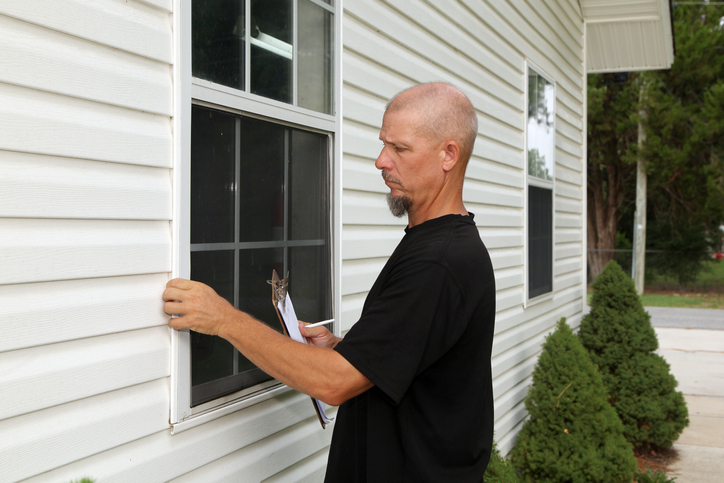
The exterior of a house can tell you a lot about what to expect from the house itself. If you’re considering a career as a home inspector, it will be your job to assess the condition of the exterior to ensure that the home is suitable for buyers to move into. With a trained eye, you’ll be examining the exterior components for any potential problems or deficiencies–relating your findings to the buyers.
When inspecting a home’s exterior, there are a few potential problems to look out for. Whether it’s a crack in the foundation or a few misplaced shingles on the roof, these seemingly small defects can create bigger issues for buyers down the road.
Read on to discover four exterior home inspection tips that will help you to determine whether a house is acceptable for future buyers.
1. During Your Home Inspector Career, Pay Attention to How Water Is Managed
If water isn’t being routed properly throughout a home’s exterior, this can create big problems in the future. When water is in places where it shouldn’t be, it can cause mold, rotting wood, foundation damage, and other issues. To ensure that a home isn’t vulnerable to water damage, it’s important to carefully inspect the gutters and downspouts of a home during your home inspector career. The gutters should be clear instead of clogged, and the downspouts should be routing water into the storm system plumbing instead of near the foundation of a home. Additionally, check the gutter and downspout mountings to make sure that they’re secure.

2. Always Carefully Examine the Roof
The roof of a home is essential in maintaining the condition of the interior. Roof problems are important to address before buyers move into a home, as they can be expensive to repair. As a home inspector, you’ll want to know how old the roof is, which can give you some context when it comes to the inspection process. To determine whether a roof is in good shape, make sure to climb up to the roof for closer examination. Check to see that the shingles are not loose, misaligned, or missing. Additionally, check all seals to ensure that water cannot leak into the interior. If the roof is in bad shape, this could be a potential problem for buyers.
3. Look Out for Rotting Wood and Other Siding and Trim Issues
The siding of a home can tell you a lot about how the home’s owners have maintained their property over the years. If you have home inspector training, you can examine the siding and trim of a home for signs of wear and tear in a few ways. First, examine the exterior paint for areas of damage. Spotty or missing paint can indicate the condition of the wood beneath it, which could be rotting. Additionally, search the siding and trim for signs of insect or rodent damage. If the siding or trim contains holes or cracks, this could be a sign that it needs replacing.

4. Is the Foundation Cracking? Don’t Forget to Inspect It
The foundation is one of the most important components of a home, as it’s responsible for maintaining the structural integrity of the building itself. As a home inspector, one of the biggest mistakes you can make is forgetting to examine the foundation for signs of stress or cracks. Foundation problems can also manifest in the form of slanted floors or misaligned window and door frames. Check the foundation to ensure that it’s completely stable, as an unstable foundation could result in safety issues for the home’s buyers.
When inspecting a home’s exterior, keeping these tips in mind will help you to make a sound assessment about the condition of a home. Don’t forget to use them throughout your home inspector career!
Ready to become a home inspector?
Get the training you need to launch your career with a program at NATS!
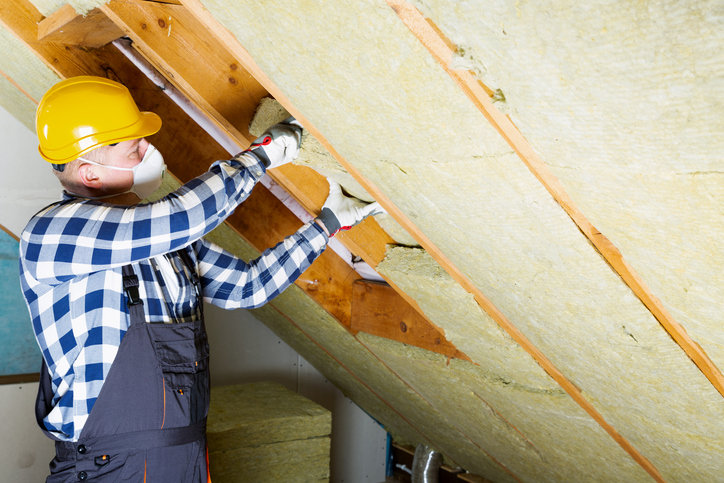
4 Things You Should Know About Energy-Efficient Home Insulation After You Become a Home Inspector
April 06, 2021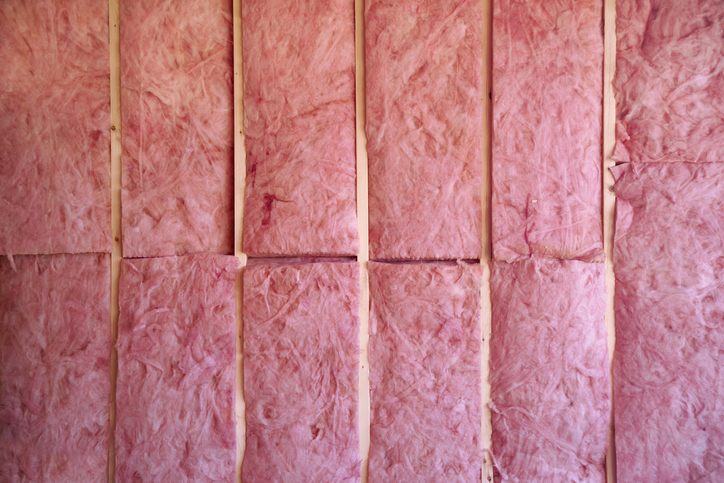
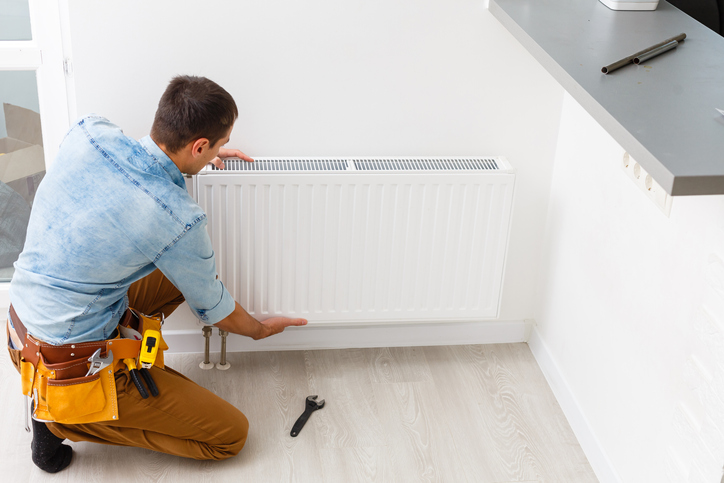
Insulation serves a vital function in every home: it prevents heat from flowing in and out. Thanks to insulation, a home can be kept cool in the summer while staying warm in the winter. However, not all insulation is created equal, and some homes are equipped with insulation that is less efficient than others. When insulation isn’t installed correctly or is located in the wrong places, a home can lose energy–resulting in a higher-than-average energy bill and a drafty living environment.
If you’re interested in becoming a home inspector, there are four things you should know. They are: energy-efficient insulation, how energy-efficient insulation works, the various types of insulation, and where it should be installed. When equipped with knowledge about energy-efficient insulation, you’ll be able to accurately assess the insulation of a home to determine whether it’s doing its job, or if an upgrade is needed.
1. Those with Home Inspector Training Should Know How Energy-Efficient Insulation Works
Today, homes are more energy efficient than those of the past. This is due to developments in building products, smart appliances, and improved electrical systems. However, much of a home’s energy consumption depends on the amount of insulation used and where it’s installed.
During your home inspector career, it’s important to check the insulation in a home’s roof, walls, floors, and other areas to determine its thickness and the material used. When insulation is optimized for efficiency and effectiveness, less heat or cold air will escape through its exterior–putting less strain on ventilation systems and resulting in reduced energy consumption.
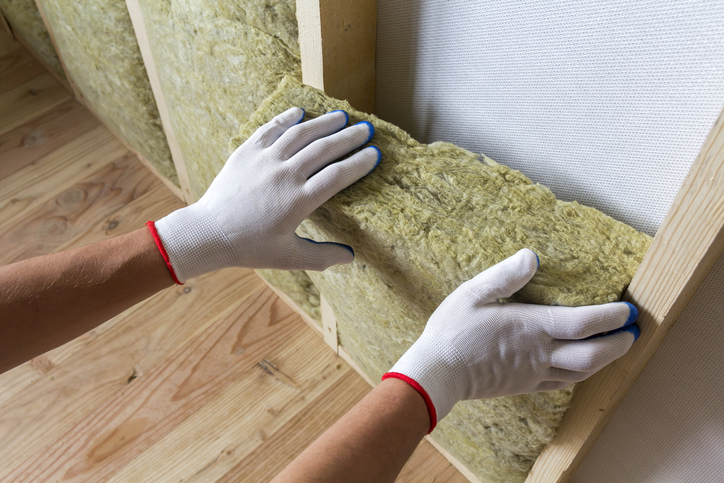
2. There Are Many Different Types of Energy-Efficient Insulation
There are many different kinds of insulation which can be used in a home, and different types of insulation materials have different advantages. Insulation’s efficiency is measured as an R-value. R refers to the resistance to the flow of heat. As a home inspector, it’s important to identify the material of insulation in a home in order to determine its R-value. Cellulose, fiberglass, and spray foam insulation are all commonly used insulation materials within a home, and each of these will have a different R-value.
3. Insulation Should Be Installed in Many Different Areas of a Home
Once the existing insulation’s efficiency has been determined, those with home inspector training can move on to check all areas of a home where insulation should be installed. Many homes use excessive amounts of energy due to the fact that many areas are left un-insulated. When inspecting a home, check that there is sufficient insulation in a home’s roof, walls, attic, floors and foundation. If any of these areas aren’t equipped with insulation already, some form of the material should be installed as soon as possible to improve the home’s energy efficiency.
4. Insulation can be Measured to Determine its Efficiency
When assessing a home’s insulation for energy efficiency, it’s important to measure the insulation in place in addition to determining which areas which need to be insulated. The efficiency of a home’s insulation can be measured using an equation. First, identify the material of the insulation, and conduct research to find this insulation type’s R-value. Next, multiply this R-value by the thickness of the insulation in place. The resulting number can be compared to standard recommendations to confirm whether the amount of insulation in place is suitable to provide adequate insulation against air flow. Existing insulation may need to be upgraded for increased thickness, depending on the results.
When establishing whether a home is energy efficient, it’s important to check where the insulation is located, as well as whether additional insulation needs to be installed. Those seeking a career in home inspection can help homeowners to reduce their energy bill by identifying areas for insulation improvement, and recommending changes that will maximize energy efficiency.
Are you ready to become a home inspector?
Get the training you need with a program at the North American Trade Schools!
Look Out for These Common Roofing Problems if You’re Entering a Home Inspector Career
February 16, 2021
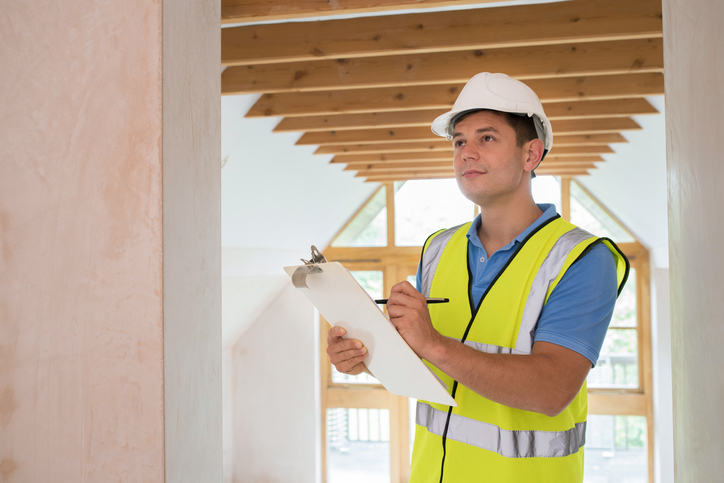
Home inspection describes a consulting service where industry professionals analyze the safety conditions of a home—helping buyers make informed decisions before purchasing or living in their chosen home.
A big part of home inspection includes assessing the roof for any signs of damage. Conducting a thorough visual inspection of the roof can reveal potential concerns and areas in need of repair to promote the safety of the home’s inhabitants. Those interested in home inspection can receive proper training, learning practical skills to ensure safe living conditions. Here’s a brief overview of what home inspectors can look for when investigating roofing problems.
Checking Gutters and Soffits When Inspecting Roofs
When searching for any roofing problems, home inspectors rely heavily on visual inspection. One of the most obvious signs of a roofing problem includes a sagging roof—which can indicate deterioration, improper installation, or difficulty supporting its weight. Acting quickly to replace a sagging roof is of utmost importance, preventing the chances of it collapsing.
Other problems can include dirty or clogged soffits (the bottom of house eaves or rafters). Dirty or clogged soffits can mess with attic ventilation, blocking airflow and promoting mould growth on the roof’s framing. Home inspectors will also want to check for any rusted gutters, which can lead to unwanted leaks. It’s also important to look for a well-installed gutter apron, typically used to stop water flows from rotting other parts of the roof (like the soffits or roof sheathing). If water stains are visible below the gutter, then gutter aprons should be installed for added protection.
Spotting Signs of a Leaky Roof after Your Home Inspector Training
Water damage can be a clear indication of a roofing problem. If the home’s ceiling or interior walls feature any water stains, then a leaky roof is likely the culprit. Addressing this problem quickly is extremely important, as doing so can prevent further problems from developing—like growing mould or damaging insulation. This can occur around bathroom fans as well, possibly indicating a leak from roof vents. It should also be noted that if mould is spotted on the exterior walls, a leaky roof should be considered as a probable cause.
Those with a home inspector career can also keep an eye out for any roofing problems when assessing the insulation. For example, a leaky roof can be responsible for interfering with the house’s insulation, affecting heating and cooling systems.

Inspecting Roof Shingles and Flashing for Signs of a Roofing Problem
Home inspectors will want to carefully look at the state of roof shingles and flashing in order to properly assess the living conditions of a house. Roof shingles are overlapping elements used to cover roofs, adding further protection. Inspectors should look out for any damaged or missing shingles, both of which increase the chances of leaky roofs. Roof shingles can also appear mismatched or uneven, allowing water to penetrate more easily.
Those who have started their home inspection training will know about roof flashing, used to protect areas where the roof intersects with other walls or structures (like chimneys). Flashing is important when inspecting water flow, preventing water from crashing and seeping into the sidewalls. If the flashing is loose or rusted, then this layer of protection is rendered inefficient—potentially rotting the roof’s sheathing and framing or leading to the growth of more mould.
Do you want to become a home inspector?
Contact NATS for more information!


