Category: Cabinetmaking
A Guide to Architectural Millwork If You’re Considering Cabinet Making School
December 12, 2019
Architectural millwork adds to the aesthetics of a building and is often a major part of what people notice and remember about a structure. Produced in a mill, millwork is manufactured to create decorative elements both for the interior and exterior of a building. Millwork can refer to doors, crown molding, baseboards, mantels, window casings and more.
Cabinet making is a skill that can lead to work in this field, as both require a technical and creative understanding of woodwork. Millwork also requires a good understanding of many elements, since building directly into a structure means interacting with other parts of it. Read on for some more things you should know about architectural millwork before graduating!
Millwork After Cabinet Making School Requires Diverse Knowledge
Millwork involves building decorative wooden elements directly into a building. Things like plumbing and lighting are affected by this, as these elements can interact with one another. Having a good basic knowledge of other trades is helpful and it is essential to know where elements are located in a structure to avoid problems or interference.
Since millwork is usually custom made, every job will be unique. The more diverse and extensive your knowledge is, the more you will be able to adapt to different rooms or environments when doing millwork. The projects you encounter will have to adapt to various layouts, dimensions and requirements. Cabinet making school is a great place to start understanding different types of projects and how to keep track of measurements and designs.
Architectural Millwork on Exteriors After Cabinet Making School
Architectural millwork refers to millwork made to fit in with the (often exterior) decor of a building. This could be elements such as trim and more elaborate details on the outside of a structure, like accents and moldings. Usually, exterior architectural millwork is done before millwork on the inside of a building. Architectural millwork can be done in a variety of styles and can be highly individualized.

An example of variation in exterior moldings is classical or ancient moldings versus gothic and medieval. The former have Grecian/Roman influence, while medieval and gothic styles draw from flora and fauna for inspiration.
Why Cabinet Making Matters for Architecture
A major difference between millwork and mass-produced pieces is the element of customization. When mass-produced pieces are used in spaces, they cannot be adapted to specific layouts or dimensions. This interferes with the overall look and style, which is important for architectural value. With customized pieces, woodwork can be designed and created to fit with the space, instead of finding a way to make the space work with the piece. Cabinet making training may lead you to working in the field of architectural millwork, which allows more opportunity for beauty and cohesive design.
A very important part of cabinetmaking is choosing materials. In custom projects, materials can make the difference when trying to achieve a look. Not only lumber, but also hardware for cabinets will affect the way that they are received. Architectural millwork can be a fulfilling path if you are interested in combining creativity with technical knowledge to improve spaces and environments.
Are you interested in cabinet making courses?
Contact North American Trade Schools to learn more.
How to Juggle Multiple Tasks in Your Career after Cabinetmaking Training
November 12, 2019
As you may already know, there are many elements involved in the business of cabinetmaking. You might work in a commercial setting, for a custom furniture maker or within a construction firm. Whatever the work setting is, you must be able to manage the small tasks that help you reach your main goal of making well-crafted woodworks.
If you are self-employed it will become even more important to know how to juggle tasks. You may have to set aside time to communicate with clients about future jobs, update them on current work, and invoice for completed pieces.
In any case, the need to multi-task or manage multiple jobs means that your work is in demand and that is a good thing. On top of having a positive attitude, here are a few suggestions to help you along the way.
Make Checklists
If you have done cabinet making training you will be familiar with reading blueprints, creating designs and making material lists for projects. Checklists play a similar role to these things whether you are doing one job or multiple jobs. They are a helpful way to break down a project and have been proven to reduce errors and increase productivity.

Checklists will also make sure that you provide consistent and reliable service to each client or for each job. This will put you in good standing to be recommended for more work. Also, writing a checklist will help you devise a plan by creating a work sequence or separating a job into several smaller tasks. This will keep you organized and encourage productivity by giving you a sense of accomplishment as you progress through each work day.
Know Your Limits
It is important to have a realistic idea of how much work you can do in a day, week or month. There will be an amount that you can do that will be optimal for productivity and work-life balance. Knowing your limits is also a matter of safety. You do not want to be stressed out or overtired when you are working with machinery and doing precision woodwork.
Understanding how much work you are able to accomplish in a given amount of time will also help you guarantee that your work is of the highest quality. After all, you will want to prioritize applying the skills you worked hard to develop in cabinetmaking school for each project you do.
Use The Skills from Cabinetmaking Training to Focus
If you are thinking of becoming a cabinetmaker it is likely you are creative and detail oriented. In order to maintain a high level of detailed work, it is necessary to be able to focus. Of course, your capacity to focus will be greater if you have already engaged with the other strategies mentioned above.
The last thing you want is to be thinking about the materials for one project while you measure and cut pieces for another project. This can lead to mistakes or lower quality work. Juggling multiple tasks means that you are able to focus on the current task because you have set up a realistic plan to get your work done. Paying attention to the work in front of you will also let you enjoy the craft and your own creativity.
Do you think cabinetmaking training is right for you?
Contact North American Trade Schools for more information.
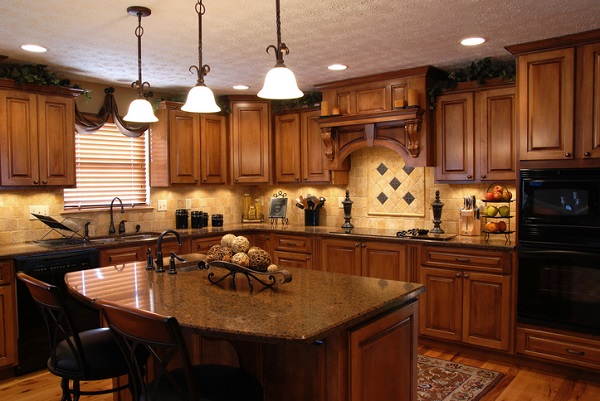
Cabinetmaking is a traditional craft, but with training and experience you will discover there is a lot of opportunity for your creativity to flourish within it. Making kitchen cabinets is one of the many ways to blend technical skills, knowledge, and personality into your cabinetmaking work.
The kitchen is one of the most versatile rooms in the house. Of course, people cook, but they also socialize, host dinners, and spend quality time with their family and friends in the kitchen. For many it is the room in the house that will be the most worn and torn.
That’s why there is a lot to think through before you start making cabinets to fit into the life of a kitchen. Here are a few tips to get started.
1. Manage Your Time and Client Expectations
After cabinetmaking school you will have a lot of opportunities to work with clients in different situations. It is always important to manage your time so that your clients know what to expect and when, but even more so if your clients are waiting to get back into their kitchen.
Discuss your plan with the client and ask lots of questions. How do they use the space? What do their dream cabinets look like? Are they looking to increase the value of their home in order to sell it in the near future? Answering these questions will help you devise a solid plan and an accurate estimate for your client so they know what to expect in terms of budget and time.
2. Use Your Cabinetmaking Training to Choose the Right Materials
An important aspect of the cabinetmaking trade is knowing how to identify and choose the right materials. Kitchen cabinet doors are sometimes made from laminate, which is a less expensive option, but it is likely you will be deciding between medium dense fiberboard (MDF), wood and plywood cabinets.

While this decision may be made by the client, with your cabinetmaking training you should be ready to give advice on their options. For example, if a client wants a stained wood look, then MDF should be avoided. But if they want to paint the cabinets a certain colour, MDF is likely the best choice. If there are any large doors in your cabinet design, it may be worthwhile to consider plywood, which is lighter and costs less than woods like maple.
Another set of choices to talk to clients about will be hardware and whether or not the cabinets will include things like a ‘Lazy Suzan’ or pantry pullouts. In all cases, make sure the hardware is durable because these are the moving parts that help keep a kitchen functional.
3. Plan an Efficient Installation
Before ordering materials take detailed notes of where things like plumbing, electrical outlets, and appliances are. Planning is essential to an efficient installation and there are cabinet making courses that include how to read blueprints and building layouts taught by experienced professional instructors.
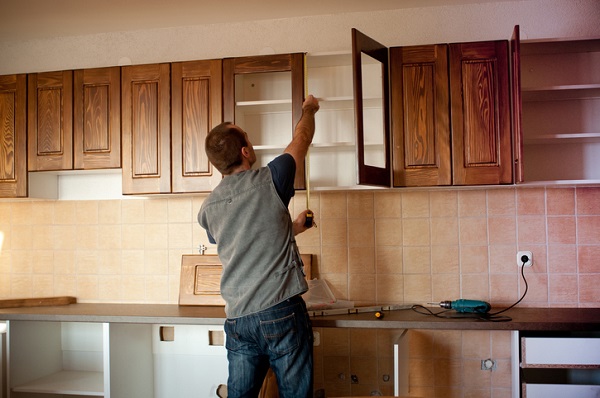
In addition to the cabinet materials and hardware, make a plan for gaps. Walls are not always straight and floors are not always level so cabinet filler pieces or shims will come in handy. When you are ready to install, start high with the wall cabinets then move to the floor cabinets. By using a bench march and those filler pieces to keep everything on the level, you will be done in no time.
Want to learn more about cabinetmaking school?
Contact North American Trades School for more information!
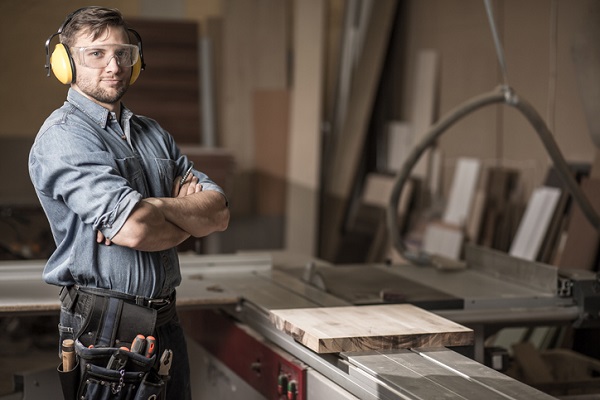
Cabinetmaking is a craft that combines the traditional art of carpentry with the most sophisticated woodworking instruments. For someone who enjoys woodworking, learning about cabinetmaking can open up exciting career opportunities. While cabinetmaking encompasses everything from the identification and selection of the finest wood, to the reading of designs, to the operation of woodworking equipment, one aspect remains perhaps the most critical: safety.
The skills that you learn in cabinetmaking school must be applied with safety always at the top of your mind. If you might be interested in a career as a cabinetmaker and you want to avoid injury, keep reading to learn some essential safety tips!
1. Where You’re Working is as Important as How You’re Working
When working in cabinetmaking, you might decide to eventually begin your own business or simply do some projects on the side in your workshop. Ensuring that the space you work in is safe should be a top priority.
If you, like many woodworking specialists, decide to set up your headquarters in your personal garage or on your property, you need to make sure that the space meets safety standards. You must consider suitable ventilation, fire hazards, and emergency protocol. Remember that while you may not be in a commercial shop, you too must take safety just as seriously if you decide to go out on your own after cabinetmaking school!
2. What You Wear Can Help Protect You from Safety Hazards
Every woodworker should have the right personal protective equipment (PPE) to wear. While sporting the appropriate PPE might seem an obvious recommendation, injuries as a result of non-adequate protection represent a significant percentage of woodworking injuries. One of the reasons for this, ironically, is expertise. Sometimes, when a professional feels overly confident in their abilities, they decide to omit some of the basic PPE. And although they have achieved mastery of their craft, certain things cannot be predicted regardless of experience. A malfunctioning piece of equipment kicking back and chipping a particle of wood or metal into an unprotected eye can cause irreversible damage!
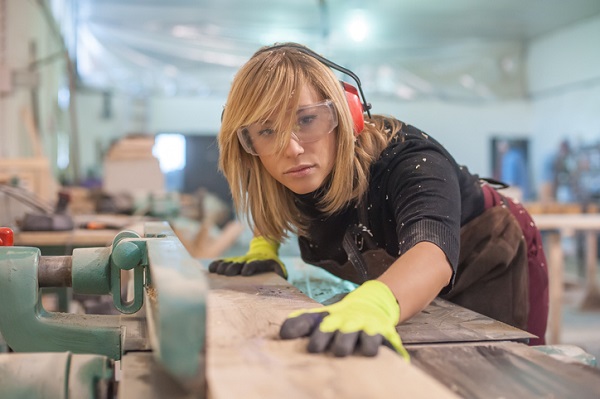
When you’re equipping yourself for the job, make sure you also pay special attention to:
- Clothing (avoid baggy, floating clothes that might get caught in the machinery)
- Jewelry (a long chain of loose bracelet might also be a hazard)
- Hair (if you’ve got long hair, make sure it’s tied up so it doesn’t get caught in the equipment)
3. Get to Know Your Tools and Equipment in Cabinet Making Training
Another important aspect of safe woodworking practice is the equipment that you are using. You’ll learn in cabinet making training about how to safely use woodworking tools and equipment. You should know what tool is required for what job, and you should know how that tool can be used most effectively. You should always verify that the tool is in adequate condition. For example, there is common a misconception that a sharp blade is more dangerous than a dull blade when, in fact, a dull blade risks getting caught or kicking.

Soliciting help is another important part of safety. If you are operating a tool with which you have little experience, or if you know that a specific task will be easier with the assistance of a fellow woodworker, then it might be a good idea to get help. Be careful, however, to only get help from people who are properly trained!
Are you interested in cabinet making courses?
Check out North American Trade Schools to learn about our programs.
When building aircraft cabinets, considerations must be taken into account for safety reasons. Weight limits are expressed in maximum gross weight, which is the heaviest an aircraft can get while remaining safe. In addition to staying light enough, aircrafts also have to meet standards for flammability. Materials need to meet set flame and smoke retardant requirements. In the case of customized or private aircrafts, these standards are even more important, as the uniqueness of designs can affect whether or not they are up to code. Read on for some facts about aircraft cabinetmaking to see if you might like to work on them one day.
You Might Work with Composite Wood after Cabinetmaking School
Composite wood may come up in your career after your courses, especially if you choose to work on aircraft cabinets. Due to weight regulations, aircraft cabinets can’t be made out of regular, solid wood, or even plywood, as this adds too much weight to the craft. In its place, professionals use composite materials, which can have the appearance of solid wood but are much lighter. Cabinetmaking courses will prepare you to work with all kinds of wood. Almost every visible part of a commercial aircraft cabin is made of composite materials. Parts in an aircraft must also be very strong—composite or engineered wood provides structural integrity without adding deadweight to the plane.
Composite wood is usually used on aircraft cabinets to keep them lightweight
Hydrographics Might Be of Interest to Students in Cabinetmaking Courses
Aesthetics are important on cabinets, as you will know from the precision and high standards in your cabinetmaking training.
Depending on the finish desired, hydrographics can be an interesting approach to use on aircraft cabinets. Hydrographics can be used to decorate cabinets in the style of solid paint colours, brushed aluminum, or wood grain patterns—among many different options. The decorative film is applied using a hydro-dip method, and can be applied to almost any common shape in an aircraft interior. Hydro dipping involves floating the film on the surface of water, then dipping an object into it, causing the film to stick. The film meets flame and smoke retardant requirements and is also very thin and lightweight for use in planes.
Private Jets and Customization Can Keep Things Interesting in Your Career
Customized cabinets for aircraft can add variety to your day and present new challenges and learning opportunities. If you’re wondering whether you’d like to pursue aircraft cabinetmaking after your training, this aspect of this career path could be something to entice you. From wanting the entire interior to be solid pink to specific sizing and storage requirements, clients may have very unique requests. You may encounter some interesting jobs that keep you stimulated and feeling creative in your career, as you pursue your passion for cabinetmaking.
Custom cabinets for a private plane layout are an interesting challenge that may come up in your career
Are you interested in cabinetmaking school?
Contact North American Trade Schools to learn more.
Comparing Custom vs. Factory Cabinets for Students in Cabinetmaking School
May 29, 2019The creation of a good-quality cabinet may seem simple, but it actually involves as lot more than many may first think. It takes a careful attention to detail to work in this profession, but it’s also a career path that is very rewarding.
Cabinets, of course, can come in many different materials and styles, but they can also be sourced from different places. Each option will have different advantages and drawbacks. As a professional cabinetmaker, your primary goal is to create a product that fits a customer’s needs. Some customers may want special custom cabinets, while others may prefer stock or factory-made options that better fit their budget.
If you’re interested in finding out what you can expect after you finish cabinetmaking training, read on to learn more!
Stock or Factory-Made Cabinets Can Be More Efficient for Cabinetmakers
Essentially, stock cabinetry is anything that is prefabricated, manufactured, or ready-made. It is mass-produced in standard sizes and common shapes, and is meant to be created and delivered quickly to customers on short notice. Stock cabinets are modular by nature, which means they often come in simple designs and can’t be customized further after they arrive.
Stock cabinetry can help cabinet installers better fit their customers’ budgets
While this may not be ideal for every customer, the benefit of installing stock cabinetry after cabinetmaking training is that it offers a quick and cost-effective option that fits a customer’s budget. If you become a cabinet installer, you might work installing stock cabinets for customers who decide to go for this option.
You Can Use Your Cabinetmaking Training to Craft Custom and Semi-Custom Options
On the other end of the cabinet spectrum, you can choose to create more personalized products after cabinetmaking school.
Custom cabinets are appealing to any cabinetmaker, because they allow them to express their creative side, as well as reflect the personality and tastes of their customers. Generally, custom cabinet services begin by offering customers a standard base size, and then adding the custom features and details they want. Due to the amount of time and labour that goes into creating a custom cabinet, they are generally of a better quality and craftsmanship than factory-made options, but also tend to be more expensive.
Students at NATS can use their training to create customized cabinetry for future customers
Some customers, however, may want a middle ground between custom and stock cabinetry, and you have the option to offer semi-custom cabinets. Semi-custom cabinets allow for more variety in size and style than stock cabinets, and are also usually made from higher-quality materials. This option helps customers get something that matches their kitchen and tastes a little more than a stock option would, while still staying on the more affordable side. The layout and design of a kitchen can change dramatically from one customer to another, and both customized and semi-customized cabinets allow you to adjust your work to each specific parameter.
Are you interested in taking the next step towards a rewarding, hands-on career?
Contact the North American Trade School for more information about our cabinetmaking courses.
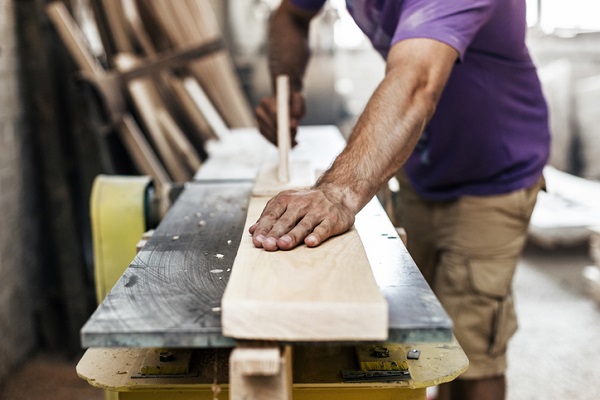
There are certain tools that are essential for most people working in the trades—like hammers, measuring tape, and power drills—but cabinetmakers typically require additional ones on top of those. Whether cutting or sanding, woodworking tools allow cabinetmakers to get work done.
If you’re looking to build your own collection of woodworking tools during and after cabinetmaking training, it can be a little difficult to know where to begin. That’s why we’re here to help. We will look at four woodworking tools which will serve you well from the day you graduate cabinetmaking school to far into your career.
1. The Jointer-Planer Is a Worthwhile Investment for Cabinetmaking School Grads
Jointer-planers combine two essential tools into one, which makes them extremely convenient for cabinetmakers. The jointer part of this tool creates a smooth surface on one side of a piece of wood while the planer can thin a board to your desired thickness (while also smoothing the other side of the board).
Jointers and planers can be bought separately and there are handheld, non-electric versions of both tools that are much cheaper than a stationary, electric jointer-planer. However, given that smoothing and getting boards to the right thickness are tasks that cabinetmakers do frequently, investing in a stationary jointer-planer will help make your work go much faster.
2. Jigsaws Are Essential After Cabinetmaking Training for Cutting Curves
As a cabinetmaker, you’ll be cutting a lot of wood. Table saws and circular saws are great at cutting straight lines, but when you need to cut a curve, then the jigsaw is your tool of choice. Since cutting curves is something you will need to do at some point in your woodworking career after cabinetmaking training, the jigsaw is an essential addition to your workshop.
Many jigsaws are also adjustable so that they can make bevel cuts (i.e., cuts on an angle rather than just vertical). Jigsaws are also very easy to use so you should make buying one among your first priorities as a cabinetmaker.
3. Every Cabinetmaker Needs a Well-Stocked Collection of Clamps
Clamps are so essential to woodworking that the phrase “You can’t have too many clamps” has become a common refrain among cabinetmakers. Clamps are essential for when you’re gluing two pieces of wood together and need them to stay in place while the glue dries. Clamps also hold pieces of wood in place for when you’re cutting or doing detail work.
There are many different clamps for different purposes, such as spring clamps, C-clamps, bar clamps, parallel clamps, corner clamps, and angle clamps. Make sure your workshop is well stocked with various different types so that you never find yourself in need of one that you don’t have.
4. The Random Orbital Sander Is the Most Useful Sander for Most Cabinetmakers
Most cabinetmakers have an array of different sanders, from belt to finishing sanders. As you progress in your career after cabinetmaking school you’ll also likely acquire a range of sanders, but if you’re looking for the sander that is considered indispensable for cabinetmaking, then choose the random orbital sander. This sander is great for smoothing large surfaces. It works quickly and doesn’t leave the swirl marks that other sanders can leave behind.
The only disadvantages are that the round shape means it can’t be used in corners (for that you’ll need a regular orbital sander) and it’s not suitable for detailed work (in which case you’ll need a rotary tool, contoured sanding grip, or detail sander). However, if you want a versatile handheld power tool that will get wood planes to a smooth finish quickly, then a random orbital sander is your best bet.
Are you interested in a new, hands-on career?
Contact North American Trade Schools to learn more about our cabinetmaking courses.
Understanding Blueprints: A Cheat Sheet for Cabinetmaking School Students
March 21, 2019If you’ve ever tried to put furniture together yourself, you may be aware of the frustration that comes with trying to make sense of a confusing blueprint. They are, however, essential to any woodworking or cabinetmaking design, and while they may seem confusing, there are actually a few things you can do to help make sense of the jumble of numbers, figures, and diagrams.
One of the primary goals of any good blueprint is that it has to be easily understood if another person were to read it. What may make sense to you might not always translate well for others, which means it’s important to use the proper drafting rules and techniques to make sure your blueprint is clear and concise.
If you’re interested in finding out more, here are a few helpful ways you can better understand the blueprints you may see during your career in cabinetmaking.
Understanding the Types of Woodworking Plans during Cabinetmaking School
A blueprint may have a variety of different components, depending on what you’re trying to build. Woodworking plans for example, probably won’t have the same level of detail as the ones for NASA’s next satellite. Although reading a blueprint may feel like rocket science, familiarizing yourself with its different formats can help you better understand the information a blueprint is trying to convey.
Blueprints often come in three basic views: plan, elevation, and section. Each of these views offers a different dimension and perspective of what the final product should look like. A plan is most commonly a horizontal bird’s eye view from above, while elevation blueprints show an object at eye level from its north, south, east, and west sides, and a section blueprint offers a vertical, cross section view, as if you were looking at the final product cut in half.
What Does a Good Blueprint Look Like for Professional Cabinetmakers?
There are many aspects of a blueprint that help make it easy to read and understand, including specific features such as lines and scale.
A good blueprint needs more than images to make sense to its readers
Scale is essential to understanding a blueprint, and helps readers better visualize what the final product should look like. Architectural scales are the most common, and are expressed using fractions; 1/2”=1’, for example, would mean that a half-inch on paper would equal one foot in reality. Important details such as scale, grid, and measurement units should be properly listed in your blueprint’s legend or notes.
The lines you use also play a part in how a blueprint is read. Bold, heavy lines—usually referred to as object lines—are meant to outline the surfaces that are visible to the eye, and should be the standard line you use to compare and define the other lines against. Hidden lines are made of short dashes to indicate hidden surfaces, while center lines use long dashes at each end and short dashes at points of intersecting components. These are only a few of the lines you will commonly encounter as a cabinetmaker, but cabinetmaking training can teach you the finer aspects of the specific details you may see on a woodworking blueprint.
Cabinetmaking Training Can Familiarize You with the Cabinetmaking Code
Although there is a standard format for the blueprints that cabinetmakers use, you may run into a variety of abbreviated or initialed words and code that describe various parts of the cabinet.
Standard cabinets should generally include specific codes which help readers understand what type of cabinet they’re building as well as its features and dimensions. A typical wall cabinet, for instance, would come in this format: W2430, with W meaning ‘wall cabinet,’ 24 indicating its width in inches, and 30 its height, also in inches. The code for a base cabinet may look similar but could include different dimensions according to its size. Cabinetmaking school teaches you to be as precise as possible, so you should always make sure the codes you use in your blueprints are accurate and properly noted.
NATS students can use their training to better understand different parts of a blueprint
Do you want to apply your new professional blueprint-reading skills in a hands-on career?
Contact North American Trade Schools for more information about our cabinetmaking courses.
Is Cabinetmaking Training Right For You? A Day in the Life of a Professional Cabinetmaker
February 12, 2019If you love working with your hands and you have an eye for detail, a career as a cabinetmaker could be a great fit for you. Cabinetmakers use precision and technical skills to create stunning woodwork. As a result of the ongoing construction boom in Southern Ontario, and the fact that many furniture manufacturers are located in the region, there is a steady and consistent demand for cabinetmakers, making it a viable career option.
If you’re considering a career in cabinetmaking, read on to learn some of the steps you’ll need to take to get there, and what your daily responsibilities will look like on the job.
A Cabinetmaker’s Role and the Path to Certification
Despite their title, cabinetmakers do more than just make cabinets. A cabinetmaker refers to a woodworking professional who makes and repairs furniture, millwork, and other wooden items. Once you become a cabinetmaker, you’ll prepare, cut, surface, and shape lumber. Additionally, you may work on a variety of projects, including new home constructions, residential renovations, and commercial properties. Experienced cabinetmakers can also pursue specializations, such as antique furniture restoration and boat oar making.
Becoming a certified cabinetmaker entails both an apprenticeship and classroom training. In Ontario, certified cabinetmakers generally need to complete 7,280 hours of apprenticeship work. As an apprentice, you will work under the direction of a journeyperson cabinetmaker. You will also have to complete 720 hours of in-class training at a cabinetmaking school during your apprenticeship. Once you complete your apprenticeship and classroom training, you’ll receive your Certificate of Apprenticeship.
Cabinetmaking School Can Prepare You for Daily Woodworking Duties
During a typical day as a cabinetmaker, you may spend the majority of your time assembling wooden products, either in a shop or at a work site. The woodworking skills and techniqies you’ll learn during your cabinetmaking training can be directly applied when you are assembling. For example, to assemble wooden products, you are going to need to know how to set up and operate woodworking equipment, such as jigsaws, band saws, and circular saws, all of which you’ll become familiar with during training.
Cabinetmakers need to be able to operate equipment like circular saws
Precision is absolutely key for this job and the old adage “measure twice, cut once” is engrained into every good cabinetmaker. To that end, you’ll use measuring equipment, like measuring tapes, levels, and protractors, and you’ll read and interpret blueprints and plans.
Cabinetmakers Will Work Both Independently and with Clients
While a large portion of a cabinetmaker’s time is generally spent woodworking, you will also need great communication and customer service skills. Cabinetmakers are not only concerned about their work being fully functional, but they strive to make it beautiful as well. For that reason, clients will often be very invested in your work. They may not care how the wiring or pipes behind their walls look, but they will definitely care how their kitchen cabinets or remodelled bathroom looks! That’s why interacting with clients is something you will do frequently as a cabinetmaker. This includes by interpreting plans for them, addressing concerns they may have, and marketing your abilities to them.
Cabinetmakers may work closely with homeowners, which requires excellent communication skills
While good communication is important, you’ll also need to be able to work independently and with little supervision. This is particularly true as you advance in your career, since many journeyperson cabinetmakers are self-employed and work out of their own shops.
Are you ready to take the first steps to a fulfilling career as a cabinetmaker?
Contact North American Trade Schools to learn more about our cabinetmaking courses!
In a versatile field like cabinetmaking, there are many different tasks that go into the creation of your final product—from preparing the layout for wood articles, interpreting blueprints and specifications, and designing templates for furniture production, to installing the cabinets themselves.
Cabinetmakers work with a variety of styles and materials to meet the demands of their clientele. In order to be able to do this correctly, you’ll need to know the benefits and features of the designs you want to use, and how these designs and styles can help your clients achieve the appearance they want to feature in their homes.
Read on to learn about a few of the most common cabinet styles you’ll work with once you start your career.
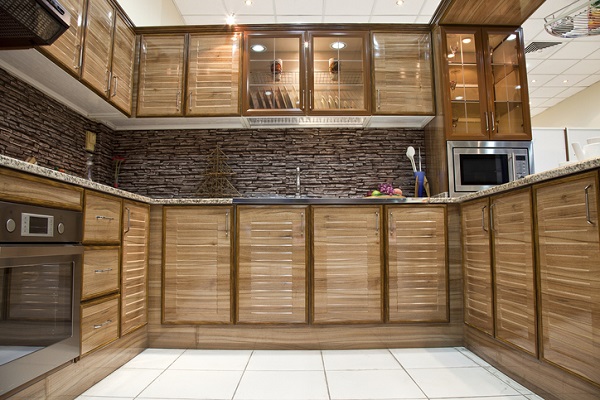
1. Slab or Flat Cabinets are In-Demand for Cabinetmakers
One of the more recent trends in modern and contemporary kitchen design is a sleek, simplified and almost minimalistic appearance. This means that a popular corresponding cabinet style is slab or flat cabinets. These are the bare bones of cabinets, and as their name suggests, are flat panels typically made of wood or laminate, without much additional decoration.
Once you graduate from cabinetmaking school, some of your clients may request textured doors, which use ripples or other effects to add a little bit of flair to their slab or flat cabinets. Even with the extra design elements, this style requires minimal labor and material to create.
2. You’ll See the Shaker Style Often after Cabinetmaking School
Shaker cabinet doors are among the most common and popular styles of cabinets, and draw their name from Shaker-style furniture, which is primarily known for its minimal and elegant design. This style of cabinet is a classic because it focuses on practicality and utility without much extra fuss.
Shaker-style cabinets are often comprised of five pieces of flat-panel wood, with four creating a frame around the fifth flat door panel. These cabinets are very versatile, and cabinetmakers can use many different types of materials and wood to add their own unique personalization to the Shaker style.
3. Glass Panels and Inserts are on the Rise in Cabinet Design
Glass inserts are generally used in upper cabinets, and serve as a kitchen’s focal point, adding more depth to smaller kitchens. Their decorative capabilities make them a popular option for clients, since they can showcase special items and features instead of hiding them behind a solid cabinet door. These types of cabinets tend to be more expensive than other styles because they are more labor-intensive to craft, and require professionals with cabinetmaking training to fit glass of a certain quality inside an existing frame.
4. Using Cabinetmaking Training to Craft Country and Rustic Style Cabinets
Country and rustic-style cabinets draw from traditional designs to give a kitchen a cozy, comfortable aesthetic. Although this style of cabinet inspires an unpolished, unrefined appearance, cabinetmakers do a lot of behind the scenes work to stain, treat and paint the materials they use. Common building materials you may work with includes knotty wood or hardwood and copper or iron features.
Some clients may request a distressed look, which can be achieved by purposefully rubbing the material of the cabinet or applying milk paint to make it look aged or antique.
Are you interested in learning more about cabinet design, style, and aesthetics?
Contact the North American Trade School for more information about our cabinetmaking courses.


