Category: Cabinetmaking
Why Cabinetmaking Is a Smart Career Choice
Cabinetmaking is a hands-on trade where you get to build real things people use every day. From kitchen cabinets to custom storage and built-in units, cabinetmakers shape the look and feel of homes and businesses. It is a mix of craftsmanship, creativity, and careful measuring, which makes the work both practical and satisfying.
Across Canada, there is steady demand for people who know how to turn sheets of wood and hardware into strong, good-looking cabinets. Renovations, new builds, and commercial spaces all need skilled cabinetmakers who can do the job right. If you are considering a future in the trades, cabinetmaking training can open doors to a stable and rewarding career.
Hands-on cabinetmaking training helps you move from curiosity to career-ready skills. With the right program, you spend time in the shop, learn proper techniques, and build real projects instead of only reading about them. That kind of practice can shape your future in powerful ways.
What Cabinetmakers Really Do
Cabinetmakers do much more than build simple boxes. Their work covers a wide range of tasks, such as:
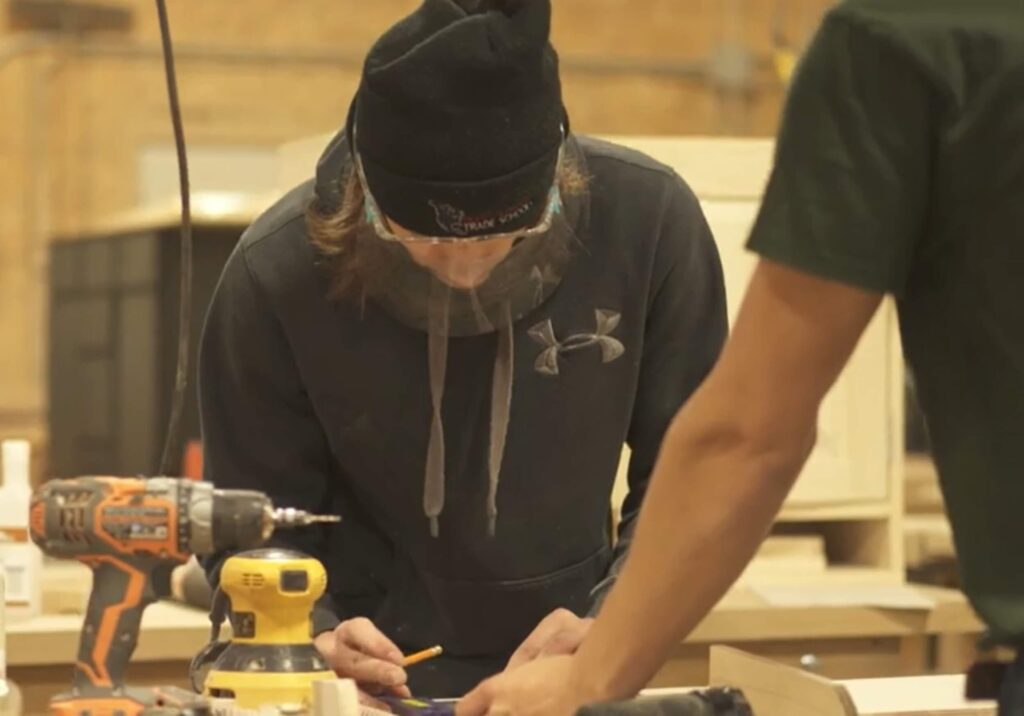
- Reading and understanding blueprints
- Measuring, marking, and laying out materials
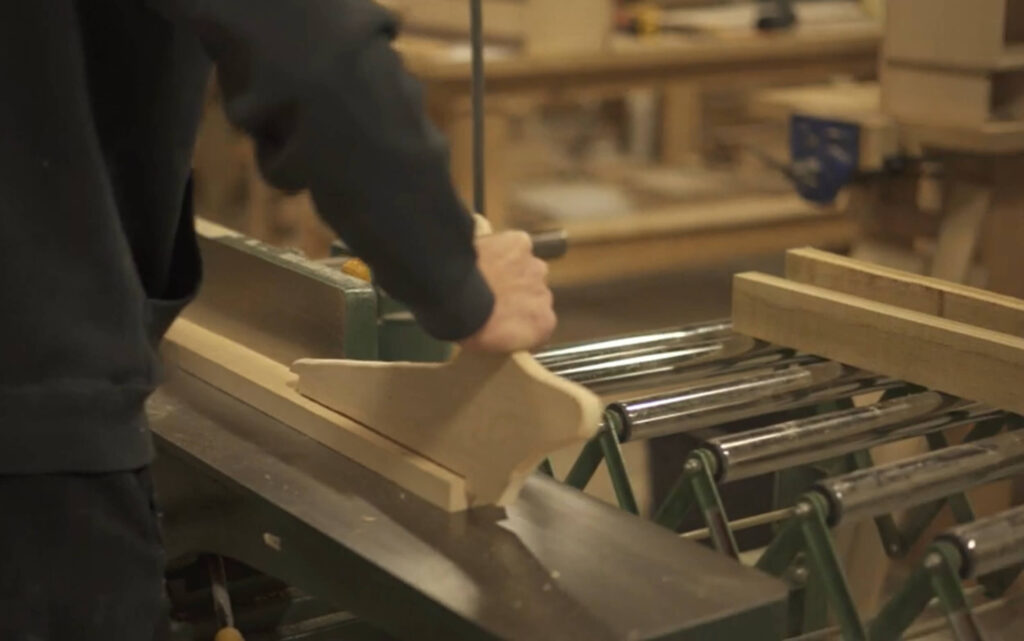
- Cutting parts using hand tools and machines
- Assembling and installing cabinets and built-ins
- Sanding and finishing for a smooth, clean look
Quality cabinetmaking training mirrors what cabinetmakers do on the job, from blueprint reading to precision installation. You learn how to read plans, work with different woods and sheet goods, and put everything together so doors line up, drawers slide smoothly, and finishes look clean.
Cabinetmakers also use modern tools and materials. In many shops, you may see CNC machines, advanced hardware systems, and laminates that need special skills to handle. You might find yourself working on kitchen and bathroom renovations, custom furniture, office interiors, or retail stores. Understanding the full scope of a cabinetmaker’s role helps you choose the right cabinetmaking training program for your goals.
Why Hands-On Cabinetmaking Training Matters More Than Theory
You can read about joints and tools in a book, but your hands really learn in the shop. Practical cabinetmaking training gives you time to cut, drill, assemble, and fix mistakes until the motions start to feel natural. That muscle memory is what lets you work faster and with more confidence on the job.
Hands-on cabinetmaking training lets you turn classroom concepts into real cabinets and installations. When you build full cabinet sets, shelves, or custom pieces, you see each step come together in real time. You also learn how to plan your work, choose the right sequence, and keep your space organized, just like in a professional shop.
Safety is another big reason practical learning matters. Tools like table saws, planers, and routers must be used with care. In a supervised setting, you can:
- Learn proper safety gear and shop habits
- Practise safe tool and machinery setup
- Build good routines that reduce risk
The most effective cabinetmaking training blends theory with extensive practice in a fully equipped shop, so you build both knowledge and safe habits at the same time.
Skills You Build Through Cabinetmaking Training
Cabinetmaking training builds a wide mix of skills that carry over to many work settings. On the technical side, you work on:
- Accurate measuring and layout
- Joinery and cabinet construction methods
- Hardware installation, like hinges and slides
- Sanding, staining, and finishing techniques
Through focused cabinetmaking training, students develop both traditional craftsmanship and modern technical skills. Many programs also introduce you to woodworking machinery, power tools, and sometimes CNC equipment or design software. Knowing how to work with these tools makes you more flexible in different shops.
You also grow important professional skills. Cabinetmaking training prepares you with the shop skills and soft skills employers consistently look for, like:
- Time management and meeting deadlines
- Problem-solving when things do not fit the first time
- Teamwork with other trades and shop staff
- Clear communication with clients, contractors, and designers
These skills help you handle busy days on the jobsite and keep projects moving in the right direction.
From Classroom to Jobsite
One of the biggest benefits of strong training is how it helps you step into real work. Quality cabinetmaking training bridges the gap between the classroom and the jobsite. With a solid base of skills, you can move into roles such as:
- Cabinetmaker in a shop
- Cabinet installer on residential or commercial sites
- Custom woodworker building one-of-a-kind pieces
- Shop lead or foreperson as you gain experience
Your projects from cabinetmaking training can become a professional portfolio that impresses future employers. When you bring photos or samples of completed cabinets, shelves, and millwork, it is easier to show what you can do instead of just talking about it.
Training that follows industry standards and timelines also helps you feel job-ready from day one. You learn to plan your work, hit deadlines, and keep quality high, which are all habits that employers value when they hire new cabinetmakers.
Choosing the Right Cabinetmaking Training Program in Canada
Not all programs are the same, so it helps to know what to look for. When comparing cabinetmaking training options, visit the shop space and ask about the type of projects you will complete. A good program will usually offer:
- Experienced instructors with real shop background
- A well-equipped woodworking shop and modern tools
- Realistic projects that copy real job tasks
- Smaller class sizes for more one-on-one guidance
It also helps to choose training that matches current labour market needs. When a program keeps an eye on what employers are asking for, graduates are better prepared for in-demand cabinetmaking roles.
At North American Trade Schools, cabinetmaking training is designed to match what employers expect on the job. Our focus is on hands-on learning and helping students build the confidence to step into real cabinet shops and jobsites across Canada.
Turning Your Interest Into a Cabinetmaking Career
If you enjoy working with your hands, solving problems, and seeing real results at the end of each day, cabinetmaking can be a natural fit. Many people find it rewarding to look at a finished kitchen or custom unit and know they built it piece by piece. If you are ready to turn your creativity and practical skills into a career, cabinetmaking training could be your next step.
At North American Trade Schools, we are proud to help future cabinetmakers learn in a supportive, hands-on setting here in Canada. When you spend time in the shop, learn from experienced instructors, and complete real projects, you are not just training for a job; you are shaping a career in the skilled trades that can grow and change with you over time.
Start Building Your Cabinetmaking Career Today
If you are ready to turn your interest in woodworking into a practical career, our cabinetmaking training can help you develop the hands-on skills employers look for. At North American Trade Schools, we combine shop experience with focused instruction so you can work confidently with materials, tools, and industry standards. Connect with our admissions team to ask questions about start dates, schedules, and financial options, and learn how we can support your goals. We are here to help you take the next step toward a future in cabinetmaking.
Why Structured Welding Training Changes Everything
Learning to weld on your own is easier than ever. With online videos, forums, and a basic machine in the garage, many people start experimenting with beads and simple projects. That kind of curiosity is valuable, and it is often how an interest in welding first sparks. The challenge comes when someone wants to move from weekend projects to steady work on real job sites across Ontario.
At that point, what is at stake is much bigger than a hobby. We are talking about safety, employability, income potential, and access to better opportunities in fabrication, construction, and industrial settings. Self-teaching can be a great way to see if you enjoy the process, but when you are serious about a career, accredited training at a career college becomes hard to replace. At North American Trade Schools, our welding-focused training, including pathways toward welding certification in London as well as at our Brampton and Burlington campuses, is built around what employers actually expect in today’s skilled trades market.
Self-Taught Welding Vs Career Training: What Really Differs
Many self-taught welders reach a point where they feel stuck. They can run a decent bead in one position, maybe on one type of material, but have gaps in their knowledge that are hard to spot without guidance. There is no structured curriculum, no guarantee that they will try multiple processes, and no one to correct unsafe habits. It is easy to stay in a comfort zone and repeat the same techniques instead of building a complete skill set.
Career training follows a different path. In a formal program, students move through a planned progression, starting with basics like equipment setup and joint preparation, then working toward more advanced positions and processes. Instructors are right there in the lab, watching posture, travel speed, and machine settings, and giving clear feedback in real-time. That kind of direction is difficult to replace with a screen and a comment section.
At North American Trade Schools, we combine theory, hands-on practice, and industry standards so students understand not only how to complete a weld, but why a particular method or setting is chosen. Classroom discussions help connect what happens in the booth to what happens on job sites. This balance is important, because employers across Ontario often ask where applicants learned to weld. When they see graduates of recognized programs, or candidates working toward welding certification in London and other cities, they know there has been consistent training and skill verification.
Safety, Codes, and Compliance You Cannot Afford to Wing
Welding looks simple when you watch a short video, but the risks are real. Without proper instruction, people can expose themselves to burns, eye damage, electrical shock, fumes, and fire hazards. Structural welds that look fine on the surface can fail under load if they are not done correctly. On an actual job site, that is not just a mistake, it is a serious safety concern.
Formal training spends time on safety from the first day. Students learn to select and wear personal protective equipment properly, from helmets and gloves to clothing and eye protection. They practise safe operation of welding machines, how to set up work areas, and how to arrange ventilation. Discussions cover hazard recognition that reflects Canadian and Ontario requirements, so students understand what supervisors and inspectors expect.
There is also a large technical side that self-teaching often skips. Reading welding symbols, interpreting blueprints, and knowing code requirements are all part of producing work that passes inspection. On construction and industrial sites, welds must match drawings and meet specific criteria, not just look acceptable. Career college programs help students build these safe habits early, so when they step into workplaces where compliance is non-negotiable, they already think and act with safety in mind.
When You Need Welding Certification in London to Get Hired
As people move from hobbyist welding into the job market, credentials start to matter. Employers use education and certification as quick ways to screen applicants, especially in fabrication shops, manufacturing plants, and construction companies that rely on consistent quality. While every employer is different, many prefer to see that a welder has completed a structured program and is prepared to work toward the certifications required for their projects.
This is where a clear path toward welding certification in London and across Ontario becomes important. Training at a career college builds the foundation for those credentials, giving students the time and support they need to practise the skills that are assessed. It is much easier to approach certification when you have already worked through relevant processes and standards in a lab setting.
North American Trade Schools supports students with job readiness built into their program experience. We focus on skills that employers actually ask about, so graduates can talk confidently about their training, the processes they have used, and the environments they are prepared to work in. While self-taught welders might pick up occasional jobs, those who combine their hands-on interest with formal training and a path toward certification often find more steady roles and better long-term earning potential.
Hands-On Labs, Equipment, and Feedback You Can’t Get at Home
Welding skills grow quickest when you can practise consistently on suitable equipment. At home, many people work with one small machine, a limited set of materials, and a single type of joint. This is enough to get started, but it does not reflect what they will face on an industrial site or in a fabrication shop.
In structured labs, students experience:
- Industry-relevant machines and tools
- Different materials and thicknesses
- A range of joint types and welding positions
- Multiple processes aligned with employer needs
Working on this kind of variety exposes students to challenges they may never see in a home setup. They learn how settings change from one material to another, how positioning affects bead appearance and penetration, and what to watch for when weld quality is critical.
Feedback is another major difference. Our instructors bring real-world experience from Ontario job sites and can point out details that a beginner might miss. Immediate comments on bead shape, arc length, travel speed, and preparation help students improve quickly and avoid building bad habits. At campuses like the one supporting welding certification in London, there is also a community aspect. Students share tips, encourage each other, and start forming connections with people who share their career goals.
Turning Interest Into a Skilled Trades Career in Ontario
For many people, the first spark of interest in welding comes from a DIY project or helping a friend. If that interest has grown into something bigger, formal training can turn it into a practical career path. Instead of guessing whether your skills are enough for a particular job, structured programs help you measure your progress against clear expectations.
Any self-taught practice you already have still counts. In fact, those hours experimenting on your own often make you more comfortable the first time you step into a lab at a career college. You may pick up new techniques faster because you already know how it feels to strike an arc and control a puddle. Formal training builds on what you have started, guiding you toward work that is safe, consistent, and aligned with the standards used across Ontario’s skilled trades.
Advance Your Welding Career With Training That Employers Trust
If you are ready to build real, in-demand skills, we are here to support your next step. Our instructors, labs and curriculum are designed to help you earn a respected welding certification in London and feel confident on the job. At North American Trade Schools, we focus on practical, hands-on learning that connects directly to industry needs. Reach out to our team today to explore start dates, admission requirements and how we can help you move forward.
Step Inside the Workday of a Network Cabling Pro
Network cabling specialists are the people who keep our internet, phone, and data connections working behind the scenes. When an office opens a new floor, a school sets up a computer lab, or a warehouse adds scanners and cameras, someone has to run the cables that make everything talk to each other. That is where this trade comes in.
On a typical day, a technician might start with a walk-through of a site, plan where cables will run, pull those cables through ceilings or walls, and finish by testing every line. The work is hands-on, active, and detailed. If you are curious about a network cabling specialist program, it helps to know what the job is really like day to day. Summer is often a busy season for moves and upgrades, so understanding the work now can help you decide if this path fits your goals.
What Network Cabling Specialists Really Do All Day
Network cabling work is a mix of planning, installing, and fixing. Before any cable goes in, technicians look at drawings of the building. These might be blueprints or simple floor plans. From there, they figure out how to reach each desk, device, or room without making a mess or breaking safety rules.
Common daily tasks include:
- Reviewing floor plans to plan cable routes
- Measuring and pulling copper or fibre optic cable
- Terminating ends at wall jacks, patch panels, or network racks
- Labelling each run and updating basic records
That planning and labelling may seem small, but it matters later when something needs to be moved or repaired. Good cabling work is neat, organized, and easy to understand.
Service work is another big part of the job. Many techs spend time:
- Troubleshooting slow or dropped connections
- Testing lines to find breaks or loose ends
- Replacing damaged cables or upgrading older ones
- Helping during office moves or expansions
Network cabling specialists rarely work alone. They often team up with:
- IT staff who manage servers and switches
- Electricians who handle power
- Construction crews who build walls and ceilings
- Facility managers who oversee the building
Because they work in active offices, homes, schools, and other busy spaces, they also need solid people skills. That means speaking clearly with clients, respecting quiet areas, keeping workspaces tidy, and answering simple questions in a calm, friendly way.
Tools, Tech, and Safety Gear on Every Job
A network cabling specialist carries a tool bag almost everywhere. Many tools are simple hand tools, but each one has a clear purpose.
You will often see:
- Cable strippers to remove outer jackets
- Crimpers to attach connectors on copper cables
- Punch-down tools to connect wires to jacks and patch panels
- Fish tapes or rods to guide cable through ceilings and walls
- Drills, bits, and ladders to reach new paths
- Label makers to mark each cable and port
Testing equipment is just as important. After the cables are run and terminated, everything needs to be checked. Technicians may use:
- Basic continuity testers to confirm each wire is connected
- Cable certifiers to check speed and performance
- Fibre optic tools for cleaning, splicing, and testing light levels
Safety gear is part of the uniform. On many jobs, techs wear:
- Hard hats to protect from overhead work
- Safety glasses when drilling or cutting
- Work boots with good grip for ladders and job sites
- High-visibility vests so others can see them
- Harnesses or fall protection when working at heights
In a strong network cabling specialist program, students work with these same tools and testers in lab settings. That hands-on practice helps them feel ready when they step onto a real job site.
Work Environments From Offices to Construction Sites
One of the biggest draws of this trade is variety. Network cabling specialists do not sit at a desk all day. They move between different sites and see how many types of workplaces run.
Typical environments include:
- Office towers with open floors and cubicles
- Data rooms and server spaces that need strict cable control
- Warehouses and factories with scanners, cameras, and control systems
- Schools, colleges, and training centres with many computers
- Hospitals and clinics with sensitive equipment
- Retail spaces and residential buildings
The conditions can change a lot from job to job. Working in a new build might mean open ceilings, exposed framing, and other trades everywhere. Retrofits in older buildings might mean tight ceilings, crowded ductwork, and careful work to avoid finished walls.
Some jobs happen during regular business hours. Others, especially in busy offices or schools, are done in the evenings or on weekends, so the work does not interrupt daily operations. Technicians may find themselves:
- Climbing ladders to reach ceiling spaces
- Working in server rooms that can be cool and noisy
- Squeezing into tight spaces to reach hidden paths
- Moving equipment and cable reels across large sites
In Ontario, summer and early fall often bring many renovation and move projects, especially for offices and schools. That can be a strong time for new technicians to find entry-level work as part of larger teams.
Skills You Build in a Network Cabling Specialist Program
A focused network cabling specialist program gives structure to all of these tasks. Instead of learning random pieces on the job, students follow a clear path from basics to more advanced skills.
Core technical skills usually include:
- Cable installation methods for copper and fibre
- Industry standards for different cable types
- Termination techniques for jacks, connectors, and patch panels
- Proper use of test gear to check and document work
Learning is grounded in real-world practice. In lab settings, students can:
- Work on simulated job sites with walls, racks, and ceilings
- Read sample floor plans and plan cable routes
- Practise neat cable management, bundling, and dressing
- Run through troubleshooting drills that feel like real service calls
Safety and professionalism are also a big part of training. Programs often cover topics like WHMIS, working at heights, basic electrical awareness, and workplace communication. These skills help new technicians stay safe, follow rules on active job sites, and work smoothly with other trades.
At North American Trade Schools, we focus on small classes, instructor support, and plenty of lab time at our Ontario campuses. Our goal is to help students move from the classroom into entry-level roles with the confidence that they have already done this work in realistic training spaces.
Take Your First Step Toward a Hands-On Tech Career
Network cabling can be a good fit for people who like variety, movement, and working with their hands. Each day brings a different mix of planning routes, pulling cable, making clean terminations, and testing connections so businesses, schools, and homes can stay online.
If you enjoy problem-solving, paying attention to detail, and being in changing work environments instead of sitting still all day, a structured network cabling specialist program can give you a clear path into this field. With training that blends technical skills, safety knowledge, and real-world practice, you can be ready to help build the networks that keep modern life running.
Launch Your In-Demand Network Cabling Career With Confidence
Prepare for a hands-on, technology-driven future by enrolling in our network cabling specialist program. At North American Trade Schools, we focus on practical skills that help you step into the field with real-world experience and confidence. Our instructors bring industry knowledge into the classroom so you can learn what employers are looking for. Take the first step today and start building a more secure and rewarding career path in network cabling.
Turning a Passion for Woodworking Into a Career
Turning a love of working with wood into a real job is possible when you know the right steps to take. Across Canada, new homes, renovations, and custom projects all need people who can build strong, attractive cabinets and built-ins. That means there is steady demand for people who can measure, cut, and assemble wood with care and consistency.
If you are serious about cabinetmaking training that can lead to a real career, formal schooling can help you move far beyond hobby level. Instead of guessing your way through projects, you learn how to work safely, plan your builds, and finish jobs that meet professional standards. At North American Trade Schools, we focus on hands-on skilled trades training, including cabinetmaking, so students can be ready for real work in real shops.
What Cabinetmakers Really Do Day to Day
Before choosing a cabinetmaking training program, it helps to understand what cabinetmakers really do day to day. Cabinetmakers work with wood and wood substitutes to build and install:
- Kitchen and bathroom cabinets
- Shelving and storage units
- Custom built-ins and displays
- Store fixtures and counters
On a typical day, a cabinetmaker may:
- Read blueprints or shop drawings
- Measure and mark materials
- Cut parts to size with saws and other tools
- Join pieces together using different methods
- Sand and finish the final product
- Help with delivery and installation
The job mixes creativity with precision. You need an eye for design to choose the right style and proportions, and you also need to follow exact measurements so doors close properly and drawers slide smoothly. Some cabinetmakers work in small custom shops, others in larger manufacturing plants, and many work on site to install cabinets in homes and businesses.
Why Formal Cabinetmaking Training Matters
A lot of people start with basic home tools and simple projects. That is a good way to find out if you enjoy working with wood. But there is a big difference between weekend projects and building cabinets that must fit perfectly, last a long time, and meet client expectations. This is where structured cabinetmaking training makes a real difference.
Comprehensive cabinetmaking training ensures you learn the right techniques from the start. In a formal program, you get:
- Clear safety instruction for hand and power tools
- Step-by-step methods that help you work faster and more accurately
- Practice with both classic hand tools and modern shop equipment
- An introduction to industry standards and common shop routines
Employers notice when someone already understands how a shop runs. Knowing how to care for tools, keep your work area organized, follow quality checks, and work as part of a team can help you fit in quickly. Strong training also helps you avoid bad habits that might slow you down or lead to mistakes on the job.
Inside a Cabinetmaking Program From First Cut to Finished Project
In a hands-on cabinetmaking training environment, you will move quickly from theory to practical skills. Early on, you focus on the basics that every good cabinetmaker needs:
- Reading tape measures, scales, and simple drawings
- Laying out parts so you waste less material
- Cutting pieces accurately with saws and other tools
- Practicing joinery like dados, rabbets, and biscuit joints
- Assembling, clamping, and checking for square
You also learn to work safely and efficiently with common shop equipment such as table saws, planers, jointers, sanders, and routers. Instructors show you how to set up machines, check for problems, and use them in a way that gives you clean, repeatable results. Over time, your projects become more complex, moving from small practice joints to full cabinets and furniture pieces.
Quality cabinetmaking training teaches you to select the right materials and finishes for each project. You get to know:
- Different species of wood and where each one works best
- Veneers and composite products often used in modern cabinets
- Basic cabinet and furniture design ideas
- Hardware choices like hinges, slides, pulls, and handles
- Staining, painting, and clear coat options for protection and style
By the time you complete a cabinetmaking program, you should have built several projects from start to finish, from first cut to final coat of finish. This gives you both skills and a sense of how long tasks take, which is very helpful once you start working in a shop with real deadlines.
How North American Trade Schools Prepares You for the Shop Floor
At North American Trade Schools, cabinetmaking training is built around real tools, real materials, and real projects. Students spend a lot of time in a shop setting that feels close to what they will see in the workplace. You measure, cut, assemble, and finish under the guidance of instructors who watch your technique and give feedback. Smaller class sizes help us give more personal support when you are learning a new tool or skill.
Our cabinetmaking curriculum is designed to reflect current shop practices and safety rules. That means you learn to:
- Plan your work so you stay efficient
- Check your measurements before cuts
- Follow step-by-step build sequences
- Inspect your work for quality at each stage
Career-focused cabinetmaking training helps you graduate with the skills local employers need. Along with technical skills, you can get help with your resume, practicing for interviews, and understanding what different employers are looking for in entry-level cabinetmakers. Learning about various roles in cabinet shops, millwork companies, and related areas can help you choose a path that fits your goals.
From Graduate to Working Cabinetmaker
Practical cabinetmaking training can open doors to a variety of entry-level positions in the industry. Many new graduates start in roles such as:
- Cabinetmaker’s assistant or helper
- Cabinet assembler in a shop
- Installer working on site
- General shop worker preparing materials and parts
As you work, your on-the-job experience will build on what you learned in school and speed up your growth as a tradesperson. You will see new types of projects, learn how different shops stay organized, and pick up tips from more experienced coworkers. With solid cabinetmaking training as your foundation, you will be ready to grow your skills and responsibilities over time.
With experience, some cabinetmakers move into more advanced roles like lead hand, supervisor, or estimator. Others decide to focus on a niche, such as custom kitchens, commercial fixtures, or fine furniture. Some people even choose to start a small cabinetry business once they have enough experience, contacts, and confidence in their skills.
Is Cabinetmaking Training Right for You?
Cabinetmaking can be a great fit if you like seeing a project come together in your hands. Many successful cabinetmaking students share a few traits:
- Enjoy working with tools and materials
- Like solving practical, hands-on problems
- Pay close attention to small details
- Have patience to measure twice and cut once
- Take pride in clean, precise work
If you are detail-oriented and love building things, cabinetmaking training could be a great fit. It gives you a clear path from simple interest to real, employable skills. At North American Trade Schools in Canada, we offer hands-on cabinetmaking training that can take you from your first cut to your first job, with guidance and support along the way.
Start Building Your Future in Cabinetmaking Today
If you are ready to turn your interest in woodworking into a practical, in-demand skill set, our cabinetmaking training can help you take the next step. At North American Trade Schools, we combine hands-on shop experience with instruction from industry-experienced instructors. You will learn to work with tools, materials, and techniques that employers value. Connect with us today to explore program details, schedules, and how we can support your career goals.
Discover a Creative Career in Cabinetmaking
Cabinetmaking is a great fit if you like working with your hands, using tools, and seeing a project come together from raw material to finished piece. It blends traditional craftsmanship with modern equipment, so you get the satisfaction of building something solid along with the efficiency of power tools and shop machinery. From kitchen cabinetry to retail fixtures, you can shape spaces people use every day.
There is steady demand for custom cabinets, renovations, and commercial millwork as homes and businesses are updated or built. That means cabinetmakers can look toward stable, long-term employment in shops, on job sites, or in related trades. At North American Trade Schools, we focus on skilled trades training in Ontario that is practical and hands-on, so our cabinetmaking students are preparing for real entry-level roles in the field, not just learning theory in a classroom.
What You Learn in a Cabinetmaking Program
A solid cabinetmaking program starts with technical foundations. You learn how to read and interpret blueprints, sketches, and shop drawings so you can understand dimensions, layouts, and construction details. Measuring and layout skills are a big part of every day in the shop, including working with fractions, angles, and accurate marking so parts fit together properly.
You also get familiar with different materials, such as solid wood, veneers, and manufactured boards like plywood and particleboard. Knowing when to choose each one, and how they behave when cut or finished, is important for both quality and cost. Alongside that, you learn the safe operation of stationary and portable tools, including saws, sanders, drills, and other woodworking equipment.
Cabinet construction methods are another major focus. You can expect to cover topics such as:
- Joinery techniques for strong, clean connections
- Building cabinet boxes with square, consistent dimensions
- Constructing doors and drawers that fit and move smoothly
- Installing hinges, slides, and other hardware
- Basic finishing, such as sanding and preparing pieces for stain or paint
Technical skills are only part of what employers look for. You also build problem-solving skills for the shop floor, like figuring out how to correct a miscut piece or adjust a design on the fly. Time management becomes second nature as you plan your work to meet project deadlines. Teamwork and communication with supervisors, co-workers, and sometimes clients are built into projects, so you can step confidently into a professional environment.
Hands-On Training at NATS: How Learning Happens
At North American Trade Schools, we believe cabinetmaking is best learned by doing. Classroom sessions support your learning, but most of your time is spent in the shop, working directly with tools and materials. You practise the same kinds of tasks you will see in cabinet shops, construction companies, and renovation firms.
Your learning usually follows a clear progression. It begins with safety training, so you know how to protect yourself and others around power equipment and hand tools. From there, you start with simple projects that help you build basic measuring, cutting, and assembly skills. As your confidence grows, you move into more complex cabinets and installations that simulate real-world work, such as fitting components together and dealing with tight spaces or tricky angles.
We focus on skilled trades training in Ontario that reflects industry expectations, so the equipment you use in our shops is aligned with what you are likely to see on the job. By the time you complete the program, you will have experience working through complete projects from plan to finished cabinet, which helps prepare you to step into entry-level positions and keep learning as you go.
Tips to Succeed in a Cabinetmaking Program
A bit of preparation before starting your training can go a long way. Brushing up on basic math, especially fractions, will make measuring and layout feel much smoother once you are in the shop. Getting comfortable with a tape measure, and practising reading it quickly and accurately, is a smart head start. It also helps to start paying attention to cabinets in homes, offices, and stores, noticing how doors line up, how drawers slide, and how different finishes look.
Once you are in the program, good habits will support your success. Some helpful strategies include:
- Always follow shop safety rules and wear required protective equipment
- Ask questions when you are unsure about a process, tool, or measurement
- Practise cuts and joints repeatedly until they become consistent
- Keep your bench and tools clean and organized for safer, faster work
Confidence grows over time, but you can encourage it with small steps. Try a simple personal project outside of class, such as a small shelf or box, to apply what you are learning in your own space. Take photos of your projects from start to finish to build a basic portfolio you can show to employers. Be open to feedback from instructors and classmates, and treat it as a way to keep improving your craftsmanship.
Planning Your Cabinetmaking Career Path
After completing a cabinetmaking program, there are several ways to start your career. Entry level positions can include roles such as cabinet assembler in a shop, installer’s helper on job sites, woodworking machine operator, or general shop assistant. In these positions, you continue to refine your skills, learn shop systems, and build speed and accuracy.
With experience, many cabinetmakers progress into roles with more responsibility, such as lead installer, production lead, shop supervisor, or specialist in custom furniture or high-end millwork. Cabinetmaking also connects well with other areas of skilled trades training in Ontario, especially construction, renovation, and interior finishing. That means you can branch out into related work if you discover you enjoy a particular aspect, such as site installation, framing, or detailed trim.
No matter which path you follow, professionalism and soft skills matter. Employers value people who:
- Show up on time and ready to work
- Meet deadlines and keep projects moving
- Pay close attention to detail in measurements and finishing
- Communicate clearly about progress and any issues that arise
By combining your technical skills with reliable work habits and clear communication, you build a strong reputation in the industry. That reputation is often what leads to new opportunities, referrals, and long-term career growth in cabinetmaking and related trades.
Take The Next Step Toward a Rewarding Skilled Trades Career
If you are ready to move from researching to building your future, we are here to help you get started. Explore our skilled trades training in Ontario to find the program that fits your goals and interests. At North American Trade Schools, we focus on practical, hands-on learning that prepares you for real opportunities in the field. Connect with our admissions team today to discuss your options and start planning your training path.
Winter often gets people thinking about doing something productive with their time. If you have been thinking about a fresh start, a cabinetmaking course in London could be a smart first step. This kind of training is not just about learning how to use a saw or sand down rough edges. It is for people who want to work with their hands, solve real problems, and build a skill set that can lead to meaningful jobs. Whether you are looking to switch careers or just get started in the trades, cabinetmaking offers more than most people expect.
We work with students across Ontario who want more than bookwork. They want training that feels real from day one. When you step into the shop, you will be learning skills that matter on the job, not just in the classroom.
Exploring the Craft: What Cabinetmaking Really Involves
Cabinetmaking covers more than just furniture. It includes reading plans, using tools safely, measuring with precision, and working through each step of a build with purpose.
• Students learn how to read and understand blueprints, which helps them go from a simple design to finished, usable pieces
• Tool safety and proper use are part of everyday shop time, from table saws to clamps and routers
• Measuring, cutting, assembling, and finishing are done by hand as part of regular training, which keeps the work realistic
This is where design meets function. When students work through problems during a build, like getting a tight cabinet corner or adjusting a misaligned hinge, they are learning to think on their feet. These are real-world scenarios that help prepare them for working on job sites or even custom furniture shops. Since the training is hands-on, the skills become second nature over time.
The Cabinetmaking program at North American Trade Schools in London includes modules on custom cabinetry, kitchen layout, lamination, workplace safety, and practical shop projects. Students have access to a modern woodworking lab and a range of industry-standard tools.
More Than Tools: Building Career-Ready Skills
There is another side to cabinetmaking that matters just as much as knowing how to cut or sand. In the shop, students also build habits that help them succeed in the workplace.
• Time management gets stronger because every build comes with a schedule
• Attention to detail is reinforced daily as even a small mistake in measurement can throw off an entire piece
• Workflow and personal accountability become part of every project
This kind of training is not just about what you make, it is about how you work. Employers want people who can stay focused, solve problems as they come up, and keep things moving safely on a job site. These soft skills make a big difference. They help students finish school with more confidence and a clearer understanding of what is expected in real work settings.
What You Will Learn Hands-On in the London Program
During the cabinetmaking course in London, you will spend much of your time working in a fully equipped shop. This is where ideas turn into real products. Students practice cabinet assembly, learn proper installation steps, and finish surfaces by hand.
We focus just as much on safety as we do on skill. Every part of the training includes safety practices that protect you and the people around you. That includes everything from knowing how to handle sharp tools to lifting heavy items the right way.
Cabinetmaking is not just about making one-off pieces. You are learning how to lay out an entire kitchen cabinet system, how to get parts to fit exactly, and how to install and trim pieces to look clean and professional. If you are considering this kind of career, you can review the full training process through our Cabinetmaking course in London.
Local Advantage: Why Training in London Supports Success
Training in London has direct benefits for anyone looking to work in southwestern Ontario. You are learning in the same region where many job sites and cabinet shops are located, which keeps your learning connected to local demand.
• New residential construction often needs skilled cabinetmakers for kitchens, bathrooms, and built-ins
• Commercial fit-outs for offices and stores rely on strong installs and custom woodwork
• Being based in the area can help with networking, job leads, and apprenticeships
When students train locally, they are more likely to stay connected to opportunities within the community. That connection helps new grads get hired and build real support systems early in their careers.
North American Trade Schools supports students with job search services, resume preparation, and local employer connections as they finish the Cabinetmaking program in London.
A Career Path That Grows with You
Cabinetmaking is one of those careers that does not stay in one spot. Once the basics are down, you can grow into different types of roles.
• Contract work lets you work for builders, designers, or directly for homeowners
• Shop careers often include specialty roles like CNC operator or trim installer
• Some grads use their skills to open workshops or small businesses
Early training can help open more than just one door. Skills in measuring, working from plans, organizing materials, and managing time carry into nearly any other job in the skilled trades. For people who want flexibility and room to grow, this trade can lead to long-term careers built on solid foundations.
Shaping Your Skills for What Is Next
What students take away from cabinetmaking training goes beyond machines and measurements. It is about building something solid that will last. That kind of work can be satisfying, especially when you know how much it matters on the job site.
Students leave the shop with job-ready skills, stronger work habits, and confidence in what they can do with their hands. Cabinetmaking combines creative thinking with practical, real-world planning. For those ready to take the work seriously, it is a trade that offers structure with room to grow.
Start Learning and Building Your Future in Cabinetmaking
Thinking about putting your hands-on skills to work in a rewarding trade? Our training in London can set you up for success. With a cabinetmaking course in London, you will gain practical experience from blueprint reading to real shop projects, equipping you to work safely and precisely in diverse settings. Whether your goal is to work in homes, commercial spaces, or your own shop, we focus on real-world preparation that leads to results after graduation. North American Trade Schools is ready to help you take the next step with the right training. Connect with us to get started.
Choosing the right wood is one of the first big decisions in any cabinet project. It affects how a cabinet looks, how long it lasts, and how easy it is to build and finish. Even before the first cut is made, the material you pick sets the tone for the whole job. The strength, colour, grain, and workability of each type of wood all play a part. This is why wood selection is often one of the first lessons in any credible training program.
But picking the right wood is only part of the equation. How you treat it makes just as much of a difference. Wood has to be prepared properly before it’s used. That includes drying, sealing, staining, and finishing. If done right, this process protects it from the elements and keeps the final product looking good over time. These are the kinds of skills that students develop through hands-on experience in the Cabinet Making program in London, where training starts with real tools, real wood, and real-time lessons.
Understanding Wood Types for Cabinet Making
Not all types of wood behave the same. Some are soft and easy to shape but dent easily. Others are strong and durable but harder to work with. Knowing the difference plays a big role in planning and building a cabinet that fits the job it’s meant for.
Here are two main categories of wood used in cabinet making:
Softwoods
These tend to be lighter in weight and easier to cut. They’re often used for internal framing or cabinets that won’t handle too much wear. Common types include:
- Pine: A light-coloured wood known for being budget-friendly and quick to work with. It can take paint well but may dent easily.
- Spruce: Often used in structural parts thanks to its strength. Its grain isn’t as prominent, but it’s still widely used in shelving and basic cabinet frames.
- Fir: Straight-grained and fairly strong, though it can split if not handled properly.
Hardwoods
These are better for visible surfaces and cabinets that need to handle wear over time. They cost more and take more skill to shape but deliver strong results.
- Oak: Known for its grain pattern and strength. It’s often used for cabinet doors and outer panels.
- Maple: Dense and smooth, maple accepts stains well and has a clean, modern appearance.
- Cherry: A reddish hardwood that darkens with age. It’s often used in upscale cabinetry for both looks and performance.
- Birch: Similar look to maple but more cost-effective. It stains evenly and takes finishes well.
In the Cabinet Making program based in London, students learn how to match the right wood to the design they’re following. They examine textures, weights, and grain direction, gaining experience in how each wood behaves once cutting or planing begins. This comes in handy later when clients want specific looks or when a build requires extra durability.
Best Practices for Wood Treatment
Once the type of wood is selected, it needs to be treated before it’s turned into cabinet parts. This protects the wood from moisture, wear, and warping. Treatment also impacts how the finish looks after paint, stain, or sealant is applied.
Here’s a simple breakdown of treatment steps:
- Drying: Wood must be properly dried to avoid issues like shrinking or expanding. Some woods come kiln-dried, but students learn how to check for leftover moisture before working.
- Sanding: This smooths out the surface so it can take finishes better. Starting with coarse grit and working to finer grades helps reduce swirls or gouges.
- Staining: Stain brings out or changes the wood’s natural colour. Proper staining techniques prevent streaking and uneven absorption.
- Sealing: A clear sealant helps lock in colour and protects the surface from moisture and wear. Some woods need pre-sealing before staining to avoid blotching.
Treating wood the right way helps improve both the look and durability of cabinets. Cutting corners here can hurt the final product. Students in London learn these steps by working with different wood types, so they understand how oak reacts differently than pine or when to pre-stain versus seal. These habits carry into every project, whether it’s built-ins, kitchen cabinets, or custom vanities.
Techniques for Enhancing Wood Appearance
Bringing out the best look in the wood doesn’t happen by accident. Small steps like sanding or applying a coat of finish can change how a cabinet feels and looks when it’s finally installed. These touches aren’t just for appearance either. They help with long-term protection too.
Sanding is often the first step in the process. It smooths the surface and gets rid of small defects or glue residue. Starting with rough grit helps shape the piece, while switching to fine grit before finishing keeps lines crisp and surfaces clean.
Painting and staining come next. Some designs use paint to create a solid colour. Others show off the grain using stains. Getting good with these techniques takes practice, especially when matching colours across different cabinet panels.
Finish work completes the job. Whether it’s a satin varnish or high-gloss sealer, finishes protect the wood and bring out rich tones. At the London campus, students learn to use rollers, sprayers, and brushes depending on what the build calls for.
Even small choices like using a cloth to get into corners instead of a brush can make a big difference. This kind of detail often comes up during hands-on lab time when students work on real materials they’ll see again in the workforce.
Common Wood Treatment Challenges and How to Prevent Them
Even with the best tools and prep, issues can still come up. Knowing what to look for, and how to fix things fast, makes life easier on the job. That’s why these challenges and their solutions are part of London’s training.
Here are a few common treatment problems and how to avoid them:
- Warping: This can happen when wood isn’t dried correctly or is stored in a damp place. Always check moisture before working and store boards lying flat.
- Splitting: Force from screws or nails can cause cracking in dry or thin wood. Pre-drilling holes, especially with hardwoods, helps prevent damage.
- Uneven stain: Softwoods like pine can blotch when stain is applied unevenly. Testing on a scrap piece and using a wood conditioner helps fix this.
- Peeling finish: If the wood isn’t clean or dry before finishing, the top layer might peel. A tack cloth and careful timing between coats help improve results.
- Sticky surfaces: High humidity or too many layers too close together often causes a tacky feel. Spacing out coats and watching the environment gives smoother outcomes.
Students at North American Trade Schools in London run into these issues early while training. Whether it’s re-sanding a poor stain job or stripping back a peeling layer, working through problems in real time gives them solid know-how.
How These Skills Pay Off in the Trade
Getting good with wood takes more than just information. It takes repetition, working with real materials, and learning from errors. For those trying to break into cabinet making, this training gives them a clear edge when starting out.
Making smart choices about which wood to use helps projects last longer and leave clients happier. Knowing how to prep and finish that wood builds trust on any crew or site. These two areas become second nature after good hands-on experience.
Programs like the Cabinet Making diploma in London teach these skills from day one. Students get their hands on real wood, test different finishes, and build habits that stay with them throughout their careers. By the time they enter a real shop, they’re not guessing—they’ve already done the work in class. These early experiences become the backbone of every cabinet maker’s future.
If you’re aiming to turn your interest in woodworking into a practical career, exploring the cabinet making diploma in London could be the next step. North American Trade Schools offers hands-on training that helps you build real-world skills and the confidence to work on job sites with ease.
Cabinet making isn’t just about building furniture. It’s about precision, design, and the skill to turn raw materials into something finished and functional. At the heart of it all are the tools used on the job. Whether you are building kitchen cabinets, custom shelves, or detailed trim, the right tools make all the difference. They help transform ideas into clean, lasting work.
For people curious about a career in woodworking, learning how each tool works is a strong first step. That’s where hands-on training really matters. At a cabinet making school in London, students use the tools themselves, learning through practical work in real shop settings. Instead of reading about how a saw cuts, you actually use it, fix your mistakes, and get comfortable with every stage of the build. This kind of learning gives you confidence when you step into the trade.
Essential Hand Tools for Cabinet Making
Getting started in this trade means learning the basics, and the basics begin with hand tools. These are tools you’ll use daily on jobsites and in shops. They might look simple, but they’re key in refining your work, handling details, and finishing jobs right.
Here are a few hand tools all cabinet makers should know:
- Chisels: Great for cleaning out joints, shaping fine corners, and making detailed cuts. You’ll learn how to choose the proper size and keep them sharp for smooth work.
- Block Planes: These help with tiny adjustments like smoothing edges or surfaces. A few passes can fix tight fits or uneven joints.
- Hand Saws: Still used widely for precision cuts in tight spaces. While machines can handle bulk cuts, the clean edge of a hand saw is needed in many final steps.
- Measuring Tools: Tape measures, combo squares, and marking gauges are used constantly. Accurate layout work is important for creating cabinets that fit and function properly.
At North American Trade Schools, students in the Cabinet Making program in London get hands-on with these tools from the beginning. Whether it’s shaping drawer parts or perfecting joints, this training builds the solid habits and control that employers look for.
Power Tools That Make a Difference
Once you’ve got the feel for hand tools, the focus shifts to machines that do the heavy lifting. Power tools help speed you up, boost consistency, and handle bigger tasks that hands can’t manage alone.
Some of the key power tools used in the school and industry include:
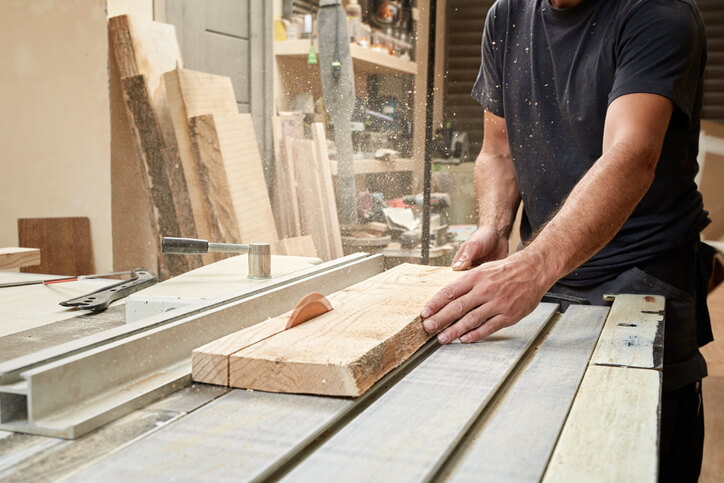
- Table Saw: One of the most important machines in any shop. This tool makes clean straight cuts and rips large sheets of wood. Learning to use it safely and precisely is a major part of your training.
- Router: Used for shaping edges, cutting slots, and adding decorative details. Different router bits create different profiles, and you’ll learn how to pick and swap them based on your build.
- Portable Sanders: Used for smoothing surfaces and edging. These are part of the final stages where surfaces need to be ready for finishing.
- Mitre Saw: Ideal for cutting clean angles. A sharp corner makes or breaks how trim and door frames fit.
Training to use these starts with learning how to set them up, adjust for wood movement and grain direction, and follow safety steps every time. In the London-based program, you don’t just watch a demo. You build projects using these tools in realistic shop settings. By the time you finish, you already have experience creating full cabinets with tools you’ll see again on the job.
Safety Gear and Practices
Part of being a pro in cabinet making isn’t just knowing how to make good cuts. It’s knowing how to work safely and avoid injury. In the London shop, safety is built into every part of training. You’ll learn what risks to watch for and how to work responsibly at each stage.
Common safety gear includes:
- Eye Protection: Safety glasses keep eyes clear of dust and chips flying off cuts.
- Hearing Protection: Machines are loud. Earplugs or earmuffs help protect your hearing over time.
- Dust Masks: Cutting and sanding wood raises fine dust. Masks protect your lungs from ongoing exposure.
- Proper Clothing: Non-slip boots and fitted clothing help reduce distractions and lower chances of getting caught in moving parts.
Beyond gear, the school teaches safe habits. That includes how to check guards, clean machines properly, unplug before changing blades, and stay alert. For example, if you’re using a table saw, you’ll also be guided on how to stand safely and guide materials the right way. These become habits with practice.
Machine maintenance is also part of the lessons. Students learn to reset tools, clean blades, and handle shutdown procedures—skills that build confidence and prevent common problems later on. All of this matters because being safe helps you stay sharp on the job while others trust you to get work done right.
Advanced Tools for Professional Results
Once you’re confident with the basics, it’s time to level up with tools that deliver speed and high-level precision. These are what you’ll often find in custom shops or larger contracts where accuracy and timing matter even more.
Advanced tools include:
- Jointers: These flatten edges and surfaces before gluing wood together. Flat joints hold strong and make the whole piece look sharper.
- Planers: Used to make boards the exact same thickness. A mismatch of just a few millimetres can throw off a whole build.
- Bandsaws: Better for cutting curves and thicker wood pieces that table saws can’t handle easily.
- CNC Routers: These programmable tools let you cut designs and parts with high detail. They run from uploaded files and are great for logos, duplicates, or design features.
These tools require more setup and planning. Students at the London location work through steps like adjusting fence settings, lining up measurements, making dry runs, and troubleshooting outputs. You’ll learn to do it all from scratch.
Knowledge of CNC routers, in particular, adds a tech edge to your toolset. Custom wood shops are starting to use them more, and someone trained to operate and fix settings efficiently stands out after graduation.
Tools Are Just the Start
Learning how to use woodworking tools properly takes time, which is why hands-on training matters so much. You get real shop time, not just textbooks or video demos. Every screw-up turns into a lesson. Every project builds finesse and deeper understanding—from glue-ups to final finishes.
At the cabinet making school in London, this approach is built into your day. You’ll practice layout, measurements, and adjustments until they become second nature. You’ll learn how to react on the spot, fix cuts that go off track, or adjust joins so they lock in better. That’s the kind of thinking that makes you successful out in the field.
This trade teaches problem solving and patience, and it offers a range of paths—shop work, millwork companies, furniture making, or even starting your own business. Learning the tools is step one. Learning to use them with purpose and care is what takes you further. The more you practice, the more capable you become. With a solid foundation of tool knowledge and confidence built through guided shop time, you’ll be ready to step into a jobsite or woodshop and make an impact from day one.
If you’re ready to take the next step toward a career in woodworking, enrolling in a cabinet making school in London can give you the skills and shop experience you need to succeed. At North American Trade Schools, our hands-on training prepares you for the real work ahead with the guidance and tools that matter most in the field.
If you consider yourself a creative person, you may wonder how to channel this personal attribute into a fulfilling and lucrative career. Though plenty of planning and hard work lie ahead, it is possible to turn your dream into a reality, and we can help you!
Are you passionate about crafting beautiful, functional pieces of furniture? Do you dream of turning your love for woodworking into a profitable career? If so, cabinetmaking training at North American Trade Schools (NATS) could be your ticket to entrepreneurship. Keep reading to discover how we’ll equip you with the skills and competencies to thrive in your future entrepreneurial endeavors.
Why Cabinetmaking Makes a Profitable Business
Cabinetmaking is both an art and a science that combines creativity with precision. As a cabinetmaker, you can transform a simple piece of wood into a stunning piece of furniture that can last for generations. What sets cabinetmaking apart is the demand for custom, high-quality work.
In an era where mass-produced furniture is the norm, there’s a growing market for bespoke pieces that add a personal touch to homes and businesses. This demand presents the perfect opportunity for skilled craftsmen to establish a niche in the market. What sort of skills should you acquire to prepare for success in your future cabinetmaking business? Let’s explore!
Skills You’ll Acquire in Our Cabinetmaking Training Program
At NATS, we understand that a successful cabinetmaker needs a strong foundation in technical skills and business acumen. That’s why our comprehensive cabinet making training covers everything from the basics of woodworking to advanced techniques in design and construction. Here’s a glimpse of what you’ll learn:
- Cabinetmaking Fundamentals: Master hand and power tools, understand the properties of different materials, and learn essential woodworking techniques.
- Cost Estimation: Learn how to execute your projects in an economically sound manner and how to price your services appropriately.
- Drawing and Blueprint Reading: Learn how the design of cabinets works and how to interpret and follow drawings accurately.
Turning Your New Skills Into a Career
After cabinetmaking college, you’ll possess unique skills that can be the foundation of a successful career. With woodworking, design, and construction expertise, you can offer custom-made furniture and cabinetry that stand out in a market saturated with mass-produced items.
To turn your skills into a career, start by identifying your niche: luxury bespoke kitchens, custom office furniture, or unique storage solutions. Developing a strong portfolio showcasing your craftsmanship and design capabilities is crucial for attracting clients.
Networking with interior designers, contractors, and architects can also open new opportunities. Social media and a professional website can help showcase your work and reach a wider audience. Additionally, understanding the business side, such as pricing strategies, marketing, and customer service, is essential for turning their craft into a profitable venture.

Combining your technical skills with entrepreneurial spirit allows you to create a career that fulfills its passion for woodworking and meets the growing demand for personalized, high-quality furniture and cabinetry.
If you’re ready to turn your passion for woodworking into a thriving career, NATS is here to help. Our cabinet making training can be a pathway to entrepreneurship for any student willing to use their strategizing and planning skills. With our experienced instructors, state-of-the-industry facilities, and a curriculum designed for success, you’ll be equipped to take on the world of cabinetmaking and make your mark as an entrepreneur.
Are you ready to earn your cabinetmaking diploma?
Contact North American Trade Schools for more information!
Is Cabinet Making the Right Career Path? A 2024 Guide For Cabinet Making Students
January 03, 2024
Are you a student contemplating a career in woodworking and craftsmanship? If so, cabinet-making might be the perfect path for you. In 2024, the demand for skilled cabinet makers will continue to rise, making it an attractive career option for those with a passion for woodworking and an eye for detail.
Ready to commit to a career in cabinet making in 2024? This field combines creativity with craftsmanship. With training options ranging from certificates to apprenticeships and a promising job outlook, it’s an ideal path for those passionate about building and design.
The Art and Craftsmanship of Cabinet Making
Cabinet-making is a centuries-old trade that blends artistry with practicality. As a cabinet maker, you will craft functional and aesthetically pleasing storage solutions, furniture, and fixtures. The beauty of this profession lies in its ability to transform raw materials into pieces of art that serve both practical and decorative purposes.
The modern cabinet maker is expected to possess a diverse skill set. From interpreting design blueprints to selecting and preparing materials, your expertise will be crucial at every stage of the cabinet-making process. Proficiency in woodworking tools, understanding various wood types, and mastering finishing techniques are just a few of the skills you’ll need to succeed.
In 2024, the demand for custom-made furniture and unique cabinetry will continue to rise. Homeowners and businesses seek personalized solutions that stand out in design and functionality. This shift in consumer preferences presents an exciting opportunity for cabinet makers to showcase their creativity and craftsmanship.

Education and Training Will Contribute To Your Cabinet Making Diploma
Pursuing a cabinet-making career, beginning with some form of formal education, can be highly advantageous. Many vocational schools and technical institutes offer comprehensive cabinet making training programs (such as NATS’ Cabinetmaking Diploma Program) that cover the fundamentals of woodworking, cabinet design, and construction techniques. These programs are also tailored to impart a broad range of skills essential in the field. This education equips students with practical, trade-level skills and instills a deep understanding of different materials and techniques used in cabinet making. These programs prepare students to enter the trade with confidence and proficiency, ready to take on the various challenges this creative and technical field presents.
Additionally, apprenticeships offer valuable hands-on experience. Working under seasoned cabinet makers, apprentices learn the trade’s practical aspects, from material selection to intricate joinery techniques. Remember, keeping up with the latest design trends and technologies is key to staying competitive in the cabinet-making industry.
Job Outlook and Career Advancement After Cabinet Making Training
With the growing interest in bespoke furniture and high-quality craftsmanship, the job outlook for cabinet makers is promising. The versatility of this skill set opens doors to various career paths, including custom furniture design, architectural millwork, and even entrepreneurship.
Experienced cabinet makers often find opportunities to advance into supervisory or managerial roles, overseeing production teams and projects. Some may start their woodworking businesses, catering to a niche market or collaborating with interior designers and architects.
Is Cabinet Making a Good Career
So, is cabinet making a good career? Like any profession, cabinet-making comes with its challenges. The job’s physical demands, the precision required in measurements, and the necessity for patience are aspects that aspiring cabinet makers should be prepared for.
However, the rewards are significant – the satisfaction of creating functional works of art, the joy of seeing your designs come to life, and the potential for a lucrative career in a growing industry. On a more practical level, the financial rewards can be substantial, especially for those who establish a niche or start their own business. While the initial earnings might be modest, skilled cabinet makers are often in high demand, leading to higher earning potential.
Are you interested in obtaining your cabinet making diploma?
Contact NATS for more information.


