Tag: home renovation courses
Considering Home Renovation Training? 3 Tips for Planning a Seamless Project
March 05, 2024
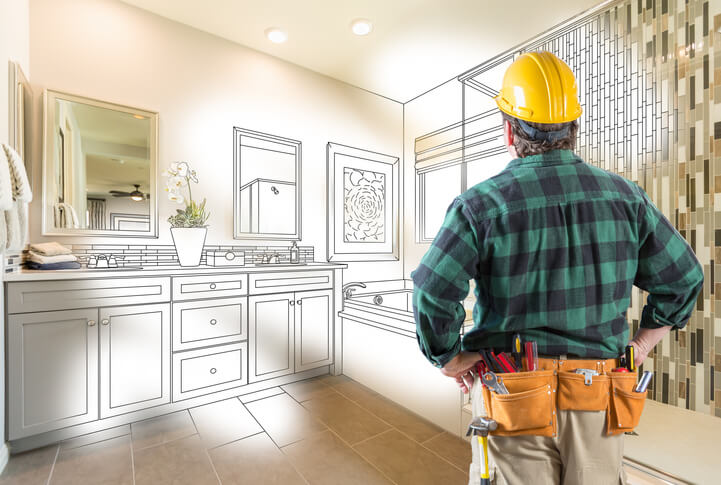
A home renovation project is a serious undertaking. Often, it requires a significant outlay in resources, skills, and effort; therefore, it’s not something to dive into unprepared.
When handling home renovation projects, failing to plan well in advance means planning to fail. Whether you’re a budding DIY enthusiast or considering a home renovation and construction career, understanding the fundamentals of planning and executing renovation projects is crucial. For those contemplating home renovation training, here are three essential tips to help ensure your projects are successful, seamless, and stress-free.
1. Home Renovation Training Emphasizes That Comprehensive Planning Is Key
Understand Your Goals: A clear understanding of your end goals is essential before diving into any renovation project. Are you looking to increase the home’s value, make it more energy-efficient, or simply update the aesthetics? Your objectives will significantly influence the project’s scope, budget, and timelines. Home renovation training equips you with the skills to assess a project from multiple angles, ensuring your plans align with your goals.
Create a Detailed Plan: A well-thought-out plan is the backbone of any successful renovation project. This includes detailed drawings or plans, a clear list of all required materials, and a step-by-step guide to the renovation process. Training in home renovation provides the technical knowledge necessary to create comprehensive plans, helping you anticipate and mitigate potential issues before they arise.
Set a Realistic Budget: One of the most common pitfalls in home renovation is underestimating costs, leading to budget overruns and incomplete projects. During your home renovation training, you’ll learn how to accurately estimate costs, including materials, labor, permits, and unexpected expenses. Setting a realistic budget and having a contingency fund can save you from financial stress.
2. Acquire the Right Skills and Knowledge
Learn From Experts: Home renovation training offers the opportunity to learn from experienced professionals. These experts can provide insights into the industry’s latest trends, techniques, and materials. Additionally, they can teach you how to use tools and equipment safely and efficiently, which is invaluable for DIY projects and professional endeavors.
Understand Building Codes and Permits: Navigating the legal requirements of home renovation projects can be complicated. Home renovation training provides an understanding of local building codes, zoning laws, and permit requirements, ensuring your project complies with all regulations. This knowledge will prevent legal issues and ensure the safety and longevity of your renovation work.
Focus on Sustainable Practices: Sustainability in home renovation is increasingly important. Home Renovation Training can introduce you to eco-friendly materials and practices, helping you make informed choices that benefit the environment and can also reduce long-term costs for homeowners.

3. Effective Communication and Project Management Are Essential When You Become a Renovation Technician
Develop Strong Communication Skills: Effective communication with clients, contractors, and suppliers is vital to the success of any renovation project. Home renovation courses often include project management principles, teaching you how to convey ideas, negotiate contracts, and resolve conflicts. These skills are essential for keeping projects on track and ensuring all stakeholders are satisfied with the outcome.
Learn to Manage Time and Resources Efficiently: Time management is critical in home renovations, where delays can lead to increased costs and dissatisfaction. Training programs provide strategies for scheduling work, coordinating with contractors, and managing resources efficiently. This ensures projects are completed within the allocated time frame and budget, with minimal waste.
Do you want to become a renovation technician?
Contact NATS for more information.

Material estimation is a key skill for anyone involved in home renovation. It’s a skill that ensures projects stay on budget and on time. As such, it requires precision, foresight, and an understanding of both the project at hand and the materials involved.
For students who have completed home renovation training, mastering material estimation is crucial for successful project management and cost control. This blog post highlights the best practices for material estimation and offers guidance to those new to the field, drawing from expert advice and industry standards.
Understanding Material Estimation
Material estimation is more than just a list of items needed for a project. It involves a detailed analysis of the required materials’ quantity, type, and cost. A reasonable estimate prevents resource wastage, ensures budget adherence, and can influence a renovation project’s overall design and implementation.
As you’ll discover in home renovation training, material estimation is a crucial process in construction and renovation projects. It involves a detailed calculation of the quantity and cost of materials required for the successful execution of any project.
The process begins with a clear understanding of the project scope, which includes the specifications and dimensions of the construction. Estimators calculate the materials needed, factoring in the square footage and specific project requirements. They then determine the cost of these materials, considering current market prices and potential fluctuations.
This estimation is vital for budgeting and planning, ensuring sufficient materials are procured without significant wastage or unexpected cost overruns. Techniques such as three-point estimation, which considers optimistic, pessimistic, and most likely scenarios, can provide a more accurate and comprehensive cost estimate.

Consider an Approach for Effective Material Estimations
- Start with Detailed Blueprints: As our home renovation courses emphasize, you need a clear understanding of the project. Use detailed blueprints to understand the scope and specifics of the renovation. This step is crucial for an accurate material list.
- Develop a Comprehensive Checklist: Create a checklist of all materials needed. This includes essential materials like wood or tiles and smaller, often overlooked items like nails, adhesives, and finishes. A comprehensive checklist helps avoid last-minute stock orders, saving time and money.
- Consult with Professionals: If you’re new to renovation, don’t hesitate to consult with experienced contractors or interior designers. Their expertise can offer valuable insights into material choices and quantities.
- Factor in Labour Costs: Remember that labour costs can significantly affect your overall budget. Understanding the correlation between material choices and the labour involved is key to a realistic estimate.
- Expect and Plan for Price Changes: The cost of materials can fluctuate. It’s wise to factor in a contingency budget for unexpected price changes. Your first estimate will rarely be your last. Regularly review and revise your estimates as the project progresses. This will help you stay aligned with your budget and timeline.
Best Practices When You Become a Home Renovation Technician
- Practice Makes Perfect: Apply your learning in real-world scenarios. Practice estimating materials for various projects to build confidence and accuracy.
- Stay Updated on Market Trends: Material costs and availability can change due to market trends. Keeping abreast of these changes will help in making informed decisions.
- Network with Suppliers: Building relationships with suppliers can give you insights into the best materials and potentially better deals.
- Continual Learning: The construction and renovation industry is constantly evolving. Stay updated with the latest materials, tools, and techniques.
Do you want to become a home renovation technician?
Contact NATS for more information.
A Day In The Life Of A Drywall Installer After Home Renovation Training
November 02, 2023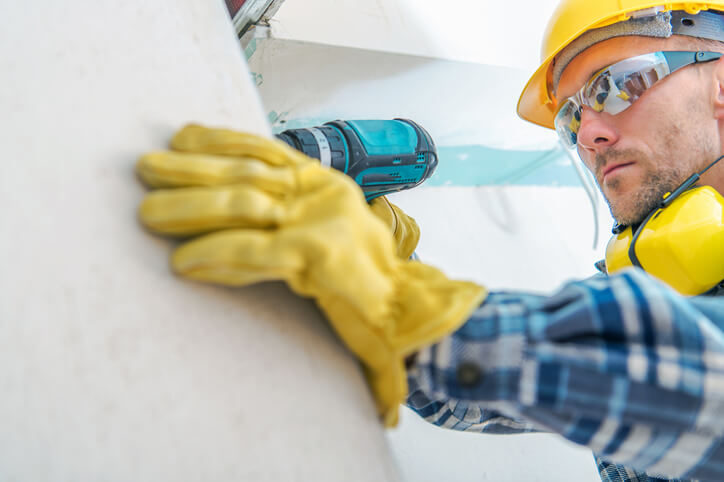
Have you ever admired the smooth walls in a freshly renovated room? Have you ever wondered what journey a room takes from a skeletal frame to a finished space, ready for painting? The transformation is the result of the meticulous work of a Drywall Installer. This profession is more than affixing panels to walls. It’s about precision, expertise, and a touch of artistry, especially for those trained in home renovation.
A Drywall Installer is a skilled tradesperson responsible for measuring, cutting, and fitting drywall sheets onto walls and ceilings during construction or renovation projects. They meticulously secure these panels, fill in joints and imperfections, and ensure a smooth surface, preparing the space for painting or further finishing. Drywall Installers are crucial in shaping buildings’ interior structure and appearance.
If this role sounds like something you would be interested in after your home renovation training, this blog post details what a day in the role entails.
Planning and Execution
Drywall Installers typically begin their day early. In the early morning hours, when most people are just stretching out of sleep, the Drywall Installer is already engrossed in blueprints, decoding the plans for the day. These aren’t mere diagrams but a roadmap to a perfect finish. Every detail, from installation methods to tool requirements, is spelled out on these sheets.
Armed with insights from home renovation courses and the blueprint as a guide, the next step involves a tape measure, straightedge, and marker. Each mark on the surface is a calculated decision, ensuring that every piece of drywall aligns perfectly with the structure’s blueprint. It’s like piecing together a jigsaw puzzle, where each piece has its unique place.
Installations
Following the markings, the physical transformation begins. Whether it’s a metal or wooden framework, each drywall piece must be securely positioned and fastened. This isn’t just about brute strength; it’s about aligning each panel perfectly, making adjustments, and securing it firmly with glue, nails, or screws.

As the main pieces find their place, attention turns to the details. This involves carving out space for essential fixtures such as electrical outlets, windows, or vents. Using tools like the keyhole saw and relying on knowledge from their home renovation training, the Drywall Installer crafts precise cuts, ensuring that every fixture integrates seamlessly with the drywall.
But straight walls are only part of the story. Corners, those tricky junctions, need special attention. That’s where metal corner beads come in, serving as protective armour for these vulnerable spots. They enhance durability and lend a neat finish to the corners.
Ensuring Finishes are to Home Renovation Training Standards
As daylight starts to wane, the role of the Drywall Installer morphs from installer to finisher. Each joint, tiny hole and imperfection in the drywall needs attention. The compound is skillfully applied with a trowel and broad knife, filling in any gaps or imperfections. This step requires a practiced hand, ensuring the compound is spread smoothly and evenly.
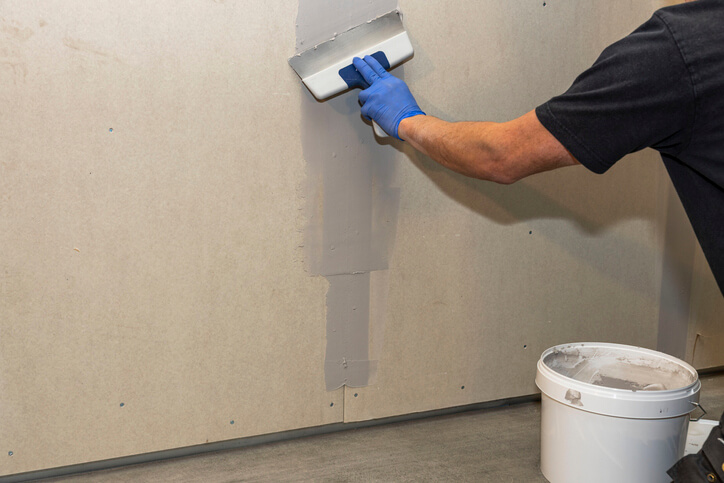
The crowning touch? A thorough sanding. Once the applied compound dries, sanding ensures the surface is silky smooth, primed, and ready for paint. By sunset, what was once a bare frame is now a canvas, transformed and ready for the following stages of interior design.
Are you interested in our world-class home renovation diploma?
Contact NATS for more information.
This obviously does not apply to everyone, but there’s something so wholesome and fulfilling about rescuing items (or constructions) from potential ruin and restoring them to their original glory. If this desire to repair and add value applies to you, you probably are already considering home renovation college.
One area that often requires attention during a renovation is wood restoration. Wood can add warmth and charm to any home, but over time, it may lose its lustre and become damaged. Wood restoration is also one of the most common projects faced by home renovation professionals, so here are four wood restoration tips to help you bring new life to wooden elements in any home.
1. Assess the Condition of the Wooden Element
Before embarking on the restoration of your piece, it’s essential to conduct some research to ascertain its value. Carefully examine the furniture for any marks or labels that might provide insights into its origin or manufacturer. If you suspect that it holds significant monetary or historical worth, it’s advisable to consult with a professional before proceeding with any restoration work. It’s also a good idea to take detailed photographs of any markings or tags as documentation. Refrain from stripping or sanding a collectible antique’s finish until you have a clear understanding of its value, as doing so could potentially diminish or even eliminate its worth.
As you’ll discover in home renovation training, it’s crucial to assess the condition of the wood you’re working with. Take a close look at the surfaces, checking for signs of rot, pests, or water damage. Look for cracks, warping, or discolouration. Understanding the extent of the damage will help you determine the best approach to restoration. Minor issues might only require sanding and refinishing, while more severe damage could require repair or replacement.
2. Prepare the Surface Correctly as Taught in Home Restoration College
Proper surface preparation is vital for achieving a successful wood restoration. To give your furniture a comprehensive cleaning, start by using a sponge and a solution of warm water and vegetable-based oil soap. Scrub the surfaces of the furniture thoroughly to remove any dirt and grime. Rinse the surface with clean water and allow it to dry completely before moving on to the next step.

For intricate or detailed pieces, employ a soft toothbrush to access hard-to-reach areas and clean the nooks and crannies effectively. In case there are tight spots that are difficult to reach, you can fashion a slender wooden dowel rod into a pointed tip, similar to sharpening a pencil. This sharpened end can then be utilized to carefully extract grime from those narrow spaces.
If you have stubborn stains or old finishes, you may have to scrape them off with sandpaper or a wood stripper.
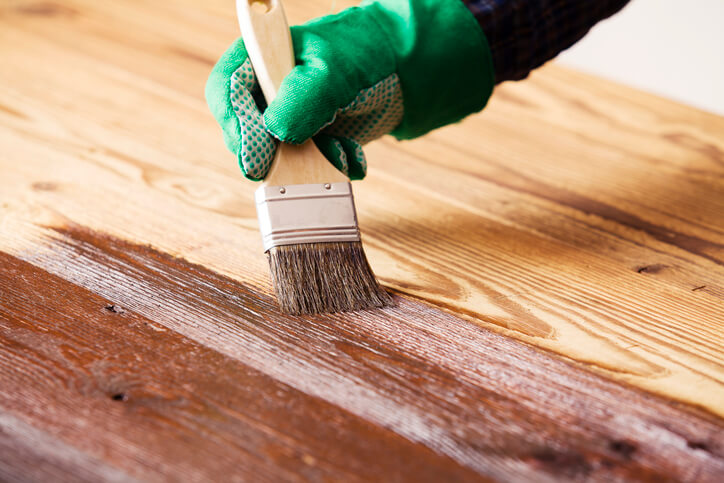
3. Choose the Right Finishing Method
The choice of finishing method will depend on the desired look and the type of wood you’re working with. Some popular options for wood restoration include staining, painting, and applying varnish or oil-based finishes. Staining can enhance the natural beauty of the wood, highlighting its grain and texture. Painting can provide a fresh and uniform appearance, while varnishes or oils offer protection and durability. Research different finishing techniques and consult with professionals to determine the best option for your specific project.
4. Home Renovation College Educates on Proper Restoration Techniques
Wood restoration requires careful attention to detail and proper technique, just as our home renovation courses explain. When sanding the wood, start with coarse-grit sandpaper to remove any imperfections, then gradually switch to finer grits to achieve a smoother surface. Always sand in the direction of the wood grain to avoid scratches. If repairs are necessary, use suitable wood fillers or epoxy to fill cracks and holes, ensuring a seamless finish. Apply finishes evenly, following the manufacturer’s instructions, and allow sufficient drying time between coats.
Are you looking for a world-class home renovation college?
Contact NATS for more information.
The Importance Of Physical Fitness For Home Renovation Training Grads
August 01, 2023
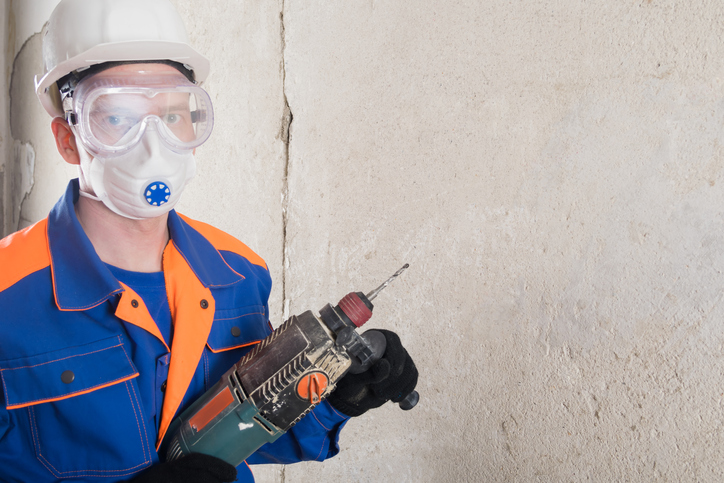
Home renovation is often a physically demanding job, with many tasks requiring strength, coordination, and endurance. Lifting, carrying, or moving heavy materials are routine activities. Even tasks that may seem relatively sedentary, like painting or plastering, can put stress on the body, specifically on the arms and back.
Physical fitness plays a critical role in enabling home renovation professionals to carry out their work safely and efficiently. It’s not simply about possessing brute strength but also having the endurance and flexibility to handle tasks for extended periods without risking injury. In this blog post, we shall explore the importance of physical fitness for home renovation professionals, and why home renovation graduates should pay particular attention to this.
Improved Physical Health
Engaging in the home renovation industry means embracing physically intensive tasks. Your day might involve demolition work, construction, or detailed activities like painting. Each of these tasks demands different physical attributes: strength, stamina, and flexibility. As a graduate of our home renovation training program, focusing on your physical health and incorporating regular exercise into your routine becomes crucial. This fitness regimen ensures your body is equipped to meet these strenuous demands, boosting your endurance, and minimizing the risk of work-related injuries.

Further, a fit body is less likely to succumb to chronic fatigue or other health complications. By prioritizing fitness, you can perform your duties more efficiently and preserve your overall well-being in the long run. Indeed, as a home renovation professional, physical preparedness is key to navigating the challenges of your work.
Improved Mental Health
Physical fitness is not just about the body; it also influences our mental health in remarkable ways. Regular participation in physical activities encourages the release of endorphins, the “feel-good” hormones, which enhance our mood, and mitigate feelings of stress, anxiety, and depression, thereby promoting a sense of well-being. The physical fitness level of graduates of home renovation training plays a crucial role in their ability to navigate the tricky world of home improvement projects.

The nature of renovation work can be complex and occasionally overwhelming. Encountering unexpected challenges or project delays is not uncommon. In these moments, physical fitness plays a vital role in helping you maintain a positive mental outlook, equipping you with the fortitude to face difficulties head-on. In essence, being physically fit doesn’t only contribute to a healthier body but also fosters a more resilient and positive mind, particularly beneficial in challenging industries like home renovation.
Reduced Stress Promotes Effective Decision Making During and After Home Renovation Training
Stress reduction is another crucial benefit of physical fitness. Home renovations are notorious for unexpected surprises and the stress that follows. Whether it’s the discovery of an electrical issue or a sudden change in the client’s plans, these situations can cause significant stress. Engaging in physical activities has been scientifically proven to help lower stress levels. This effect is vital for home renovation college graduates, as lower stress levels will enable you to remain calm under pressure and make effective decisions.
Increased Productivity
Increased productivity is a significant advantage of physical fitness. A body in prime physical condition can work longer and harder. Maintaining a high level of fitness can make you more productive and capable of completing tasks efficiently. Furthermore, regular exercise can improve sleep quality, leading to better concentration, fewer mistakes, and overall better performance on the job.
Are you interested in our home renovation courses?
Contact NATS for more information.
Measuring a room may seem like a straightforward task that requires little guidance, and some people actually prefer to overlook this part. However, when it comes to home remodelling, accurate measurements are crucial for ensuring a successful project. Taking accurate measurements before starting a home remodelling project can prevent a lot of extra stress and expenses further down the road.
Knowing how to measure a room correctly is an essential skill that sets the foundation for any renovation endeavour. In this blog post, we will explore three essential tips to help you take accurate measurements after home renovation training.
1. Home Renovation Training Sets the Groundwork
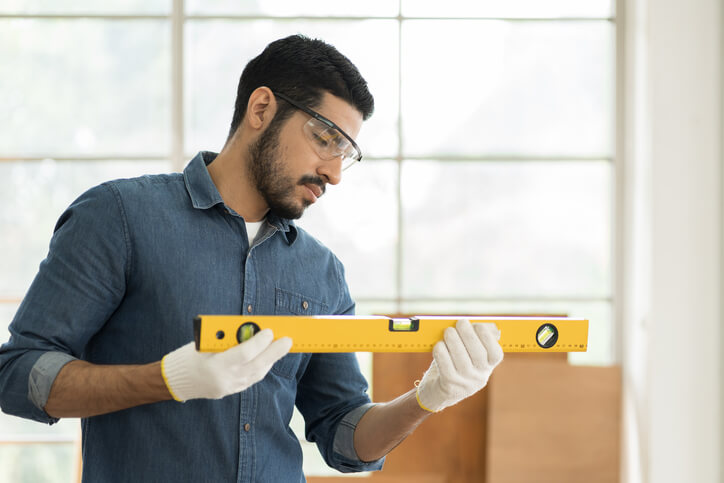
The foundation of accurate measurements lies in using reliable measuring tools. While it may be tempting to use the tools you already have at hand, investing in high-quality measuring tools will greatly enhance your accuracy. A few essential tools to consider include a tape measure, a laser measure, and a level.
To ensure accurate measurements after your home renovation training, first, check that your tape measure has a minimum length of 25 feet. You should enlist a friend to help you hold the tape straight, as this improves accuracy. Take note of the location of electrical outlets while measuring, which is essential for planning lighting and other electrical needs. If you find it difficult to measure manually, consider using a laser measuring tool for precise and automated measurements. Lastly, remember to measure any windows to account for their dimensions in your remodelling plans.
2. Be Systematic and Thorough
To accurately measure a room during home remodelling, start by measuring the baseboard length from one corner to the next using either a tape measure or a laser measure. Record the measurements and repeat the process for the remaining walls. If the room is L-shaped, remember to measure the additional wall.
Take note of the measurements for doorways, including the swing direction of the door. Also, measure the distance from openings to hallways and open archways, using techniques and insights you picked up from the home renovation courses you took. Measure the height of the room, accounting for any key openings that affect the room’s layout.
Don’t forget to measure additional infrastructure features such as shelves, fireplaces, cabinets, and other built-in components within the room. These measurements should be included in your overall measuring process.
3. Home Renovation Training Ensures You Know How to Measure Correctly
To minimize errors and increase accuracy, always take multiple measurements of the same dimensions and cross-verify the results. Even the most precise measuring tools can be subject to human error, so this step is vital for ensuring consistency.
When measuring, take note of the smallest unit of measurement on your tool and record the measurements accordingly. For example, if your tape measure has markings in inches and centimetres, be consistent in your recordings and avoid mixing the units.
If possible, have someone double-check your measurements or use alternative methods to verify accuracy. For instance, if you measured a room’s length using a tape measure, cross-verify it by measuring the width as well. The measurements should match up, providing reassurance that your initial measurements were accurate.
Are you interested in home renovation technician training?
Contact NATS now for more information!
3 Paint Application Tips to Use After Home Renovation Technician Training
April 25, 2023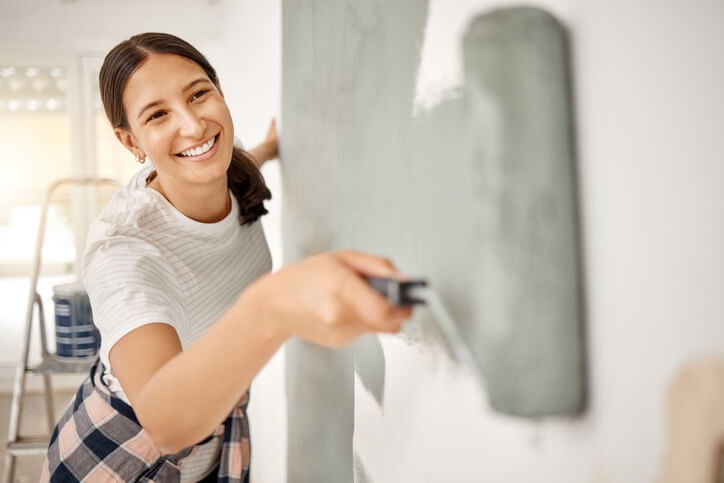
Painting is one of the final stages of every building or home renovation job. However, it’s also one of the most delicate tasks. Get it right, and you’ll have applied the perfect finish to your masterpiece and crafted the perfect ambience for the home. On the other hand, if you get it wrong, it can take the shine away from all your hard work up to that point.
If you’re considering becoming a Home Renovation Technician, you likely have an eye for design and the ability to bring a client’s vision to life. After completing your training, you may use paint application techniques to enhance the finished look of a project. In this blog post, we will discuss three paint application tips you can use after completing your home renovation technician training.
1. Prepare the Surface After Home Renovation Courses
Before beginning any paint application after your Home Renovation Technician training, it is crucial to prepare the surface properly. Preparing the surface means cleaning, sanding, and priming the area to ensure the paint adheres well and looks smooth. Cleaning the surface may involve removing any dirt, debris, or peeling paint that may be present. Sanding the surface helps to smooth out any bumps or roughness that may interfere with the application of the paint. Finally, priming the surface will help the paint stick and ensure the colour appears consistent.
It is important to note that different surfaces may require different preparation methods. For example, wood surfaces may require more sanding than metal surfaces, and concrete surfaces may require a special primer. Knowing the correct preparation methods for different surfaces can help you achieve a professional-looking finish.
2. Use the Right Tools and Techniques
Using the right tools and techniques can also make a significant difference in the outcome of your paint job, as you will learn in your Home Renovation courses. There are a variety of tools available for paint application, including brushes and rollers. Each tool has its own strengths and weaknesses, and it is important to choose the right tool for the job. For example, brushes are best for detail work and edging, while rollers are ideal for large, flat surfaces.
In addition to using the right tools, it is important to use the correct techniques. For example, when using a brush, you should use long, smooth strokes to avoid visible brush marks. When using a roller, you should roll in a “W” shape to ensure even coverage. Knowing the correct techniques for each tool can help you achieve a professional-looking finish.
3. Choose the Right Paint
The type of paint you choose can also drastically affect how your paint job ends up. There are a variety of paint types available, including latex, oil-based, and specialty paints. Each type of paint has its properties and is best suited for different surfaces and applications. Latex paint is best for interior walls, while oil-based paint is best for exterior surfaces. Specialty paints, such as chalk or metallic paint, are ideal for adding texture and interest to a project.

Choosing the right paint type is equally as important as choosing the right colour and finish. The colour should complement the rest of the room or project, while the finish should match the desired look and durability. Choosing the right paint can help you achieve a professional-looking finish that will last years.
Are you interested in earning a Home Renovation diploma?
Contact NATS to learn how to get started.
Considering Home Renovation Training? A Day In The Life of A Renovation Technician
February 27, 2023Home renovation is an industry that is constantly growing, and the demand for skilled Renovation Technicians has never been higher. With the right training, this career path can be rewarding and exciting. In this blog, we will be taking a look at what a typical day in the life of a renovation technician looks like and why home renovation training is a smart career move.
A Home Renovation Technician is a professional who works on home renovation projects. They typically work on many projects, from small-scale renovations, such as bathroom and kitchen upgrades, to larger projects, such as basement remodels or even complete home renovations.
A typical day in the life of a Home Renovation Technician will vary depending on the specific project they are working on. However, there are certain tasks that they will commonly perform. These tasks include:
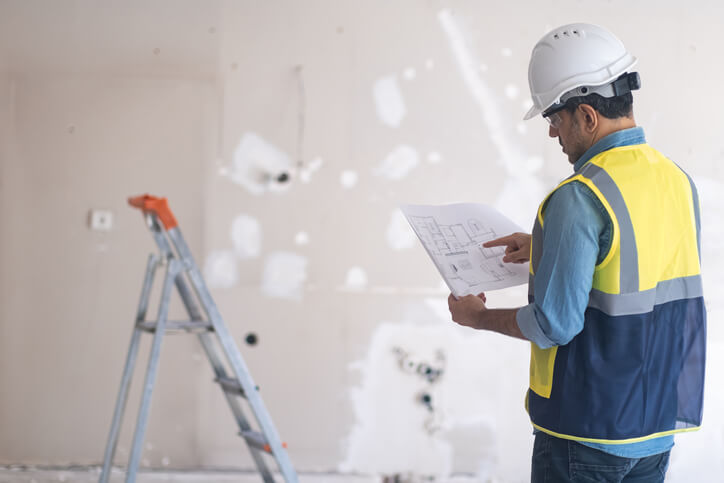
Site Inspections and Measurements After Home Renovation Training
Before any work can begin, a Home Renovation Technician will visit the site and accurately measure the space to be renovated. They will also inspect the area for any potential hazards or issues that must be addressed.

Accurate measurements are essential to ensure that the renovation plan is feasible, and that the materials and fixtures that will be installed fit perfectly in the space. The Home Renovation Technician will rely on their home renovation training and various tools, such as measuring tapes, laser distance meters, and leveling tools, to ensure accurate measurements.
After the initial site inspection, the Home Renovation Technician will work with the homeowner to plan and design the renovation project. This will include creating a detailed plan and schedule for the work to be done, as well as selecting materials and fixtures.
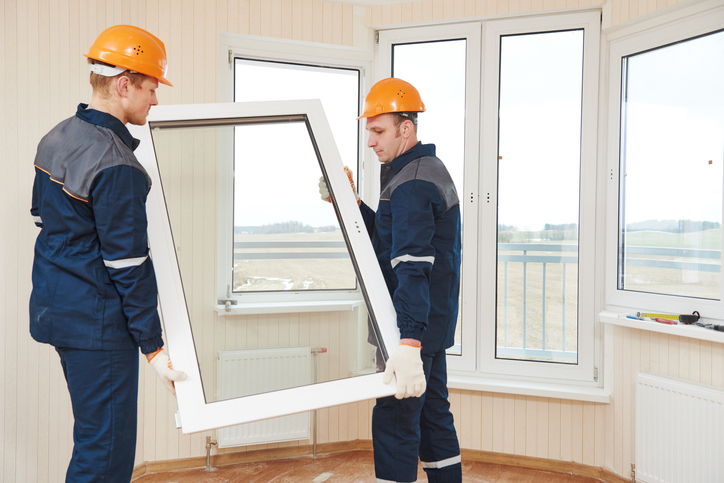
Demolition, Installation and Construction
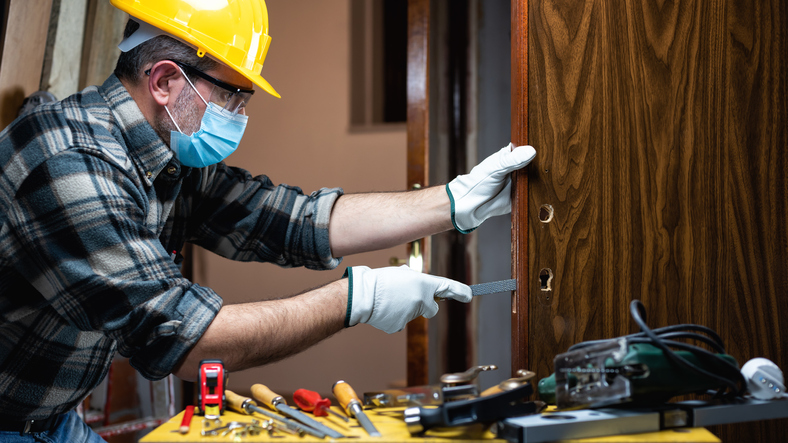
Once the planning and design stage is complete, the Home Renovation Technician will begin the actual work on the project. This typically involves demolition and preparation of the area to be renovated, including removing old fixtures and materials.
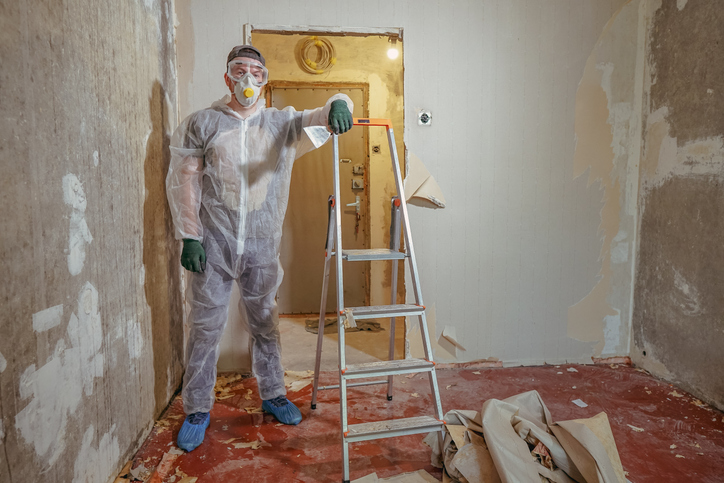
Before demolition work can begin, the Home Renovation Technician must ensure the site is safe to work on. This may involve shutting off electricity or water, or putting up barriers to protect the surrounding area. They must also ensure that hazardous materials, such as asbestos or lead, are safely removed or contained. Once the site is safe to work on, the Home Renovation Technician will begin the demolition process. They will need to work carefully to avoid damaging any parts of the site that are being preserved, drawing inspiration from techniques they learned in their home renovation courses.
The next stage of the renovation process is the installation and construction phase. This is where new fixtures, appliances, and materials will be installed, and any new structures or features required by the renovation plan will be constructed.
Finishing and Cleanup
The final stage of the renovation process is finishing and cleanup. At this stage, the Home Renovation Technician will apply finishing touches to the space, such as painting walls, for instance. They will also ensure all plumbing and electrical work is completed according to the necessary codes and regulations by licenced electricians and plumbers.
In addition to the finishing touches, the Home Renovation Technician will also perform a thorough cleanup of the site. This includes removing all debris and waste materials from the renovation area, ensuring that all tools and equipment are properly stored away, and cleaning the area to ensure it is safe and ready for use.
Looking for a reputable home renovation college?
Contact NATS to learn how you can get started.


