
This obviously does not apply to everyone, but there’s something so wholesome and fulfilling about rescuing items (or constructions) from potential ruin and restoring them to their original glory. If this desire to repair and add value applies to you, you probably are already considering home renovation college.
One area that often requires attention during a renovation is wood restoration. Wood can add warmth and charm to any home, but over time, it may lose its lustre and become damaged. Wood restoration is also one of the most common projects faced by home renovation professionals, so here are four wood restoration tips to help you bring new life to wooden elements in any home.
1. Assess the Condition of the Wooden Element
Before embarking on the restoration of your piece, it’s essential to conduct some research to ascertain its value. Carefully examine the furniture for any marks or labels that might provide insights into its origin or manufacturer. If you suspect that it holds significant monetary or historical worth, it’s advisable to consult with a professional before proceeding with any restoration work. It’s also a good idea to take detailed photographs of any markings or tags as documentation. Refrain from stripping or sanding a collectible antique’s finish until you have a clear understanding of its value, as doing so could potentially diminish or even eliminate its worth.
As you’ll discover in home renovation training, it’s crucial to assess the condition of the wood you’re working with. Take a close look at the surfaces, checking for signs of rot, pests, or water damage. Look for cracks, warping, or discolouration. Understanding the extent of the damage will help you determine the best approach to restoration. Minor issues might only require sanding and refinishing, while more severe damage could require repair or replacement.
2. Prepare the Surface Correctly as Taught in Home Restoration College
Proper surface preparation is vital for achieving a successful wood restoration. To give your furniture a comprehensive cleaning, start by using a sponge and a solution of warm water and vegetable-based oil soap. Scrub the surfaces of the furniture thoroughly to remove any dirt and grime. Rinse the surface with clean water and allow it to dry completely before moving on to the next step.
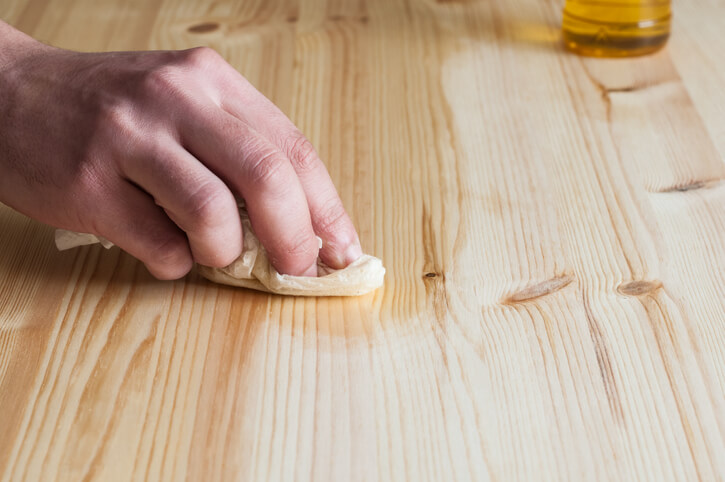
For intricate or detailed pieces, employ a soft toothbrush to access hard-to-reach areas and clean the nooks and crannies effectively. In case there are tight spots that are difficult to reach, you can fashion a slender wooden dowel rod into a pointed tip, similar to sharpening a pencil. This sharpened end can then be utilized to carefully extract grime from those narrow spaces.
If you have stubborn stains or old finishes, you may have to scrape them off with sandpaper or a wood stripper.
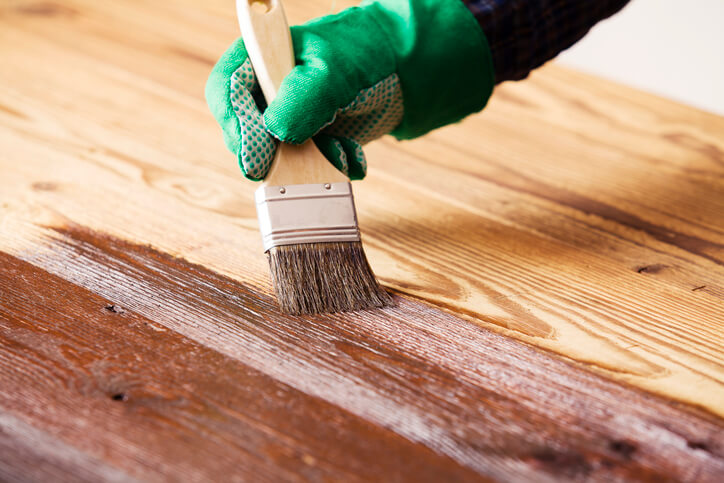
3. Choose the Right Finishing Method
The choice of finishing method will depend on the desired look and the type of wood you’re working with. Some popular options for wood restoration include staining, painting, and applying varnish or oil-based finishes. Staining can enhance the natural beauty of the wood, highlighting its grain and texture. Painting can provide a fresh and uniform appearance, while varnishes or oils offer protection and durability. Research different finishing techniques and consult with professionals to determine the best option for your specific project.
4. Home Renovation College Educates on Proper Restoration Techniques
Wood restoration requires careful attention to detail and proper technique, just as our home renovation courses explain. When sanding the wood, start with coarse-grit sandpaper to remove any imperfections, then gradually switch to finer grits to achieve a smoother surface. Always sand in the direction of the wood grain to avoid scratches. If repairs are necessary, use suitable wood fillers or epoxy to fill cracks and holes, ensuring a seamless finish. Apply finishes evenly, following the manufacturer’s instructions, and allow sufficient drying time between coats.
Are you looking for a world-class home renovation college?
Contact NATS for more information.


