Tag: cabinet making training
Is Cabinet Making the Right Career Path? A 2024 Guide For Cabinet Making Students
January 03, 2024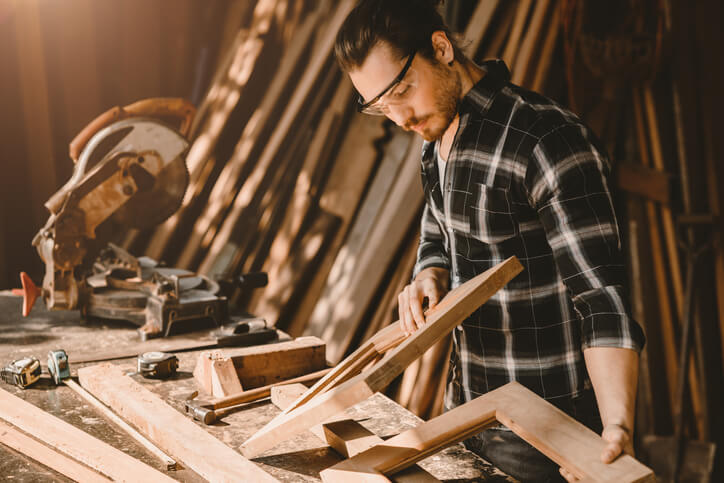
Are you a student contemplating a career in woodworking and craftsmanship? If so, cabinet-making might be the perfect path for you. In 2024, the demand for skilled cabinet makers will continue to rise, making it an attractive career option for those with a passion for woodworking and an eye for detail.
Ready to commit to a career in cabinet making in 2024? This field combines creativity with craftsmanship. With training options ranging from certificates to apprenticeships and a promising job outlook, it’s an ideal path for those passionate about building and design.
The Art and Craftsmanship of Cabinet Making
Cabinet-making is a centuries-old trade that blends artistry with practicality. As a cabinet maker, you will craft functional and aesthetically pleasing storage solutions, furniture, and fixtures. The beauty of this profession lies in its ability to transform raw materials into pieces of art that serve both practical and decorative purposes.
The modern cabinet maker is expected to possess a diverse skill set. From interpreting design blueprints to selecting and preparing materials, your expertise will be crucial at every stage of the cabinet-making process. Proficiency in woodworking tools, understanding various wood types, and mastering finishing techniques are just a few of the skills you’ll need to succeed.
In 2024, the demand for custom-made furniture and unique cabinetry will continue to rise. Homeowners and businesses seek personalized solutions that stand out in design and functionality. This shift in consumer preferences presents an exciting opportunity for cabinet makers to showcase their creativity and craftsmanship.

Education and Training Will Contribute To Your Cabinet Making Diploma
Pursuing a cabinet-making career, beginning with some form of formal education, can be highly advantageous. Many vocational schools and technical institutes offer comprehensive cabinet making training programs (such as NATS’ Cabinetmaking Diploma Program) that cover the fundamentals of woodworking, cabinet design, and construction techniques. These programs are also tailored to impart a broad range of skills essential in the field. This education equips students with practical, trade-level skills and instills a deep understanding of different materials and techniques used in cabinet making. These programs prepare students to enter the trade with confidence and proficiency, ready to take on the various challenges this creative and technical field presents.
Additionally, apprenticeships offer valuable hands-on experience. Working under seasoned cabinet makers, apprentices learn the trade’s practical aspects, from material selection to intricate joinery techniques. Remember, keeping up with the latest design trends and technologies is key to staying competitive in the cabinet-making industry.
Job Outlook and Career Advancement After Cabinet Making Training
With the growing interest in bespoke furniture and high-quality craftsmanship, the job outlook for cabinet makers is promising. The versatility of this skill set opens doors to various career paths, including custom furniture design, architectural millwork, and even entrepreneurship.
Experienced cabinet makers often find opportunities to advance into supervisory or managerial roles, overseeing production teams and projects. Some may start their woodworking businesses, catering to a niche market or collaborating with interior designers and architects.
Is Cabinet Making a Good Career
So, is cabinet making a good career? Like any profession, cabinet-making comes with its challenges. The job’s physical demands, the precision required in measurements, and the necessity for patience are aspects that aspiring cabinet makers should be prepared for.
However, the rewards are significant – the satisfaction of creating functional works of art, the joy of seeing your designs come to life, and the potential for a lucrative career in a growing industry. On a more practical level, the financial rewards can be substantial, especially for those who establish a niche or start their own business. While the initial earnings might be modest, skilled cabinet makers are often in high demand, leading to higher earning potential.
Are you interested in obtaining your cabinet making diploma?
Contact NATS for more information.
Cabinet making is a skill and an art. Whether you’ve just finished a professional course or are embarking on a DIY journey, crafting a cabinet with precision and care can be immensely satisfying. However, even after creating a beautiful piece, installation’s another critical step. And this is where many enthusiastic cabinet makers stumble.
Here are some common installation mistakes made that could be avoided by those who completed the cabinet making courses.
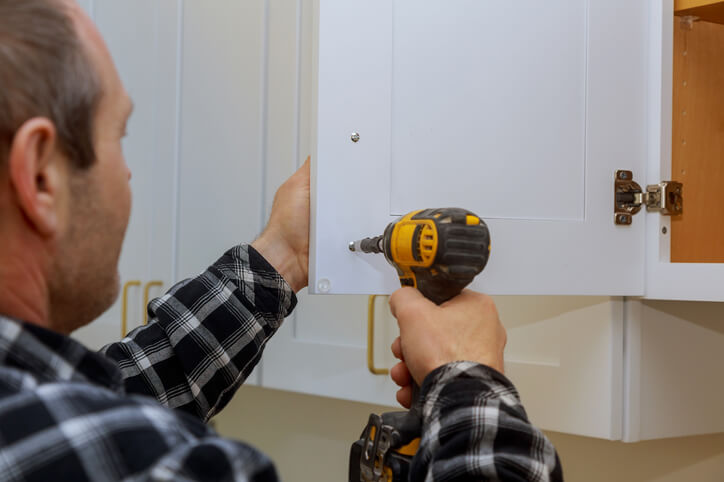
Failing to Check Measurements and Levelness
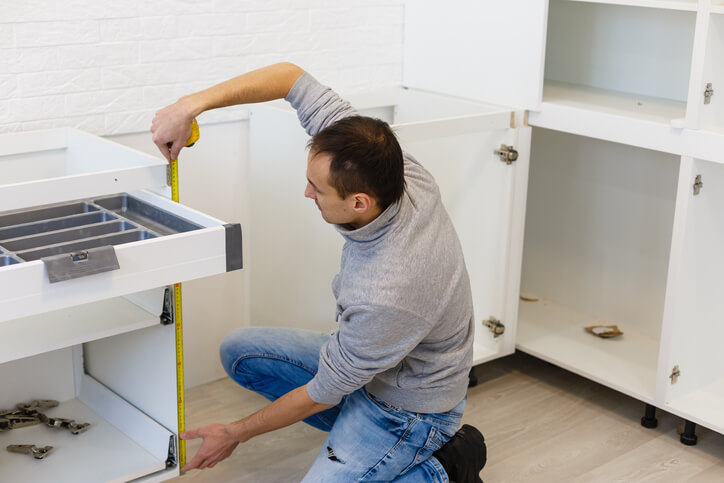
One of the golden rules in woodworking and cabinet installation is “Measure twice, cut once.” It’s easy to get excited and rush through measurements, but even a few millimeters off can spell disaster for your installation. Incorrect measurements can lead to gaps, misalignment, and a cabinet that doesn’t fit or function as intended. As it is one of the fundamentals discussed in the cabinet making training, always double or triple-check your measurements before making any cuts or installations.
A flawlessly crafted cabinet can be ruined by uneven installation. Cabinets that are not level can lead to uneven doors, difficulty opening or closing, or even long-term structural issues. Always use a trusted level system during installation and make necessary adjustments to ensure your cabinets sit perfectly as required.
Overlooking Wall Studs and Ignoring Spaces or Fillers
Mounting cabinets directly on drywall without anchoring them to studs is a recipe for disaster. Over time, the weight can cause the cabinets to pull away from the wall, leading to damage and potential injury. Always locate and mark the wall studs and ensure that your cabinet screws penetrate these studs for a secure installation.
Beyond this, every room has quirks, and the walls must not be straight. Spacers or fillers are essential to address these irregularities. They help ensure that your cabinet fits perfectly and has a professional finish. Ignoring them can lead to unsightly gaps or cabinets that jet out in odd ways.
Forgetting the Toe Kick as Taught in the Cabinet Making Courses
The toe kick is that recessed space at the bottom of floor cabinets, and it’s not just for aesthetics, as most cabinet making courses emphasize. It provides a comfortable space for your feet as you stand at the counter. It might seem like a minor detail, but omitting a toe kick can make your kitchen or workspace uncomfortable and can detract from the overall finished look.
Using Inadequate Hardware and Neglecting the Finish
It’s not just about the wood. Screws, brackets, and other hardware are crucial in securing your cabinet. Skimping on or using the wrong hardware can lead to wobbly cabinets or, worse, cabinets that fall apart after a short period. Invest in high-quality hardware that’s designed explicitly for cabinetry.
Also, after installing your cabinet, finishing it with sealants or paints that protect the wood and enhance its appearance is essential. This step will make your cabinet look polished and professional and protect against moisture, stains, and everyday wear and tear.
Are you interested in a cabinet making diploma?
Contact NATS for more information.
4 Essential Woodworking Techniques for Those in Cabinet Making Training
August 11, 2023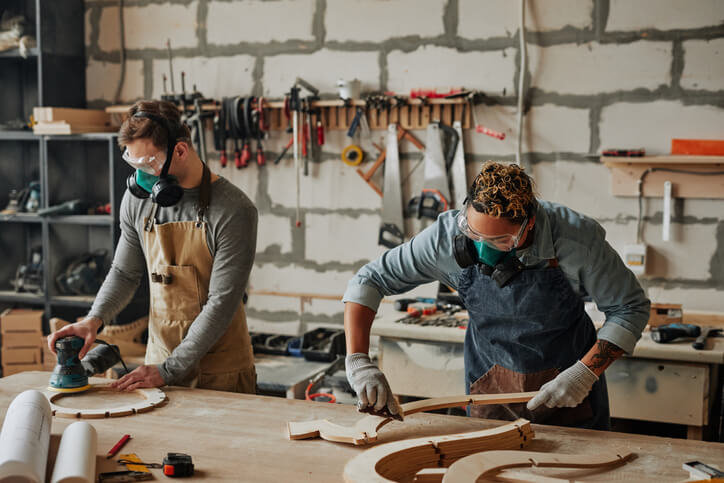
Like many other handcrafts, cabinet-making requires the use of several intricate skills and techniques. The accuracy, precision, and skill that go into it can only be obtained from quality learning and constant practice. This is why we have dedicated and passionate instructors at the North American Trade Schools (NATS) to pass down their wealth of experience to willing learners. If you choose a cabinet making career, you’ll be interested in the woodworking techniques discussed in this article.
Milling After Cabinet Making Training
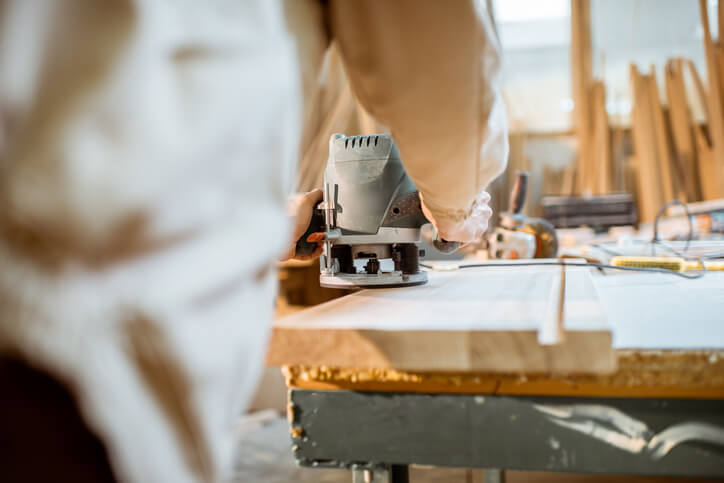
Milling involves the conversion of rough lumber into symmetrical and precise work pieces, and it’s one of the most useful techniques you’ll learn during cabinet making training. It is the wood preparation process that begins with flattening one face of the board at the jointer and then smoothening the board’s opposite face at the planer. Next, you can make the board’s remaining edge true to the other by using a table saw and a chop saw.
Jointing
Jointing is the process when you smooth one face of the workpiece so you can reference it from that face whileTruing up the workpiece. During your journey through the cabinet making certificate program you will be shown the importance of good jointing techniques.
Planing
Planing is a surface-smoothing technique that rids the wood surface of any defects and excess material. You must learn to use a hand or electric planer to carry it out. When properly done, the lumber board will turn out with an even thickness across its required length. This is after you must have used the jointer to flatten one face of the board.
Sawing
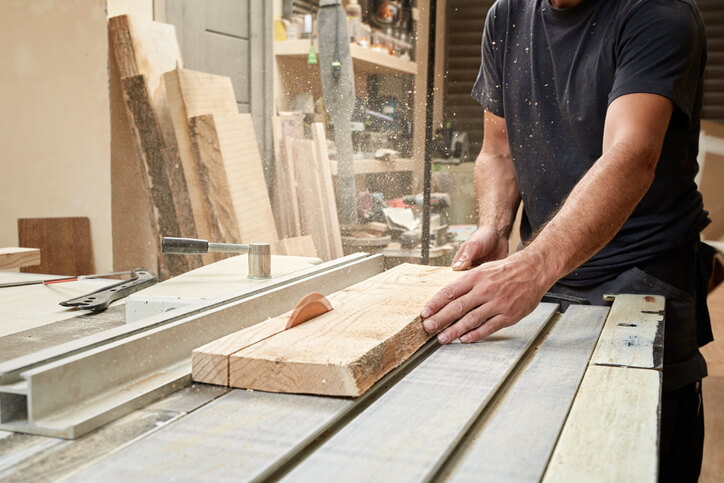
Sawing is unarguably one of the most important parts of cabinet making. Our cabinet making courses provide insights into how to use several sawing tools and the various techniques for handling them. These tools include the chop saw, handsaw, table saw, circular saw, and chainsaw, among other sawing tools used for different purposes and project types. The key to using some of these tools is maintaining the right posture to achieve maximum impact without endangering yourself.
Drilling and Boring
While drilling creates holes in the wood, boring further enlarges the hole by removing excess material along the depth of the opening. Both processes will need precise control of the work tools to create openings with the right fit, and this requires adequate knowledge of the use of the proper drilling and boring tools and their accessories.
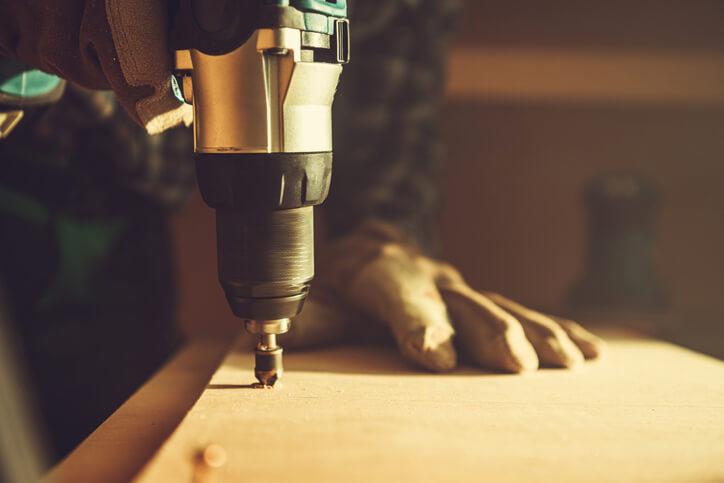
While using the drilling press, ensure the drill is at the correct speed, as drilling too fast can break the drill bit and create poorly machined holes. And while drilling in deep cuts, take out the drill at intervals to cool and clean the bit.
Finishing
This is the last stage of the cabinet-making process. It involves a series of actions, including sanding, filing, and rendering, all of which are taken to add finishing touches to the cabinet. For the best results, start with coarse grit sandpaper and sand in the board’s grain direction to create a fine grit surface free of scratches.
Top it off by applying thin coats of the selected finish across the entirety of the cabinet while looking out for joints and other hidden parts. Lightly sand on the cabinet surface before applying the topcoat, if necessary.
Want to earn your cabinet making diploma?
Contact NATS to learn how you can get started.
Cabinet making is fun and rewarding career path that allows you to use plenty of creative licenses. Many exciting decisions exist in this area, from the wood you choose to work with to the style your project emulates.
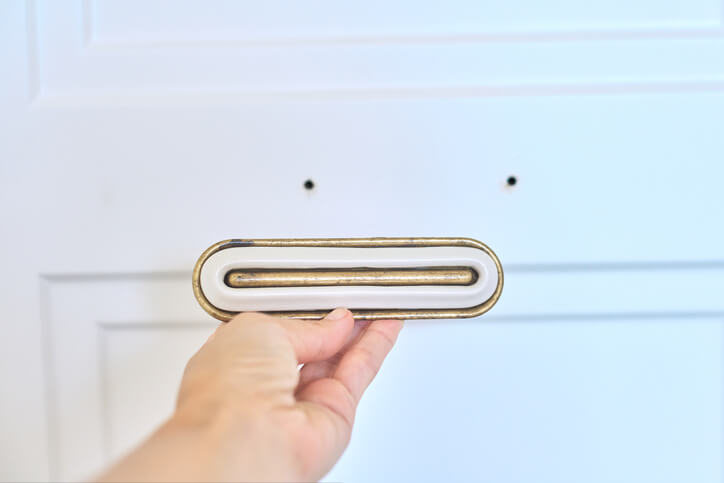
During cabinet making training, you’ll learn about the different types of hardware you can use to add the finishing touches to your cabinets. Handles on cabinet doors are essential, as they contribute to everyday ease of use and present the perfect opportunity to make a significant style statement. Read on to learn what you should consider when choosing hardware for your cabinets once you begin your career.
Know Different Hardware Styles After Cabinet Making Training
During cabinet making training and throughout your career, you’ll see and learn about a vast array of cabinet door handle styles. Knowing the characteristics of each style and what design components complement one another will help you make the right decision for your clients. Most cabinet hardware falls under one of the following style categories:
- Contemporary: Sleek lines, a neutral colour palette, and simplicity are hallmarks of the contemporary style. If you’ve built cabinets for clients wanting a contemporary space, opt for something simple and streamlined. For example, linear bar handles are a trendy contemporary option to create a harmonious effect that your clients are sure to love.
- Traditional: There’s a reason why the traditional style has stood the test of time. The ornate details and curved shapes create a look best described as ‘fancy.’ This hardware style looks best in a space with plenty of opulent details and pays homage to antique decor. Traditional-styled cabinet door handles can be added to a modern space for an eclectic touch.
- Rustic: The ‘farmhouse’ or rustic style has recently gained popularity among clients, particularly in kitchens. Rustic finishes tend to produce a homey look where simplicity is favoured with industrial details. Rustic hardware is simple but balanced, typically combining straight and curved lines.

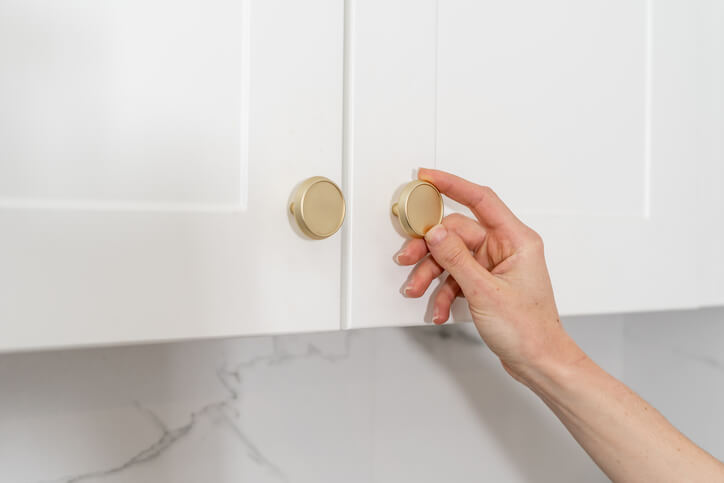
Remind Clients to Keep Comfort in Mind When it Comes to Cabinet Hardware
Cabinet doors can be closed and opened multiple times throughout the day, depending on their location. After Cabinet Making training, it’s important to remind clients to consider comfort in order to maximize the overall results of the project.
Providing clients with samples of each style are so they may test each handle’s feel and functionality will help them make the right decision. Ask them to pay close attention to how each handle feels in their hands, whether there are any imperfections in the material, and how easy (or difficult) it is to open a door with the handle. Comfort plays a significant role in the overall user experience of cobinet making jobs.
Help Clients Choose the Right Finish After Cabinet Making Training
The finish will likely be the most noticeable characteristic of the hardware your client chooses for their cabinets. While chrome and brushed nickel are some of the more common choices, there are many other options your clients can choose from.
Regarding kitchens and bathrooms, there’s a common belief that the hardware should match the faucet; however, this isn’t necessary. Simply make sure that clients know that the finishes of their hardware should compliment (not necessarily match) other finishes in the space.
Our Cabinet Making diploma program teaches students about the wood selection process, as well as how to read drawings, operate woodworking machines, and practice the arts of cabinet making. Hands-on training is a hallmark of our program, and our students are fully prepared to work on various cabinet making and installation projects with confidence and mastery.
Are you ready to start Cabinet Making courses?
Contact NATS to learn how you can get started.

Cabinet making is an intricate and complex woodworking skill that requires precision, accuracy, and attention to detail. As a cabinet making school student, you’ve probably spent much time and effort crafting your cabinets to perfection. But what about finishing them? While cabinet making requires a high degree of technical skill, it’s the finishing that gives a cabinet its final touch of class and sophistication
The final step in the process can make or break the overall look and feel of your creation. Here are five finishing tips to help you achieve a professional-looking finish for your cabinets.
1. Prepare Your Surfaces After Cabinet Making Training
Before you start applying any finish, make sure your surfaces are properly prepared. This means sanding them down to remove any rough spots or imperfections. Start with a coarse grit sandpaper and work your way up to a finer grit, just as you were taught in cabinet making training. Make sure to sand in the direction of the grain to avoid creating any scratches.
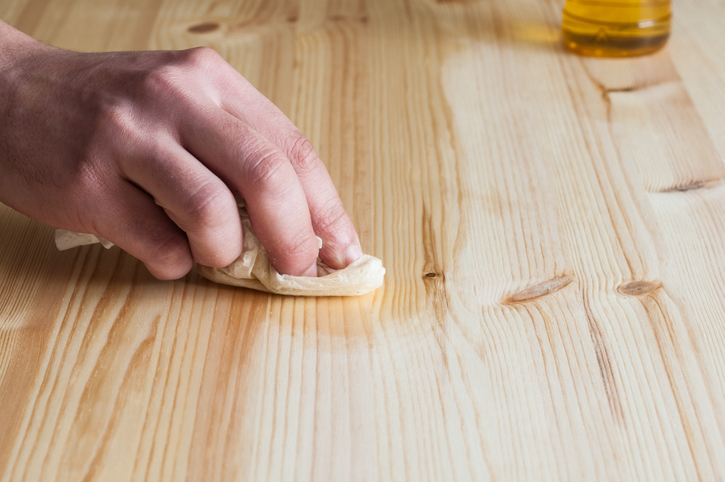
After sanding, wipe down the surfaces with a tack cloth to remove any dust or debris. Pay attention to the insides of your cabinet and cover exposed hardware with tape.
2. Choose the Right Finish
There are many different types of finishes to choose from, each with its own benefits and drawbacks. The type of finish you choose will determine the final look and feel of your cabinets, as well as how they will stand up to wear and tear over time. Some popular options include lacquer, varnish, and oil-based finishes. Consider the type of wood you’re working with, as well as the desired look and feel of the finished product. If you’re unsure which finish to use, talk to your instructor or a professional in the field.
3. Apply Thin Coats
When applying your chosen finish, it’s important to remember that less is more. If you apply too much finish at once, it may drip and have uneven coverage, which can be difficult to fix later.

To achieve a thin coat, apply a small amount of finish to your brush or spray gun. Then, work the finish into the wood, covering the entire surface evenly. Be careful not to overwork the finish, as this can result in drips and an uneven appearance. Use a brush or spray gun to apply the finish, making sure to follow the manufacturer’s instructions for application and drying times.
4. Sand Between Coats
After each coat has dried, use fine-grit sandpaper to lightly sand the surfaces, drawing inspiration from insights gained in your cabinet making courses. This will help remove any imperfections and ensure that the next coat adheres properly. Be careful not to sand too much, or you may remove some of the finish.
5. Finish With a Topcoat
Once you’ve applied your final coat of finish, consider adding a topcoat to protect the surfaces from wear and tear. A topcoat can also help enhance the appearance of the finish, making it look more vibrant and lustrous. Some popular topcoat options include polyurethane and wax.
Remember to prepare your surfaces properly, choose the right finish, apply thin coats, sand between coats, and finish with a topcoat. With these tips in mind, you’ll be able to create beautiful, high-quality cabinets that will stand the test of time.
Are you ready to begin your training at cabinet making school?
Contact NATS to learn how you can get started.
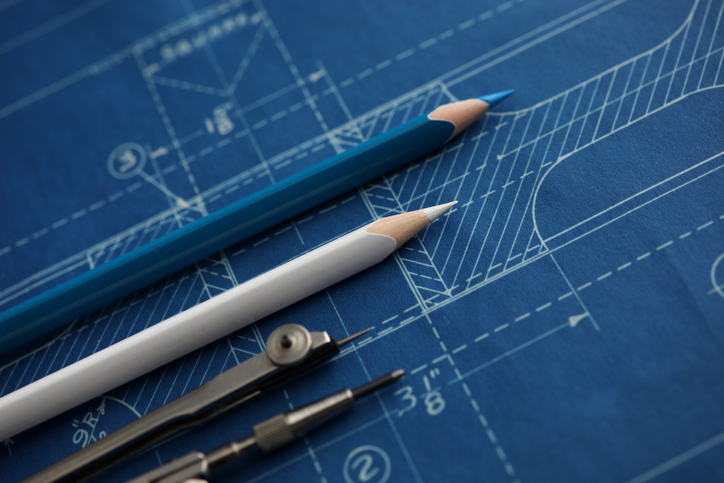
Blueprint Reading: 4 Best Practices to Keep in Mind After Cabinetmaking Training
January 10, 2023
Cabinetmaking and other construction projects require detailed plans to ensure that all key elements are in the right place, that the project is compliant with safety codes, and that it meets customer expectations. That’s where blueprints come in. They are two-dimensional technical drawings that illustrate the design of a project in detail. By looking at a blueprint, you should have a good idea of a project’s dimensions, materials, and the exact placement of each component.
Without any experience in cabinet making or construction, blueprints may seem complex at first glance; however, with the right training, you can hone this essential skill and approach each project confidently. Read on for blueprint best practices you can keep in your arsenal throughout your training and career.
1. Always Begin With the Title Block
The title block will stand out to you when you look at a blueprint after Cabinetmaking training. It contains basic introductory information that will come in handy throughout your project. That’s why it’s an excellent idea to look at the title block before you begin a project. In addition to the project name and number, this part of the blueprint contains contact information for the designer in case you spot an error or anything that needs further clarification. You’ll also see an index which is a reference list of all the drawings in the set of plans.

2. Study the Legend to Understand Your Project Fully
Similar to what you would see on a map, the legend on a blueprint decodes the symbols found throughout a design to represent key components of the project. While there are universal symbols, there are also industry-specific symbols, and some companies even have their own custom symbols. Studying the legend right away will make it much easier to understand your blueprint since you’ll know exactly what each symbol represents. The legend may also contain the standard scale to give you a good idea of the project size.
3. Pay Close Attention to the Notes
When interpreting a blueprint after Cabinetmaking school, you’ll find that notes are often littered throughout a set of plans. For this reason, it’s wise to set time aside for a thorough reading of the entire project plan to ensure that you don’t miss any important specifications. As they study the notes in a blueprint, many experts make notes of their own with any questions and concerns about the design. It’s best to clarify any unknowns before getting started to ensure that no materials, power, or time are wasted.

4. Develop a Trained Eye in Cabinetmaking School
As with most construction skills you’ll develop in training, and throughout your career, mastering blueprint interpretation will require a lot of practice. For this reason, you’ll want to choose a Cabinetmaking training program that provides ample opportunity to read and execute plans effectively. With time, you’ll develop a trained eye and reading blueprints will become second nature. With this skill set, which you’ll develop in our Cabinetmaking Diploma Program, you can go on to enjoy an exciting career in cabinetmaking and installation, store fixture making, architectural millwork, and more.
Ready to earn your Cabinetmaking Diploma?
Contact NATS for more information!
Cabinet Design Techniques that Those in Cabinetmaking Careers Will Want to Remember
December 08, 2022If you’re considering a career as a cabinetmaking professional, you’ll be an expert in the art of designing, building and installing different styles of cabinets. Not only will you be selecting the wood you’ll work with, but you’ll also operate different woodworking machines. You will also be responsible for putting together blueprints, using different techniques for assembling and finishing cabinets, and more. By mastering different design techniques during your cabinetmaking training, you’ll be able to perform a wide range of cabinetry projects–enabling you to accommodate your customer’s needs.
There are many different types of cabinets that can be installed in kitchens, bathrooms, and other rooms in a building. The more design techniques you are familiar with, the more advanced your skill set will be. Below, explore several cabinet styles and design techniques that you’ll perfect after cabinet making courses.
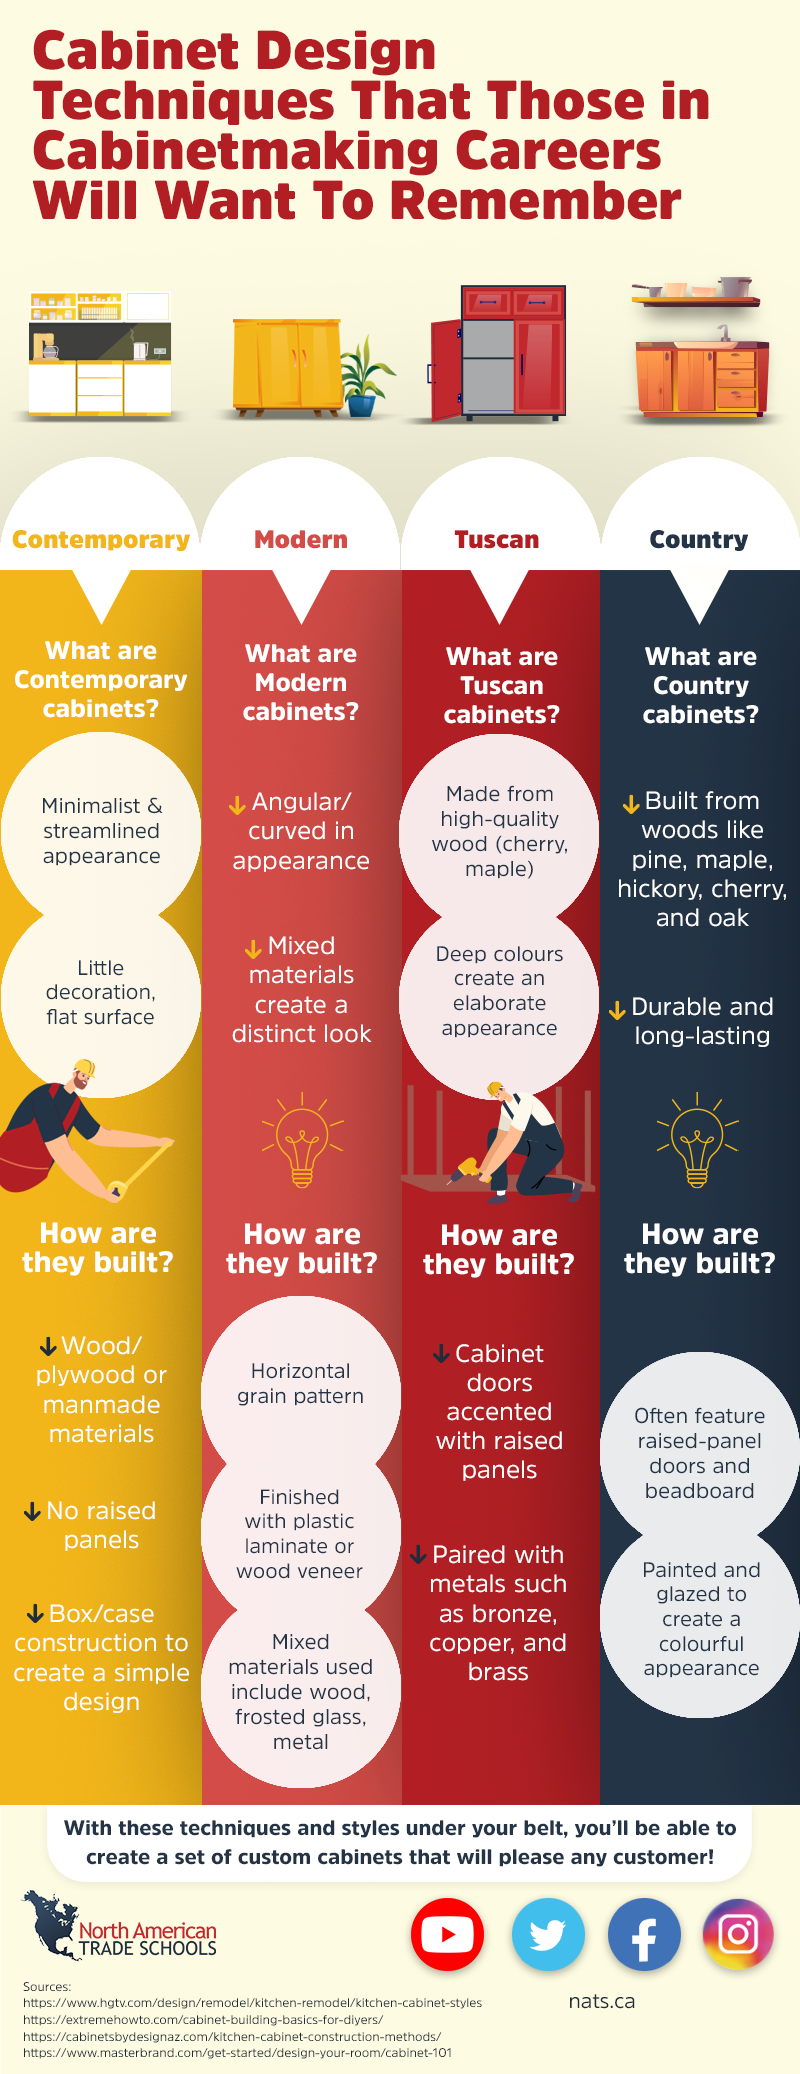
[Infographic] Cabinet Design Techniques that Those in Cabinetmaking Careers Will Want to Remember
Contemporary Cabinets
What are contemporary cabinets?
- Minimalist & streamlined appearance
- Little decoration, flat surface
Materials used:
- Wood/plywood or manmade materials
- No raised panels
- Box/case construction to create a simple design
Modern Cabinets
What are modern cabinets?
- Angular/curved in appearance
- Mixed materials create a distinct look
How they’re built:
- Finished with plastic laminate or wood veneer
- Horizontal grain pattern
- Mixed materials used include wood, frosted glass, metal
Tuscan Cabinets
What are Tuscan cabinets?
- Made from high-quality wood (cherry, maple)
- Deep colours create an elaborate appearance
How they’re built:
- Cabinet doors accented with raised panels
- Paired with metals such as bronze, copper, and brass
Country Cabinets
What are country cabinets?
- Built from woods like pine, maple, hickory, cherry, and oak
- Durable and long-lasting
How they’re built:
- Often feature raised-panel doors and beadboard
- Painted and glazed to create a colourful appearance
With these techniques and styles under your belt, you’ll be able to create a set of custom cabinets that will please any customer!
Sources:
https://www.hgtv.com/design/remodel/kitchen-remodel/kitchen-cabinet-styles
https://extremehowto.com/cabinet-building-basics-for-diyers/
https://cabinetsbydesignaz.com/kitchen-cabinet-construction-methods/
https://www.masterbrand.com/get-started/design-your-room/cabinet-101
Are you looking for a way to channel your creativity into a career? Taking cabinetmaking courses could be a great way to do just that. Cabinetmakers are artists who use their woodworking skills to create beautiful pieces of furniture for many different rooms of the house. From the beginning stages of design to the development of blueprints, and all throughout the manufacturing process, cabinetmakers produce pieces tailored to the specifications of the client or company they’re working for.
If you’re wondering what a career as a cabinetmaker could entail, you can find out everything you need to know about this profession, including what kinds of duties you’ll be performing and your opportunities for employment, in the infographic below. Read on to find out what a career will be like after cabinetmaking training.
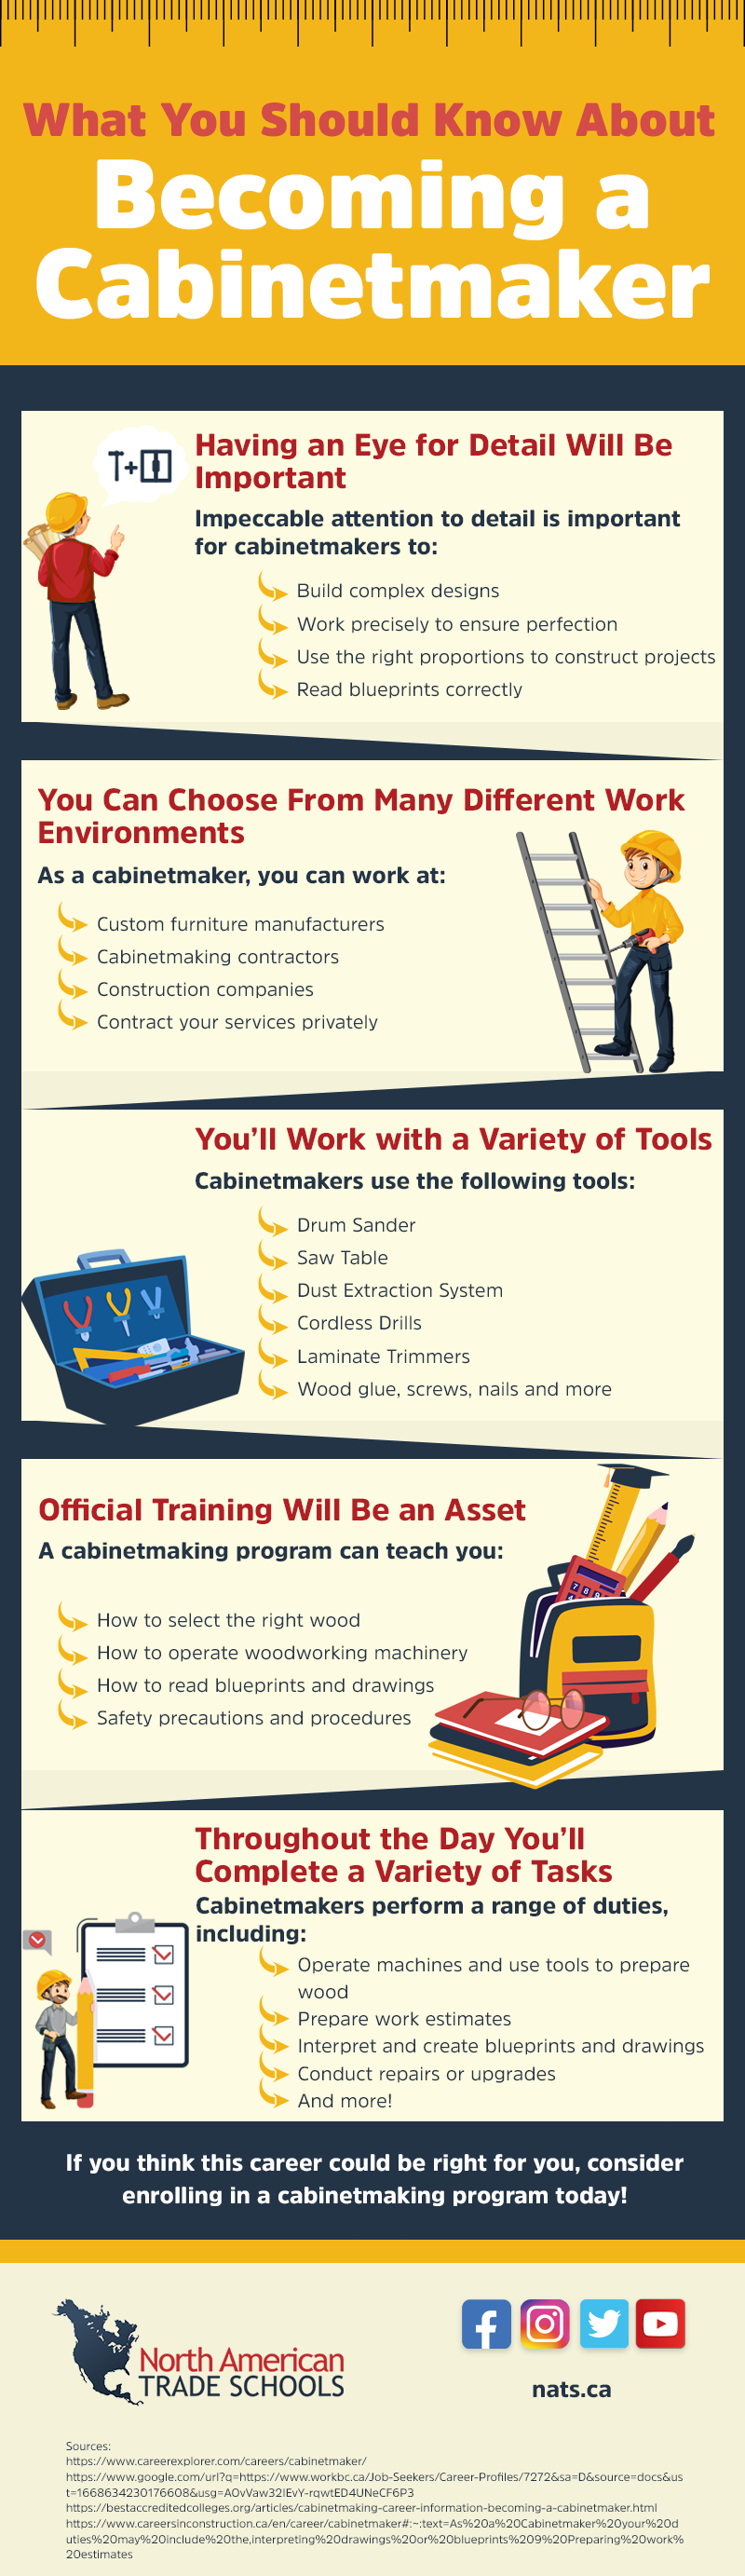
[Infographic] What You Should Know About Becoming a Cabinetmaker
Having an Eye for Detail Will Be Important
Impeccable attention to detail is important for cabinetmakers to:
- Build complex designs
- Work precisely to ensure perfection
- Use the right proportions to construct projects
- Read blueprints correctly
You Can Choose From Many Different Work Environments
As a cabinetmaker, you can work at:
- Custom furniture manufacturers
- Cabinetmaking contractors
- Construction companies
- Contract your services privately
You’ll Work with a Variety of Tools
Cabinetmakers use the following tools:
- Drum Sander
- Saw Table
- Dust Extraction System
- Cordless Drills
- Laminate Trimmers
- Wood glue, screws, nails and more
Official Training Will Be an Asset
A cabinetmaking program can teach you:
- How to select the right wood
- How to operate woodworking machinery
- How to read blueprints and drawings
- Safety precautions and procedures
Throughout the Day You’ll Complete a Variety of Tasks
Cabinetmakers perform a range of duties, including:
- Operate machines and use tools to prepare wood
- Prepare work estimates
- Interpret and create blueprints and drawings
- Conduct repairs or upgrades
- And more!
If you think this career could be right for you, consider enrolling in a cabinetmaking program today!
Sources:
Cabinetmaker | Careers in Construction
Cabinetmaking Career Information: Becoming a Cabinetmaker (study.com)
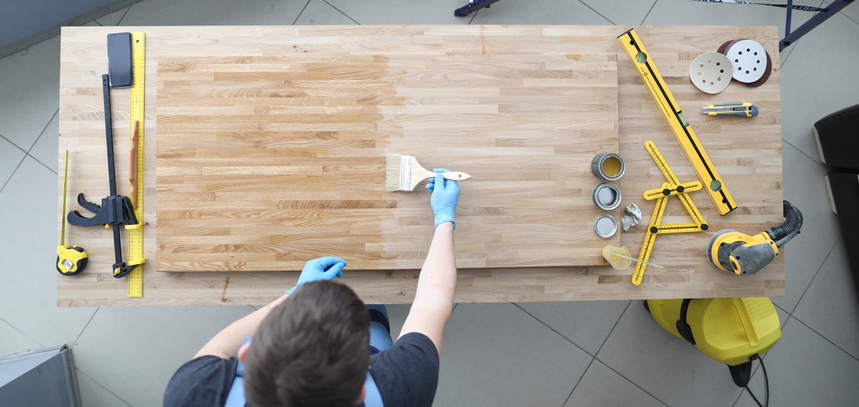
Various steps are involved in modern cabinetmaking, and correctly applying the finish is an important one. With the right finish, you can create beautiful and durable cabinets. That’s because applying the right finish plays a big role in helping you extend the lifespan of your cabinets.
Students interested in becoming professional cabinetmakers can complete their training and hone their skills, gaining the experience they need to successfully launch their careers. Here, they learn how to identify and select wood, read drawings, operate woodworking machines and even apply different types of protective and decorative finishes. Through the techniques you develop from your training, you can complete key cabinetmaking tasks (like applying the finishing) with confidence and skill.
Here’s how you can get started on creating masterfully finished cabinets!
Planning and Preparing for Your Cabinetmaking Project
Planning ahead is the most important step when starting a cabinetmaking project, especially when it involves applying finishes. First, you’ll want to make sure that your cabinets can handle the finish you choose. For a smooth finish, it’s best to look for close-grained wood species that are known to take paint well, like maple or poplar wood. If you plan on using open-grained wood, then you’ll need to use a wood grain filler.
Ultimately, you want to ensure that the cabinets you’re working with are in good shape. In addition to planning your timeline, you need to consider your materials. After taking cabinet making courses, you may be using a range of equipment, including a mask, brushes, gloves, tape, a sprayer and a drying rack. It’s also best to work in a clean space with a moderate temperature to help with drying your work.
Finishing Cabinets Efficiently After Cabinet Making Training
Finding the right finish depends on the style you want to go for. You can pick paint finishes or opt for stain ones. The former can help you create a modern aesthetic while the latter can produce a more traditional look. Generally, a paint finish allows you to apply a wide range of colours to your cabinets, while a stain finish is best used for emphasizing the wood. It should be noted that paint finishes aren’t as durable and stain finishes can be more time-consuming to apply.
When applying, you’ll want to thoroughly clean the items you’re working on and remove any grease or dirt. Here, wood filler can be used to fill in dents or cracks in the wood for an even finish.
Sanding is also a key part of this process. Before applying your primer and in between each coat of paint and primer, you’ll want to sand the surface. If you notice any sharp edges or corners, then sanding should be your go-to solution to smooth down surfaces and help the wood absorb the paint well. For a professional result, you can rely on an airless spray painting device.

Things to Keep in Mind When Finishing Cabinets
Remember, wood is easily influenced by moisture as well as extreme cold and heat. Although paint can slow down the wood’s changes, it loses its elasticity once it dries. This can create cracks or chipping. To prevent this from happening, you’ll need to put extra care into your preparation stage, properly sand your surfaces and let your work dry completely before moving on to the next steps.
If you’re using a stain finish or applying a new technique, then you may want to test and refine your work on a scrap piece of wood. This way, you can save your materials and boost your productivity. By completing your cabinet making training, you can gain the knowledge and skills you need to become a professional in the field. You’ll learn how to efficiently shape and cut wood, assemble components and work on the preparation of articles for finishing. With these insights, you can more confidently apply cabinet finishes and complete your cabinetmaking projects.
Thinking of going to cabinet making school?
Contact NATS for more information!
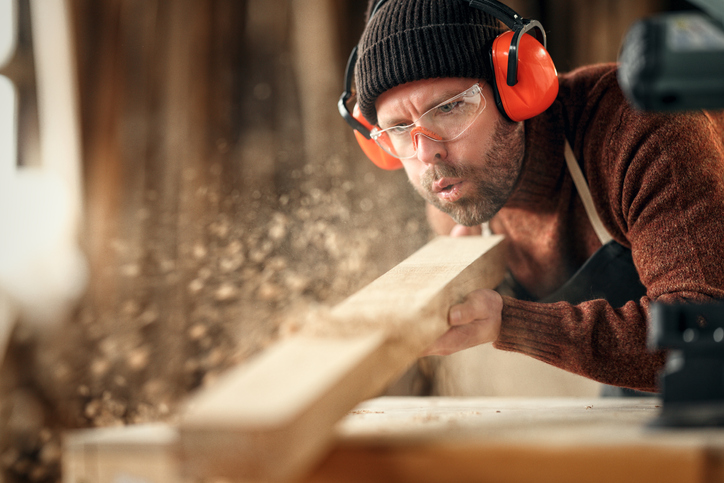
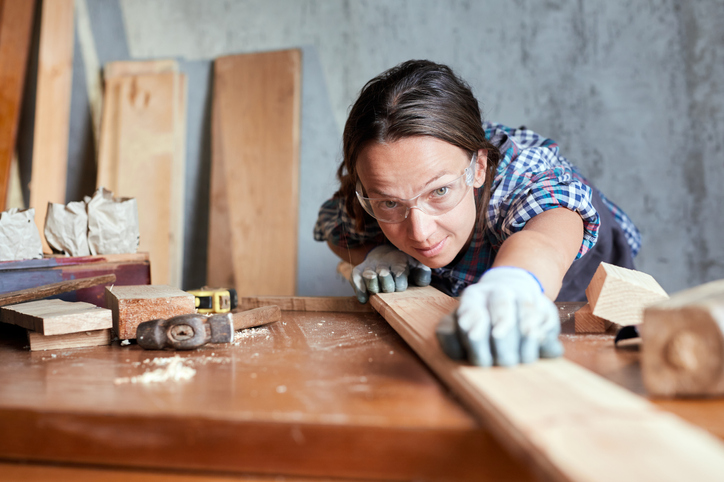
Are you a detail-oriented person looking to turn their affinity for “handy” tasks into a profession? As a cabinetmaker, you’ll be crafting furniture, art and more from wood, using your knowledge of woodworking and modern tools to produce high-quality creations. Your passion for innovation will help you to turn a vision into a step-by-step project, applying your skills to carry your work from conception to completion.
With training at North American Trade Schools, you’ll gain the practical experience necessary to pursue a career in this field, equipped with industry-relevant skills and techniques. You may decide to work in a team for a construction company, furniture manufacturer or contractor, or take on projects at your discretion as a self-employed cabinetmaker.
Whatever path you choose, your day-to-day work will be both engaging and hands-on. Below, make a more informed decision about your career by discovering what a day on the job could look like as a professional cabinetmaker.
Daily Responsibilities of a Professional With Cabinet Making Training
After cabinet making school, you’ll have a few key responsibilities to attend to on any given day. As a cabinetmaker, you’ll be working on various projects at a time. In order to complete each project, your duties might include:
- Studying blueprints and plans for upcoming projects
- Measuring dimensions of different wooden components for assembly
- Using woodworking machines to shape components
- Assembling, trimming, fastening and reinforcing various parts
- Sanding, polishing or staining finished designs
- Repairing various types of wooden furniture
While these are just some of the duties you may be responsible for, you can expect to perform any of these on a given day on the job.

Weekly and Monthly Duties
While there are a number of responsibilities you’re likely to complete on a daily basis, after cabinet making training, there will also be a few tasks which you’ll complete on more specialized occasions.
For one, you’ll hold consultations with clients and potential customers, listening to their requests, specifications and goals, and drawing up potential projects based on their parameters. After these sessions, you’ll likely draw up work estimates for clients to give them an idea of what the project entails.
You may also need to conduct routine maintenance on the machinery and equipment you use, cleaning and inspecting your tools for signs of damage or wear and tear. If you use machinery that’s programmed by a computer, you’ll also need to reprogram this machinery regularly.
Work Conditions
As a cabinetmaker, your working conditions and environment will depend on the nature of your employment. If you work for a construction company or furniture manufacturing company, it’s likely that you’ll be working in teams, using a variety of woodworking machinery. If you’re self-employed, you may work out of your own home or garage, travelling to clients’ houses to get a better idea of their specifications.
As you complete your training and apprenticeship, gaining experience in the industry, you’ll have a better idea of the kind of organization you’d like to work at, or even the type of cabinetry you’d like to specialize in.
Ready to enrol in cabinet making courses?
Start training today with a program at the North American Trade Schools!


