Author: toppyhem
5 Safety Tips to Keep in Mind Once You Become a Home Renovation Technician
October 19, 2021
If you’re about to launch your career as a home renovation technician, there’s no skill more important than knowing how to stay safe when completing a renovation project. Home renovation technicians are experts in all things home renovation–including carpentry, interior and exterior finishing, cabinetmaking, plumbing, stair construction, electrical systems, painting, and more. When renovating a home, there are many safety hazards to be aware of at all times. By taking the proper precautions, you can avoid suffering unnecessary accidents and injuries throughout your career. Below, discover five safety tips to keep in mind as a home renovation technician.
1. After Home Renovation Training, Keep Your Workspace Organized
Once you become a home renovation technician, one of the most important safety practices to follow is to maintain an organized workspace. When working to complete home renovation projects, it’s likely that you’ll occasionally be using dangerous tools and equipment–such as saws, nails, and more. In order to avoid an accident during your career, it will be crucial to keep the workspace around you organized. Make sure to properly store blades, drill bits, and cutters, and avoid letting power cords get tangled. A clean and organized workspace allows you to know where your tools and equipment are located at all times. This helps to prevent you from an accidental encounter with a dangerous tool or piece of equipment.
2. Have a Safety Kit On Hand
Every home renovation technician should prepare a safety kit to have on hand at all times while on the job. In the event of an emergency, having a well-stocked safety kit can prevent further injury and reduce harm caused by accidents on the job. Before completing any home renovation project, make sure your safety kit includes first-aid materials, such as: bandages and disinfecting wipes, as well as gauze, burn dressing, and anything else you might need in the event of an injury.
3. Wear Protective Equipment
After completing your home renovation training, it’s important to dress for safety when working on the job. When handling a home renovation project, wearing the proper protective clothing will work to reduce the harm that an accident might incur. As a home renovation technician, you should wear long-sleeved clothing, sturdy work boots and protective gloves during any job. If working beneath a construction area, wear a hard hat, and use safety glasses when working with power tools and equipment. Lastly, wear a face mask if your workspace is dusty, or if you’re handling chemicals such as varnishes, solvents, or preservatives.

4. Use Caution When Working with Ladders
When using a ladder to access a roof or out of reach area, never forget to ensure that it’s positioned correctly before stepping on it. Make sure to keep the ladder rested on a solid flat surface, and keep your weight centered as you climb up it. Lastly, avoid standing on the top two rungs of any ladder. If you need more height, use an extension instead. Following these practices will help you to avoid falling when using a ladder as a home renovation technician.
5. Keep Ventilation in Mind
During your home renovation technician career, you’ll want to make sure that your workspace is kept well ventilated, especially when working with hazardous chemicals or materials. If your workspace is poorly ventilated, you may be at a higher risk of exposure to hazardous fumes. Additionally, it’s important to keep ventilation in mind when sanding, as breathing in residual dust can be damaging to your lungs. If it’s not possible to safely ventilate your workspace, make sure that you wear a certified respirator or dust mask.
Are you interested in home renovation school?
Launch your career today with a program at the North American Trade Schools!
How to Craft a Great Resume After Completing Electrician Training
October 12, 2021
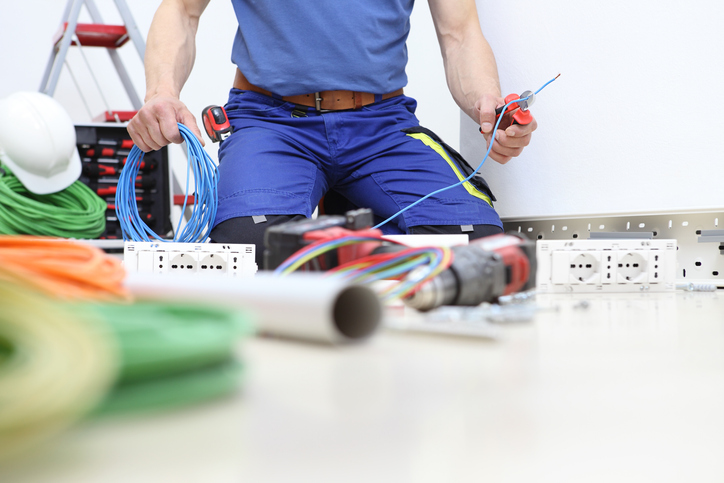
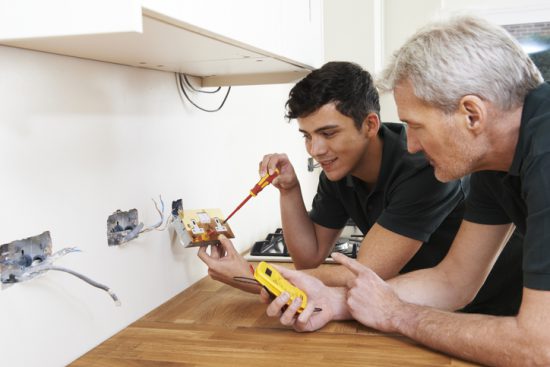
If you’re about to complete your electrician training, you’re probably gearing up to apply for jobs in the electrician industry. While the job application process can seem intimidating, once you know how to put together a great resume, you’ll be able to succeed in launching a rewarding career. During your training, you’ll have built the skills and gained the qualifications necessary to perform a variety of tasks as a construction and maintenance electrician. Not only should your resume reflect that you have what it takes to be an asset to any organization within the industry, but it should help you to stand out amongst other candidates and catch the attention of potential employers. Below, discover a few tips that will help you to create a strong, industry-aligned resume as a future electrician.
After Electrician Training, Don’t Forget to Format Your Resume Correctly
When putting together your resume, one of the biggest mistakes you can make is to neglect to format your resume correctly. When searching for the right candidate, employers may look over hundreds of resumes in a short span of time. Thus, your resume should be formatted in a way that makes it easy for a potential employer to read. When formatting your resume after electrician training, make sure to include a header that includes your name and contact information, followed by clearly labeled sections. Within each section, there should be clear spacing between separate items, and bullet points should be used when listing details such as skills or descriptions of activities and experience.

Include a Summary of Your Qualifications
The goal of your resume is to catch the attention of potential employers, and there’s no better way to do this than with a brief summary of your skills and qualifications at the top of the page. Including a summary of your qualifications gives a potential employer an idea of who you are as a candidate, and lets them know why you’re qualified for the position you’re seeking. Depending on the job description, you can tailor your summary to highlight what makes you a good fit for the particular position.
Detail the Skills You’ve Gained in Electrician Training
Within your resume, you’ll also want to include a list of the skills you’ve built in electrician training. Including a list of skills will help employers to identify why you’re qualified for a particular position, and verify that you’re well-trained as a future electrician. It is important to make sure your details are results-oriented–to show what kind of skills you can offer. Skills to consider putting on your resume might include residential wiring, code interpretation, print reading, conduit bending, service installation, machine control repair, and more.

Tailor Your Resume to the Job Listing
After completing your training at electrician college, it can be tempting to send the same resume to each position you apply to. After all, the job application process can be plenty of work. However, it’s crucial to tailor your resume to the specific job you’re applying for. You’ll want to make sure that the skills and qualifications you’re including in your resume are those which align with what the employer is seeking. Using keywords listed in the job posting can help you make your resume more specific to the position you’re applying to. Tailoring your resume will help employers to recognize how your specific skills and qualifications make you a great fit for the job at hand, increasing your chances of success in the process.
Are you ready to enroll in electrician school?
Launch your career with a program at the North American Trade Schools today!
If You’re Enrolled in HVAC Technician Courses, Discover 5 Signs of Low Refrigerant in a System
October 07, 2021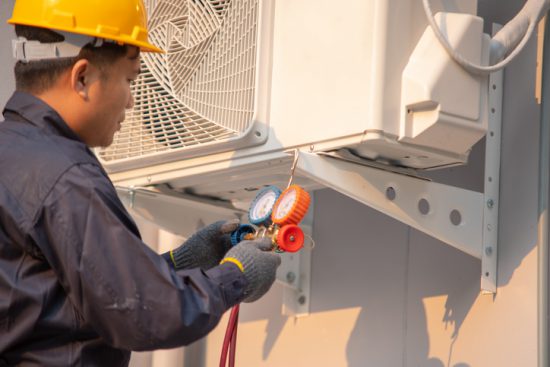
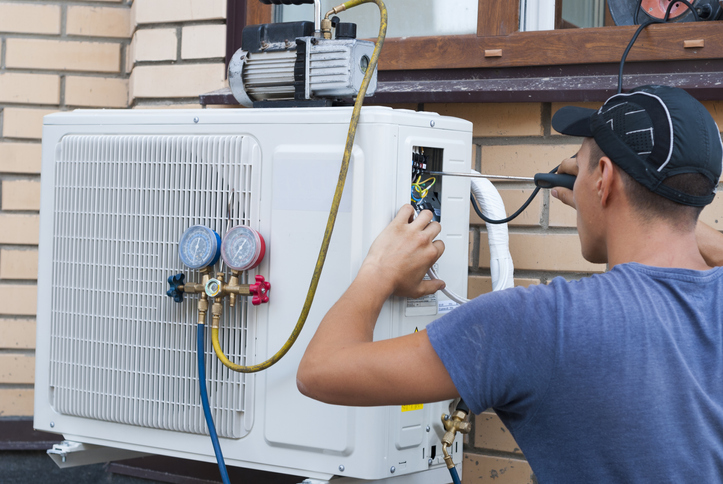
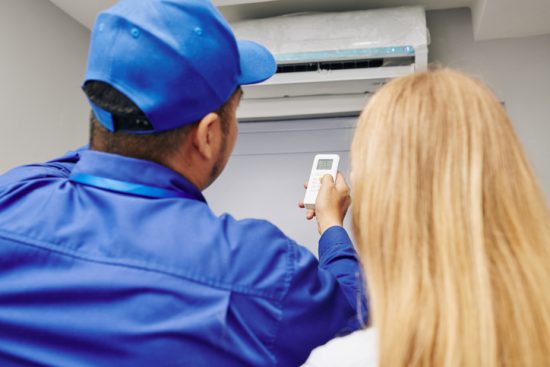
If you’re considering becoming an HVAC technician, you’ll be launching a career as an expert in the field of heating, ventilation, and air conditioning systems. Your expertise will enable you to perform services for clients such as installing HVAC systems, maintaining and repairing the systems, and troubleshooting problems within these systems. When servicing air conditioning systems during your career, one of the most common problems you may encounter is a low level of refrigerant within the system.
Refrigerant, a compound which absorbs heat from the surrounding environment, is essential to the smooth operation of an AC system. Within an AC system, refrigerant is stored inside copper coils–taking in heat from the air in a home or other indoor space. The refrigerant is then distributed through the condenser and compressor, where it is converted from liquid to gas to liquid. The resulting hot air is blown outside, while another fan blows air over the cold coils containing the refrigerant and into the building. Given the importance of refrigerant in the distribution of cold air, when refrigerant levels are low, an AC system’s performance will be negatively affected.
When refrigerant levels are low, it’s typically either due to a leak, or because the AC system was installed incorrectly. During your career as an HVAC technician, becoming familiar with the signs of low refrigerant in an AC system will help you to successfully identify and repair related issues before greater damage ensues. Below, discover five common signs of low refrigerant in an air conditioning system.
1. After HVAC College, Look Out for Longer Cooling Cycles
If a client complains that it’s taking a particularly long time to cool their home, low refrigerant levels could be at fault. With low refrigerant levels, the air being blown indoors is warmer than usual, meaning that the air conditioning system has to run longer cycles to match the thermostat-designated temperature. After HVAC school, check the refrigerant levels of an AC system if the cooling cycles seem unusually long.

2. The Refrigerant Lines Freeze
Low levels of refrigerant can also have a negative effect on the AC system’s refrigerant lines, or evaporator coil. The evaporator coil is responsible for taking hot air from the indoors and adding it to the refrigerant. However, when refrigerant levels are low, the evaporator coil will become too cold, leading to a buildup of ice. Typically, this ice will start to spread to other parts of the AC system, including its surrounding components.
3. The Energy Bills Go Up
When a client complaining of higher energy bills requests your services, the air conditioning system’s refrigerant levels will be one of the first things you’ll want to check. Due to the longer cooling cycles which are needed to cool a home, the air conditioning system is working much harder than it should be. Since harder work translates to a greater consumption of energy, always remember to check refrigerant levels when a client’s energy bill spikes.
4. Lack of Cold Air
After HVAC college, it’s safe to suspect low refrigerant levels when an AC system isn’t blowing cold air. Because the cooling chamber contains more heat when refrigerant levels are low, it’s difficult for the system to adjust the temperature of the air it’s sending out. This causes the system to expel lukewarm rather than cool air–a problem which is more than inconvenient for those trying to keep their homes cool during the warmer months!
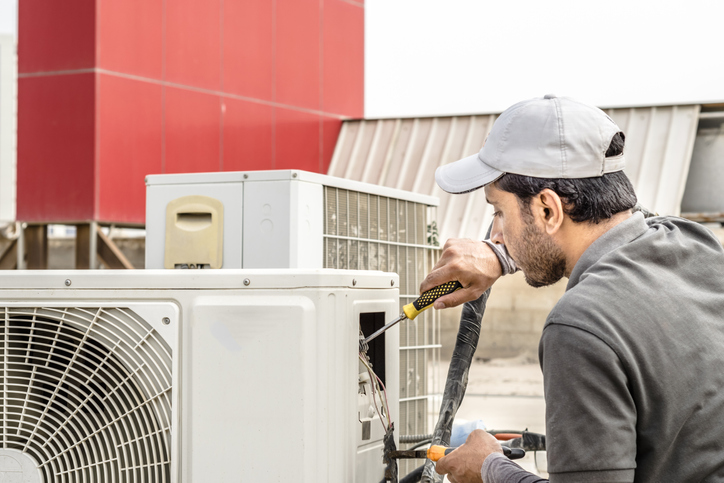
5. There’s a Hissing Noise
When refrigerant levels are low, one of the probable causes is a leak somewhere within the AC system. In the case of a leak, it’s likely that a hissing noise can be heard, indicating that refrigerant has escaped from the coils that contain it. The moment you hear a hissing sound coming from an air conditioner unit, check the refrigerant levels to ensure that there isn’t a hazardous leak.
Ready to enroll in HVAC technician courses?
Become an expert in HVAC systems with a program at the North American Trade Schools!
Tips for Inspecting Electrical Systems During Your Home Inspector Career
October 01, 2021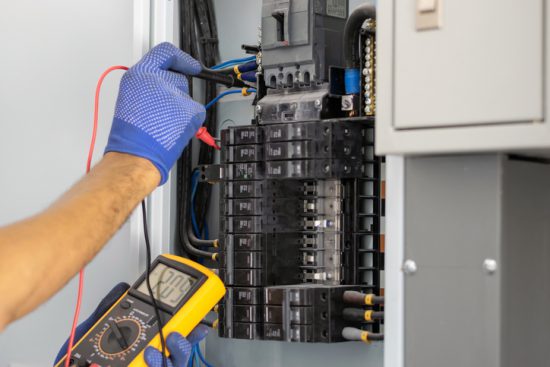
If you’re considering a career as a home inspector, you’ll be responsible for ensuring that a home is suitable for purchase. In this role, one of your duties will be to inspect a home’s electrical system. This inspection involves examining electrical components, systems, and wires to ensure that they meet the electrical safety standards outlined in national codes. This inspection ensures that a home’s electrical components operate safely, and enables future homeowners to save energy and avoid hazards. Below, discover some tips for conducting an electrical system inspection during your career as a home inspector.
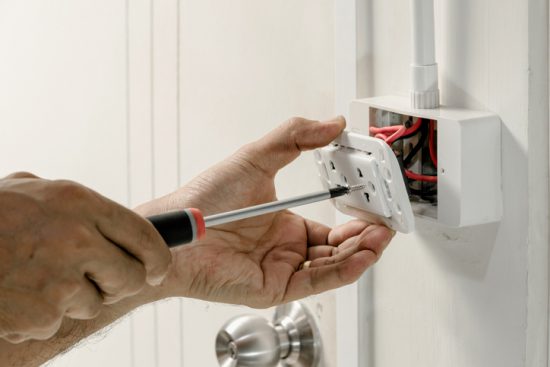
During Your Home Inspector Career, Inspect the Outlets and Light Switches
After completing your home inspector training, you’ll want to examine a home’s outlets to determine whether they’re up to code or need replacing. When examining the outlets as part of your inspection of the electrical system, it’s important to check for the following:
- Whether the outlets or switches are warm to the touch
- Whether they show signs of discolouration
- Whether a strange smell (fishy or burning) is present near the outlets or light switches
- Whether they’re all in working condition
- Whether the plugs fit into the outlets
If any of these problems are present, it might be necessary to inspect an outlet or light switch for damage, or even replace these components altogether.
Inspect the Smoke and Carbon Monoxide Detectors
During any electrical system inspection, it’s also important to inspect a home’s smoke and carbon monoxide detectors. There should be a smoke and carbon monoxide detector installed on at least every floor of a home and outside of every room, and a smoke detector within each bedroom. If there aren’t enough detectors, additional devices may need to be installed to keep the home up to code. Additionally, the smoke alarms and carbon monoxide detectors should be tested to ensure they’re in working condition.
Check the GFCIs and AFCIs
Within a home’s electrical system, GFCIs and AFCIs are responsible for protecting against short circuits and electrical overloads. GFCI breakers and outlets protect against electric faults, while AFCIs protect against electrical arcing faults. Once you become a home inspector, you can test these components to make sure that they’re in working order. You can also check to make sure that the outlets in the home’s bathroom and kitchen are equipped with GFCIs, while AFCIs are used wherever there are circuit breakers.
Examine the Electrical Appliances
A home’s electrical appliances should also be examined during an inspection of the electrical system, especially if the appliances are included with the new homeowners’ purchase. During your inspection, check to make sure the wiring around appliances is clear of any dust and debris or heat sources, as these may impede energy efficiency or increase the risk of fire. Additionally, check the HVAC system to ensure proper ventilation. Lastly, check that all of the appliances in the kitchen are plugged into GFCI outlets, as this is essential for their safe usage.
Ready to launch your home inspector career?
Start training with a program at the North American Trade Schools!

If you’re passionate about working with your hands and turning your love of the woodworking craft into a career, you might want to consider becoming a cabinet maker. Through a cabinet making program, you’ll learn how to select the right type of wood, design and plan the layout of cabinets, read blueprints, utilize woodworking machines, and perform different procedures and techniques relevant to cabinetry.
Once you launch your career, you’ll use the skills you’ve built in order to create custom cabinetry for the clients you work with. While the possibilities for creating custom cabinetry are endless, there are a few basic building principles which will be helpful to follow. Below, discover an introductory guide to the art of custom cabinetry.
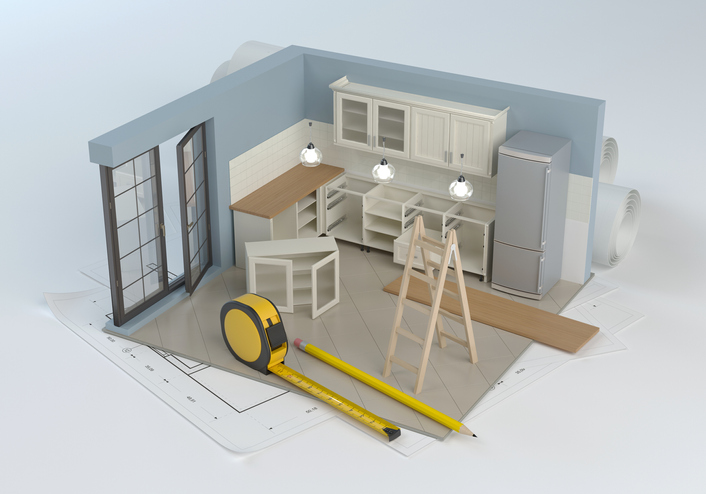
After Cabinet Making School, Start by Making a Plan for Your Cabinets
The first step of custom cabinetry is the planning and design process. In this stage, you’ll want to pick the wood you want to use for the cabinets–a decision which may be based on a client’s request. Next, you’ll want to conduct a thorough inspection of the area where you’ll be installing the cabinets, measuring the space where the cabinets will go in order to obtain the right dimensions for your design. With your dimensions in hand, you can move on to designing the type of cabinets you want to create–using blueprints to plan out your designs. As a professional with cabinet making training, planning out the dimensions, materials and specifications of your cabinets before beginning the building process will help you to avoid mistakes and work more efficiently.
Building Cabinet Frames
After planning your custom cabinet design, you can move on to building the cabinet frames–including the side and front frame. With your side frames cut to the right dimensions, you can use a table saw to cut a “dado” A dado is a groove which enables one piece of wood to connect to another and into the sides of the cabinet. Then, you can put the sides together using both a finish nailer and wood glue to secure them to each other. Here, it’s helpful to use a framing square–a device that lets you know whether the cabinet sides have been placed together squarely. Next, you can build the front–or face frame–of the cabinet. Typically, you’ll want to save your selected wood material for this piece, using plywood for the hidden sides of the cabinet. Once the face frame has been cut, you can drill holes in it, attaching it to the rest of the frame with pocket screws and wood glue.

Putting on the Finishing Touches
While attending cabinet making school, it’s important to note that no custom cabinet making process is complete without putting in some finishing touches before installing the cabinets. First, you’ll want to refine the appearance of the cabinets you’ve built by performing some light sanding on the surface of the cabinets. Next, you’ll want to stain or paint the surface area of the cabinets in order to obtain the right appearance. Lastly, when it comes to installation, you can use carefully selected hinges to attach cabinet doors, and use drawer tracks and rails in order to install cabinet drawers. Once everything is working properly, your custom cabinet installation is complete!
Are you ready to begin cabinet making courses?
Get started with a program at the North American Trade Schools!
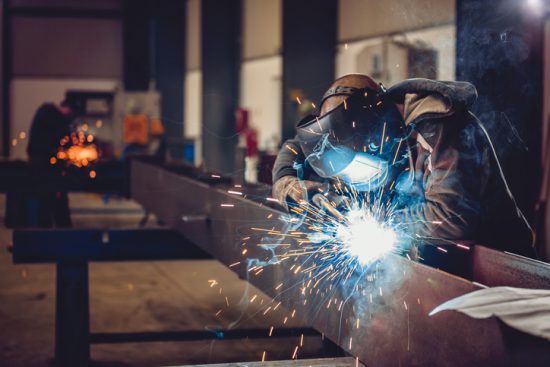
After building industry skills and expertise during your welding training, there’s only one thing between you and a successful career as a professional welding technician. It all comes down to the interview. Performing well in an interview will show a potential employer that you’re not only a qualified candidate for the respective position, but also that you have what it takes to succeed as a welder. While the interview process might seem intimidating at first, when you take the proper steps to prepare for this important meeting, you’ll be sure to succeed. Below, discover five different tips for a successful interview.
1. If You’re Seeking a Welding Career, Research the Company Before the Interview
While some welding skills and processes might be universal, the fact remains that no employer is the same. There are a variety of companies within many different industries, which require skilled welding technicians to perform certain tasks. When preparing for an interview, it’s important to conduct research on the company you’re interviewing with, as well as the position you’ll be applying for. After your welding technician training, conducting this research prior to the interview will ensure that you’re prepared to describe to an employer why you’re a good fit for the position in question. Additionally, you’ll be prepared for any questions that an interviewer might ask you regarding what you know about their company.

2. Make Sure You Dress for Success
If you’re seeking a career as a welder, it will be important to dress appropriately before arriving at any interview. Within the welding industry, it’s typically standard to dress as you would for a welding job. Attire such as a long sleeve shirt, work boots, and jeans are all acceptable to wear for an interview. Additionally, you might want to bring along some basic welding tools and safety equipment, as you may be asked to perform a bench test or other welding procedures for your interviewer.
3. Be Prepared to Answer Questions About Yourself
While your interviewer will want to ensure that you have the necessary skills to succeed in the role in question, they’ll also want to know who you’ll be as an employee. Thus, during an interview for any welding career, you can expect some questions about your motivations for entering the welding industry, as well as your strengths as a welder. Preparing answers to questions like these will help you to show an interviewer who you are as a welder, and what benefits you’ll bring to their company if you’re hired for the position.

4. Demonstrate Your Credentials
In any job interview, it’s important to be prepared to demonstrate your credentials to your potential employer. You’ll want to bring your resume in paper form, as well as proof of your completion of a welding training program. If you have a relevant welding certification, you should also bring this along to an interview. Once your interviewer sees that you’ve completed the required training, they’ll be secure in the knowledge that you have what it takes to succeed.
5. Prepare Questions for Your Interviewer
Last but not least, never show up for an interview without at least a few questions prepared for your employer. In order to come up with your questions, you can use the research you’ve conducted about the employer you’re interviewing with, as well as the job description. An example could be asking the employer what a regular work day would look like at their company. When you ask questions during an interview, your interviewer will know that you’re taking this opportunity seriously, as you’ve taken the time to engage in critical thinking about the position at hand.
Ready to enrol in welding courses?
Launch a successful career with a welding program at the North American Trade Schools.
4 Interview Questions to Expect After Construction School (& How To Answer Them)
September 16, 2021
Ready to launch your career as a construction electrician? Preparing for your job interview is one of the best ways to increase your chances of success. When you arrive at the interview stage, your potential employer has already seen your resume. This means they already know you have the skills and experience necessary to take on the job at hand. So what’s the point of an interview? It’s your golden opportunity to show an organization that you’re not only a good fit for the role you’re applying for on paper. You’ll get to tell them why you’re perfect for the job based on your character, commitment, work ethic–and any other professional talents you think they need to hear about!
Below, discover four common interview questions that you should prepare to be asked when applying for a job as a construction electrician.
1. What Made You Choose a Career in Construction?
Employers want to know what motivated you to enter a career in construction, as this will tell them more about who you are as a person and how committed you are to the industry. When answering this question, it’s important to be honest–while emphasizing why you’re passionate about working as a construction electrician. Did you always know you were going to become an electrician? Tell your potential employer why. Do you enjoy being challenged and solving complex problems? Don’t forget to let your interviewer know what excites you about this career path. By answering honestly, your passion for the role will shine through–which will impress prospective employers.

2. What Do You Know About Our Company?
In almost any field, it’s likely that an interviewer will ask a candidate what they know about their company. This question is meant to test your knowledge of the organization you’re applying to work for. Interviewers want to know that you’ve researched their company. This demonstrates your interest in the position and let’s them know that for you, this isn’t just another job. Prepare for this question by conducting plenty of research on the company before arriving at the interview. You’ll want to familiarize yourself with the organization’s mission, values, their history, the services they offer, and any other relevant information.
3. Where Do You See Yourself in the Next Five Years?
If you’re interviewing for a position in the construction trades after completing your training, you’ll want to come to an interview prepared to explain your future career plans. A hiring organization wants to know that the person they’re planning to hire has an idea of how they want to advance throughout their career. When answering this question, talk about how the position you’re applying for will equip you with the skills you’ll need to succeed in attaining your career goals. Showing your potential employer that this job is a step in the right direction for you assures them that you’ll be committed to their organization for a longer period of time.

4. Do You Have Any Questions for Us?
Don’t mistake this seemingly “easy” question for one that isn’t important. When an organization asks an interviewee whether they have any questions, they’re gauging your interest in the role. Coming prepared for an interview with a list of questions based on the research you’ve conducted is a great way to show an organization that you’ve given this opportunity plenty of thought. Asking questions also shows that you’re taking the process seriously.
Before your next interview, study these questions and come up with some thoughtful answers. When you arrive prepared, you’ll be sure to succeed!
Are you considering attending construction school?
Launch your career with a program at the North American Trade Schools today!
Infographic: 5 Reasons You Should Consider Becoming a Home Inspector
September 15, 2021Home inspectors have an important job, as they use their extensive knowledge of construction and building codes to identify potential problems in homes and communicate them to their clients. After completing home inspector training, these professionals possess a special set of skills that enable them to determine even the most subtle of housing component failures and offer effective solutions. During a home inspection, home inspectors check a house’s structure, heating, plumbing, air conditioning, exterior, interior, insulation, roofing and more–utilizing their practical skills as well as careful attention to detail to conduct an airtight inspection.
Want to become a home inspector? There are many benefits to pursuing this particular career. In fact, check out this infographic to discover five reasons to consider a home inspection career.
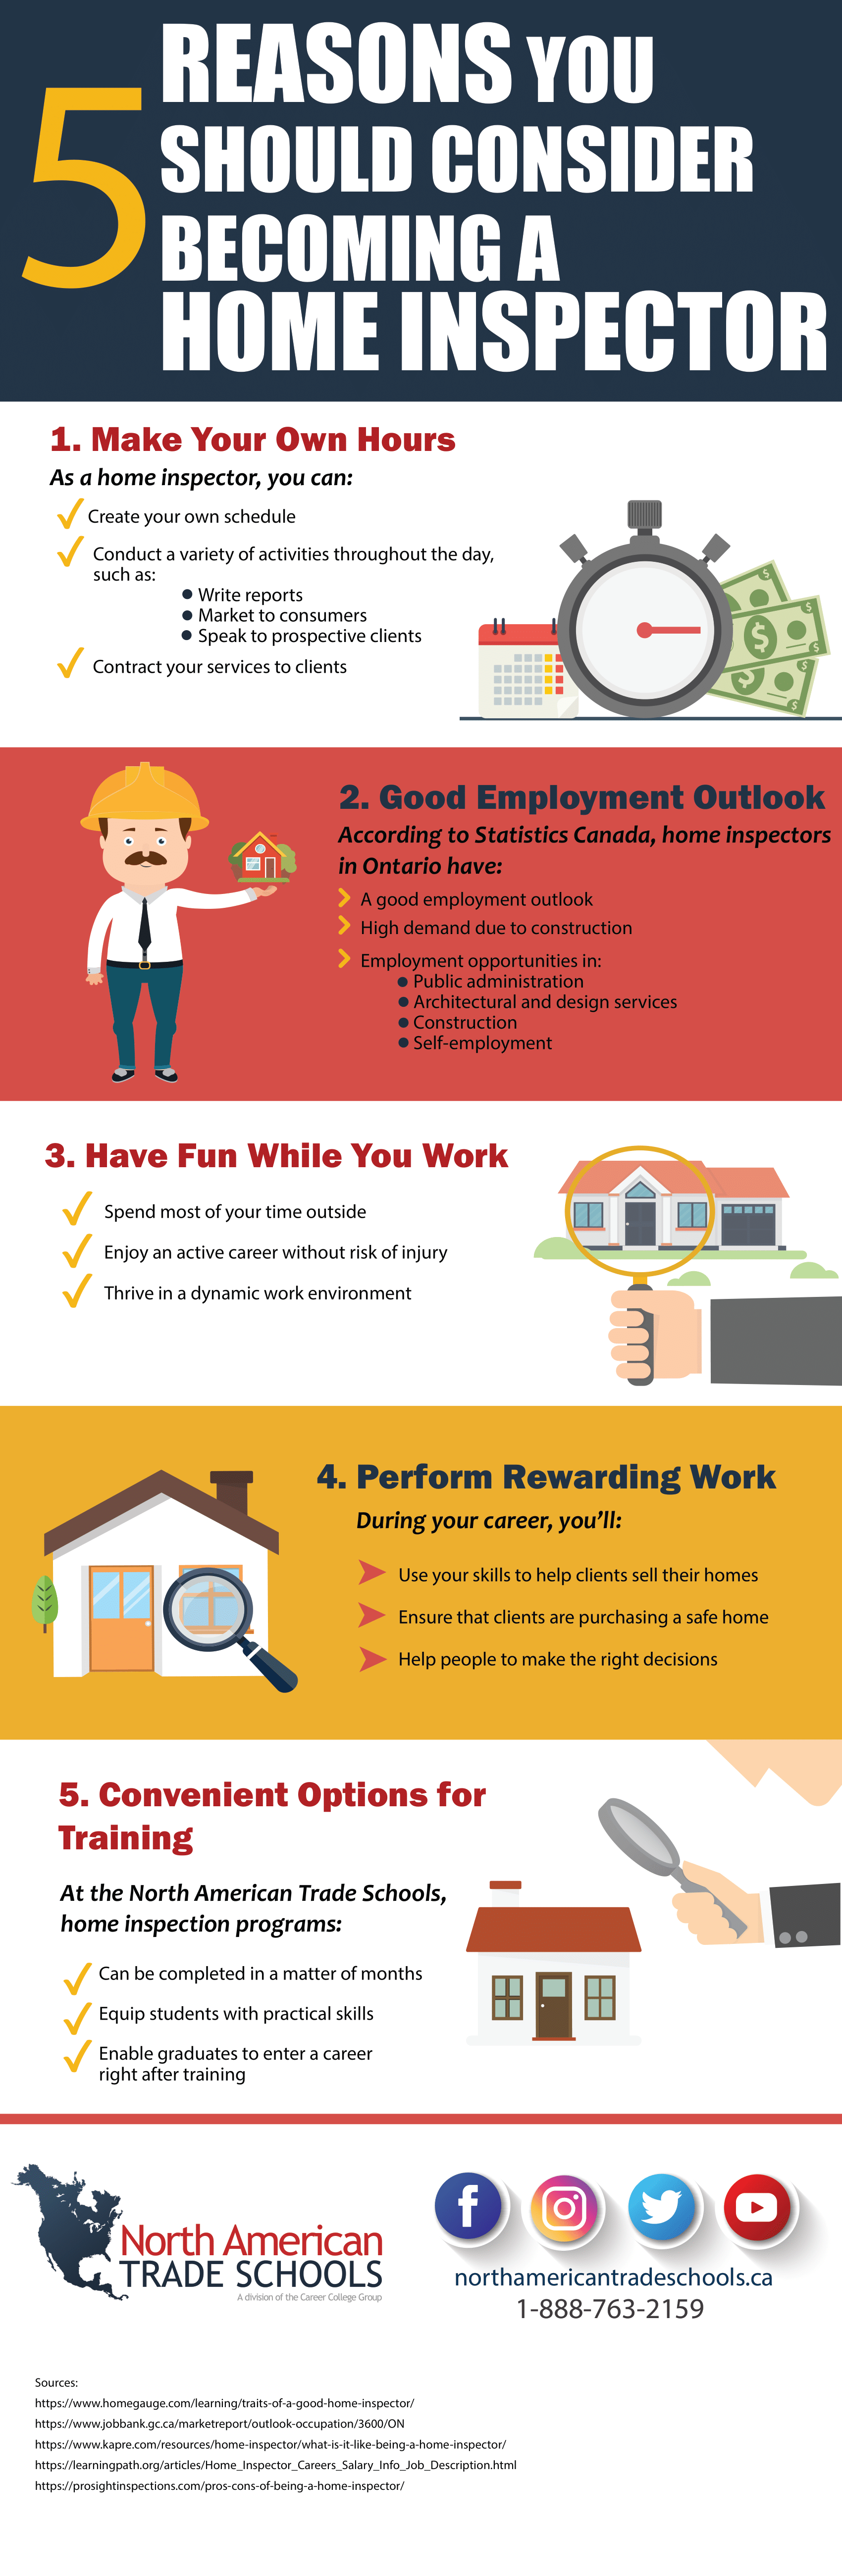
[Infographic] 5 Reasons You Should Consider Becoming a Home Inspector
1. Make Your Own Hours
As a home inspector, you can:
- Create your own schedule
- Conduct a variety of activities throughout the day, such as:
- Write reports
- Market to consumers
- Speak to prospective clients
- Contract your services to clients
2. Good Employment Outlook
According to Statistics Canada, home inspectors in Ontario have:
- A good employment outlook
- High demand due to construction
- Employment opportunities in:
- Public administration
- Architectural and design services
- Construction
- Self-employment
3. Have Fun While You Work
- Spend most of your time outside
- Enjoy an active career without risk of injury
- Thrive in a dynamic work environment
4. Perform Rewarding Work
During your career, you’ll:
- Use your skills to help clients sell their homes
- Ensure that clients are purchasing a safe home
- Help people to make the right decisions
5. Convenient Options for Training
At the North American Trade Schools, home inspection programs:
- Can be completed in a matter of months
- Equip students with practical skills
- Enable graduates to enter a career right after training
Considering Home Renovation Training? A Guide to Interior Painting
September 14, 2021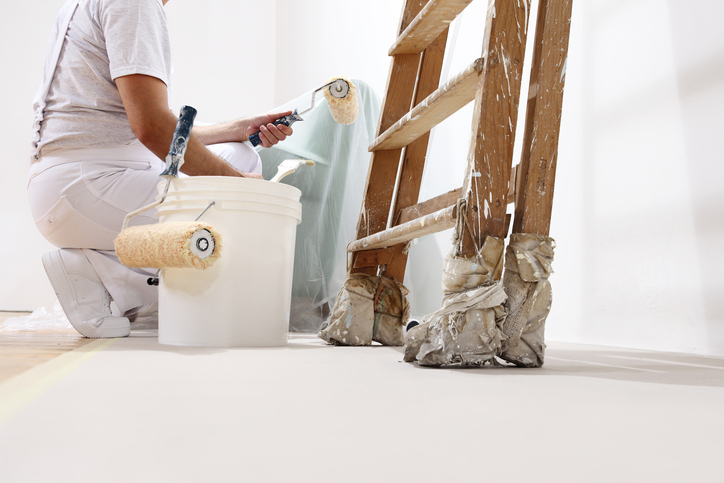
Interior painting might seem simple at first. After all, it’s just putting paint on walls, right? However, as many home renovation professionals and DIY painters already know, there are many factors to consider for achieving a successful interior paint job. If you’re considering a career as a home renovation technician, having a solid understanding of the interior painting process, in addition to knowing a few important tips and tricks will help you to improve the quality of your interior painting job.
Below you’ll discover a guide to painting home interiors – helping you tackle any such project with confidence and ease!
The First Step Professionals With Home Renovation Training Take: Assessment and Prep
Rather than jumping right into painting, there are a few important preliminary steps that every professional with home renovation training will want to take. The first is to assess the condition of the walls themselves. Are there imperfections, holes, or spots of unevenness? If that’s the case, it’s important to sand the walls first using an abrasive paper. Removing rough spots and patches of drywall compound will ensure that the paint goes on evenly, and also makes it easier to apply a new coat of paint.
After sanding, you’ll also want to look closely at the existing paint and the type of walls to determine which primer to use. Primer should always be applied before coloured paint, as it ensures that the colour of the paint will be as vibrant as possible, removing the possibility of dark spots or areas of thin application. If you’re painting paneled walls, you’ll want to use an oil-based primer – but if the walls are drywall, a water-based primer will do a great job of masking any blemishes.
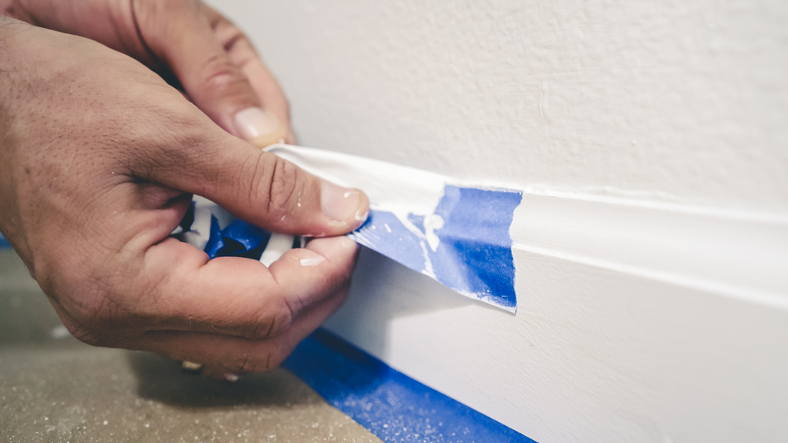
Next, you can tape the trim using painter’s tape. One trick is to use a putty knife to press the tape down, as this will prevent any bleeds from occurring. Lastly, you’ll want to cover the surrounding furniture and floors with canvas cloth, as the use of canvas prevents the possibility of leakages. Once you’ve completed these steps, you’re ready to start painting!
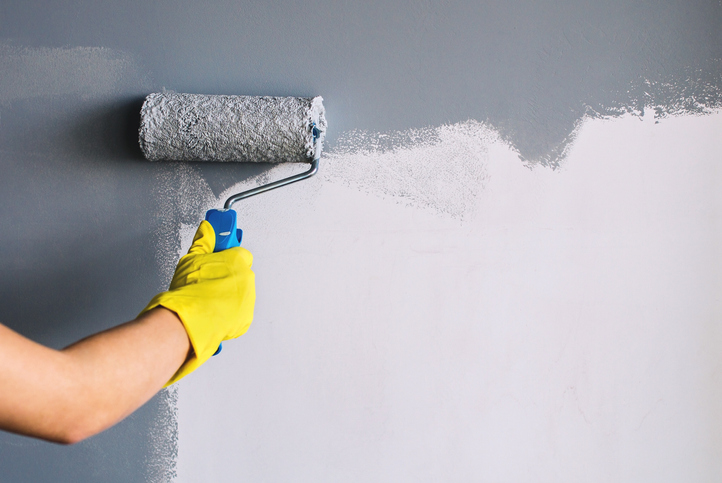
Painting the Interior Walls
After you become a home renovation technician, there are a few things to keep in mind when it comes to applying the first layer of interior paint. You’ll want to make sure that you’re using the right painting materials, including a paint roller and a smaller paintbrush to fill in the edges. When using a roller, it’s important to avoid roller lap marks, which can be done by applying the paint in overlapping strokes. Make sure to paint the entire wall completely, as lap marks are more likely to appear when paint is applied over dry paint. Lastly, remember to apply two coats of paint to the walls, as this helps ensure that the paint appears even and consistent in colour.
Finishing Touches and Clean Up
Once the paint has been thoroughly applied to the interior, it’s time to think about finishing touches and clean up. After the paint is dry, you can examine your work to determine whether there are any imperfections. These will be likely to appear in the corners and areas of trim, and are typically fixable with primer or another layer of paint. When it comes to fixing imperfections, a smaller brush can be used to carefully target the area in question. Once complete, you can begin carefully removing the painter’s tape from the trim, and storing the canvas cloths for future projects.
When you follow this guide, you’ll be ready to succeed in any interior painting project. After launching your career as a home renovation technician, remember these helpful tips!
Ready to launch a rewarding career by training at a home renovation school?
Get the skills you need to succeed with a program at the North American Trade Schools.
If you’re thinking about becoming an HVAC technician, you’ll be launching a rewarding and dynamic career within the heating, ventilation, and air conditioning industry. With the skills you possess, you’ll be able to provide essential services to clients–installing and maintaining both ventilation and air cooling equipment, as well as gas and propane heating systems. As an HVAC technician, not only will your technical skills be important, but so will your ability to interact with clients and provide quality, reliable service.
Below, explore some qualities that will help you to succeed in the HVAC industry, both during your training and throughout the rest of your career.
1. Graduates of HVAC College Are Good with People
If you have strong interpersonal skills, you’re off to a great start! HVAC technicians interact with many different customers on a daily basis. Therefore, an HVAC technician must be able to speak with a friendly demeanor, listen to any requests or concerns, and provide all necessary information in a patient and comprehensive manner. Once you graduate from HVAC college, your ability to communicate actively with customers will help you to establish trust and earn you even more clients through word of mouth recommendations. During your training, consider building interpersonal skills in order to succeed throughout your HVAC technician career.
2. Successful Technicians Are Reliable
As an HVAC technician, clients are trusting you to perform a service for them. To gain their trust, you’ll not only want to possess the necessary skills and knowledge, but you’ll also need to provide reliable service. With this in mind, it’s important that HVAC technicians can prove to be extremely reliable, as this will help to enhance their reputation and establish customer loyalty. During your career, make sure to be on time to appointments, and notify customers if you’re running late or are unable to perform a requested installation or repair.
3. Attention to Detail Is a Quality Shared by HVAC Professionals
During HVAC school, you’ll learn about the importance of precision within the HVAC field. HVAC technicians must be able to use a number of tools and testing devices such as thermometers, pressure gauges, voltmeters, manometers, and more. With strong attention to detail, HVAC technicians can use these devices to measure and obtain information about electrical circuits, refrigerant pressure, air flow, and burners. As an HVAC technician, being attentive to detail will help you to accurately install and maintain the heating and ventilation systems you work with–ensuring that no mistakes are made due to incorrect information.
4. Preparedness Is an Essential Quality for HVAC Technicians
If you’re a highly organized person, you’ll excel in a career as an HVAC technician. These professionals must be prepared for a number of different appointments every day–showing up to each one equipped with the tools and equipment necessary to complete the job at hand. As an HVAC technician, preparation is key to being able to perform any installation or repair, as your ability to remember which parts and tools you need for specific tasks will ensure that you’re always providing a quality level of service.
5. A Good HVAC Technician Is Confident
There’s nothing more terrifying to a customer than an HVAC technician who seems unsure of their capabilities. As customers are trusting you to correctly install and repair the heating and ventilation systems they rely on, it’s important that you build the skills necessary to confidently address the needs of your clients. At the North American Trade Schools (NATS), you’ll receive hands-on training in the installation and maintenance of HVAC systems, equipping you with the knowledge to work confidently throughout your career. Consider training with NATS in order to launch a career as a capable and successful HVAC technician!
Ready to take HVAC technician courses?
Launch your career with a program at the North American Trade Schools today!


