Author: toppyhem
4 Things You Should Know About Energy-Efficient Home Insulation After You Become a Home Inspector
April 06, 2021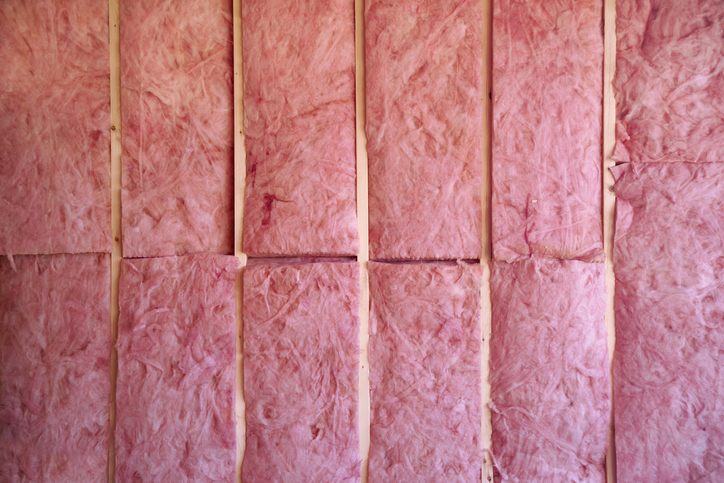
Insulation serves a vital function in every home: it prevents heat from flowing in and out. Thanks to insulation, a home can be kept cool in the summer while staying warm in the winter. However, not all insulation is created equal, and some homes are equipped with insulation that is less efficient than others. When insulation isn’t installed correctly or is located in the wrong places, a home can lose energy–resulting in a higher-than-average energy bill and a drafty living environment.
If you’re interested in becoming a home inspector, there are four things you should know. They are: energy-efficient insulation, how energy-efficient insulation works, the various types of insulation, and where it should be installed. When equipped with knowledge about energy-efficient insulation, you’ll be able to accurately assess the insulation of a home to determine whether it’s doing its job, or if an upgrade is needed.
1. Those with Home Inspector Training Should Know How Energy-Efficient Insulation Works
Today, homes are more energy efficient than those of the past. This is due to developments in building products, smart appliances, and improved electrical systems. However, much of a home’s energy consumption depends on the amount of insulation used and where it’s installed.
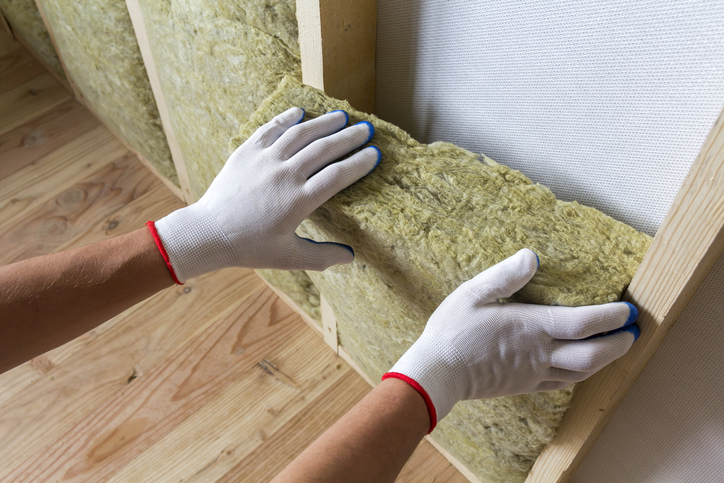
During your home inspector career, it’s important to check the insulation in a home’s roof, walls, floors, and other areas to determine its thickness and the material used. When insulation is optimized for efficiency and effectiveness, less heat or cold air will escape through its exterior–putting less strain on ventilation systems and resulting in reduced energy consumption.
2. There Are Many Different Types of Energy-Efficient Insulation
There are many different kinds of insulation which can be used in a home, and different types of insulation materials have different advantages. Insulation’s efficiency is measured as an R-value. R refers to the resistance to the flow of heat. As a home inspector, it’s important to identify the material of insulation in a home in order to determine its R-value. Cellulose, fiberglass, and spray foam insulation are all commonly used insulation materials within a home, and each of these will have a different R-value.
3. Insulation Should Be Installed in Many Different Areas of a Home
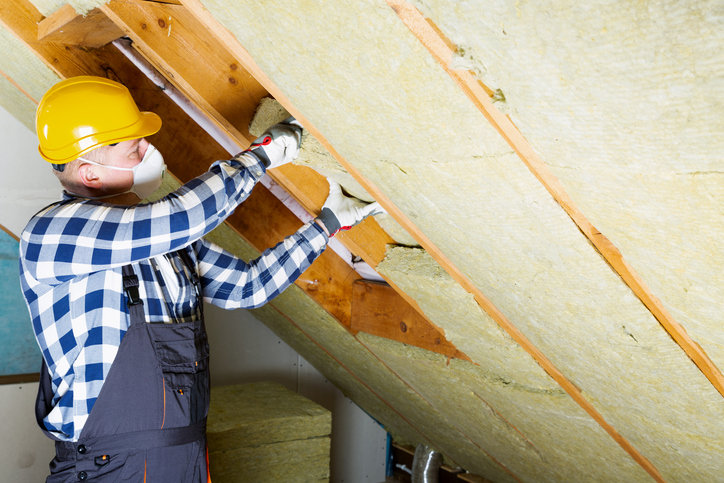
Once the existing insulation’s efficiency has been determined, those with home inspector training can move on to check all areas of a home where insulation should be installed. Many homes use excessive amounts of energy due to the fact that many areas are left un-insulated. When inspecting a home, check that there is sufficient insulation in a home’s roof, walls, attic, floors and foundation. If any of these areas aren’t equipped with insulation already, some form of the material should be installed as soon as possible to improve the home’s energy efficiency.
4. Insulation can be Measured to Determine its Efficiency
When assessing a home’s insulation for energy efficiency, it’s important to measure the insulation in place in addition to determining which areas which need to be insulated. The efficiency of a home’s insulation can be measured using an equation. First, identify the material of the insulation, and conduct research to find this insulation type’s R-value. Next, multiply this R-value by the thickness of the insulation in place. The resulting number can be compared to standard recommendations to confirm whether the amount of insulation in place is suitable to provide adequate insulation against air flow. Existing insulation may need to be upgraded for increased thickness, depending on the results.
When establishing whether a home is energy efficient, it’s important to check where the insulation is located, as well as whether additional insulation needs to be installed. Those seeking a career in home inspection can help homeowners to reduce their energy bill by identifying areas for insulation improvement, and recommending changes that will maximize energy efficiency.
Are you ready to become a home inspector?
Get the training you need with a program at the North American Trade Schools!

Cabinets are an essential component of any kitchen, providing storage and giving the room a unified appearance. The design and installation of a cabinet set can make or break a space, and unfortunately, there are many possible mistakes that can be made throughout the cabinet making process. If you’re interested in a career in cabinetry, you’ll be building and installing cabinets for your clients’ homes.
Here are the top mistakes that cabinetry professionals make, and how to avoid them.
1. Those with Cabinet Making Training Should Remember to Plan for Function
When cabinets are correctly placed, it’s easy not to notice how much space they take up, or how frequently they’re being opened and closed. However, if the design and layout of a set of cabinets makes it inconvenient to move and operate within a space or access items stored within them, this is a sign that the cabinets are not placed correctly.
In order to avoid a poorly designed cabinet layout, those in cabinet making school should remember to plan ahead and account for the intended function of a space. Cabinets should store clutter rather than create it, and in order to maximize their potential, it’s important to place cabinets in areas where they will be useful. For example, a storage cabinet next to the oven should be big enough for pots and pans, and a spice drawer should be nearer to the stove than the fridge. Planning a cabinet layout in advance will ensure that cabinets are being used properly and saving space instead of creating problems.

2. Don’t Forget About Alignment!
Even the nicest set of cabinets can’t distract a viewer from an alignment issue. When installing cabinets in a home, it’s not uncommon for cabinet makers to forget to correctly level the cabinets. Leveling cabinets is especially important in older homes, where the floors and walls tend to be uneven. Installing cabinets on uneven surfaces can make them appear unbalanced, and it’s important for cabinet makers to take the measurements necessary to ensure precise alignment beforehand. By taking measurements, cabinet makers will know where cabinets need to be leveled in order to create a finished, uniform look.

3. Failing to Account for Appliances
Cabinets take up a good deal of space, and if they are not correctly installed, they may interfere with the appliances they are built around. A set of cabinets should integrate seamlessly with the appliances in their vicinity, but one of the most common mistakes that cabinetry professionals can make is failing to account for the size of these appliances when performing an installation. Not measuring the appliances correctly can result in the inability to fit cabinets into their intended space, or the doors of appliances and cabinets clashing when open.
Before installation, professionals with cabinet making training will want to take stock of the appliances within a space, ensuring that the cabinets will be able to fit around them. In order to create a more cohesive look, cabinets should be similar in depth to larger appliances like refrigerators and ovens. Depending on the client, cabinetry professionals may also want to measure smaller appliances such as microwaves or stand mixers, so that cabinets are able to store these properly.
4. Applying the Wrong Paint
For those pursuing a career in cabinet making, another mistake to avoid involves applying the wrong kind of paint to the cabinetry set. Whether they’re located in the washroom or the kitchen, cabinets are used frequently. Thus, it’s important that the appropriate paint is used to prolong the longevity of the cabinets and allow for easy cleaning. Cabinet making professionals should avoid using water based paint. These paints are not stain resistant, making them a poor choice for functional cabinets. Instead, opt for an oil based paint, which is stain resistant and requires less maintenance.
Are you ready to enroll in cabinet making courses?
NATS has got the program for you. Launch your career today!

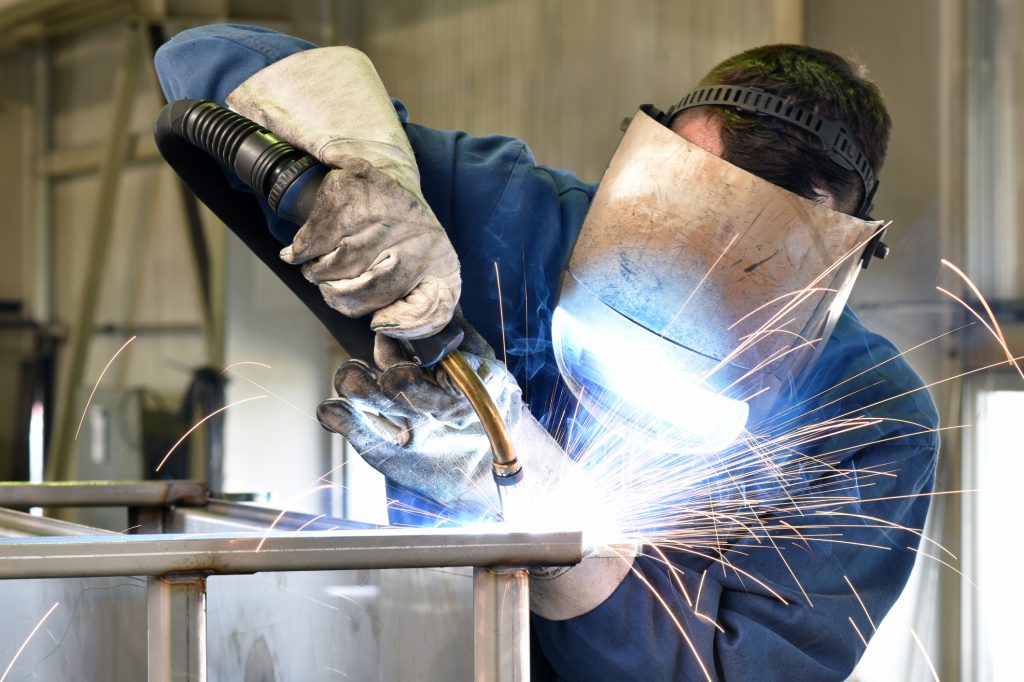
In a welding project, arc-on time has a direct effect on the number of parts completed during manufacturing operations. However, what many manufacturers don’t realize is that the average arc-on time is typically 10% to 12% of the welding process. Increasing arc-on time can result in improved productivity and cost savings, and thus, welding professionals should make boosting this metric a priority. There are many factors that contribute to improved arc-on time, and in order to see results, the entire welding process must be considered.
If you’re training for a career as a welder, here are three ways to increase arc-on time during a welding project.
1. If You’re in a Welding Career, Increase Arc-On Time By Choosing the Right Welding Process
If you’re having trouble increasing your arc-on time, start by analyzing the welding process you’re using. Making a change to the process can result in improved efficiency and increased arc-on time, but many manufacturers are hesitant to make this change due to the reapproval and further training necessary to switch processes. Options for welding processes include standard GMAW (gas metal arc welding), modified short-circuit GMAW, or a pulsed GMAW process. Switching from a standard to a pulsed process can result in benefits such as increased travel speeds, lower heat input, and reduced amounts of spatter, contributing to increased arc-on time.

Professionals in a welding career can also make changes to their process by utilizing metal-cored or flux-cored wires instead of a solid wire, which is conventionally used in GMAW applications. Depending on the materials being welded, a metal-cored wire can result in faster travel speeds to boost arc-on time. Welders may also utilize different shielding gases to improve the productivity of their process. Most manufacturing operations utilize 100% carbon dioxide shielding gas, but substituting a mixed gas, such as one composed of 90% argon and 10% carbon dioxide, can produce fewer spatters and faster travel speeds. This allows welders to spend less time on post-weld grinding—increasing arc-on time.
2. Welders Can Check Their Parameters and Consumables to Increase Arc-On Time
Arc-on time can be negatively impacted by inaccurate parameters and faulty consumables–factors which not only increase inefficiency, but are preventable. When welding professionals check that their parameters are correctly inputted before beginning the welding procedure, they can reduce the chances of having to solve issues through rework or spending excess time on post-weld cleanup. Professionals can check parameters such as heat input, travel speed, and wire stick-out. With the right travel speed heat will be controlled, reducing spatter and optimizing penetration. Additionally, if too much wire is sticking out, there will be excessive spatter, requiring more rework and extra post-weld cleanup.

Before beginning the welding process, those in welding technician training can also ensure that their consumable connections are properly adjusted and correctly installed. Welding professionals can check for loose connections or worn weld cables to prevent a poor quality welding job or increased spatter. If the quality of these connections is confirmed beforehand, troubleshooting time can be reduced.
3. Take Advantage of Technology to Increase Arc-On Time
Advances in technology offer many advantages to welders looking to improve their arc-on time and increase efficiency. Technology is being increasingly used to improve welding power sources–making welding machines more accurate and easier to use. Some welding power sources today feature synergetic control, which allows them to automatically make changes in accordance with the operator’s adjustments. This also allows the operator to increase their arc-on time without worrying about parameters. Today, welding systems also offer a simplified machine setup–reducing the time welders spend setting up by adjusting other parameters according to the material thickness. These technologies improve accuracy, reducing spatter and post-weld cleaning to optimize arc-on time.
While these three factors contribute to increased arc-on time, those interested in entering a career in welding can also increase their arc-on time by receiving the proper training. Students at the North American Trade Schools’ (NATS) welding program benefit from hands-on training to prepare for a welding career. For welding graduate Emily Harrison, her “favourite thing about [NATS] was the knowledge of the teachers and how much practical work you were able to do.” With training from NATS, you’ll be equipped to identify ways in which arc-on time can be increased throughout your welding career.
Are you interested in taking welding courses?
The North American Trade Schools’ welding program can launch your career—learn more today!
3 Qualities Any Commercial Electrician Should Have After Electrician School
March 16, 2021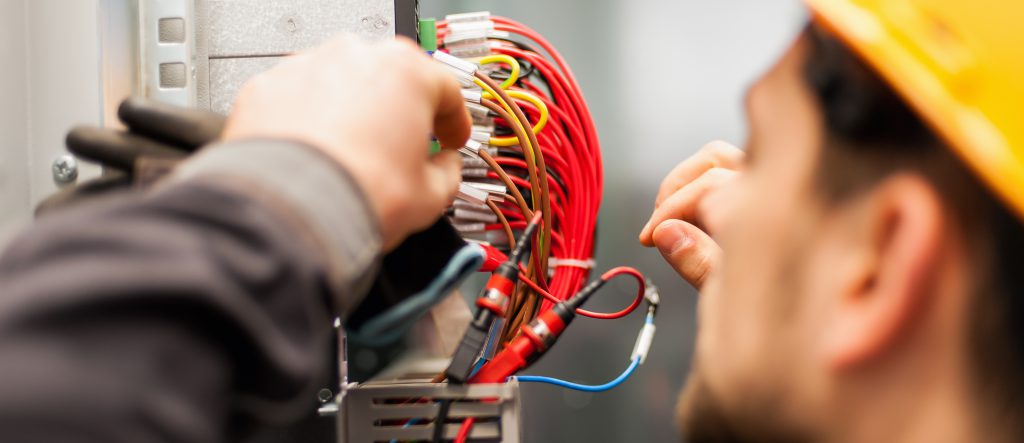
Commercial electricians install electrical systems and wiring within commercial buildings. Their work requires extreme precision and attention to detail–as well as extensive knowledge of electrical systems, codes, electrical standards and guidelines, and more. Commercial electricians often face the complex task of installing and maintaining extensive electrical systems for structures, such as: shopping malls, office complexes, restaurants, and other buildings. These electricians have difficult, and at times, dangerous jobs. Their ability to succeed in their field is made possible through a few key personal qualities.
If you’re interested in a career as a commercial electrician, exploring the qualities below can help you to gain a better grasp of what this profession requires.
1. Problem Solving Capabilities are Important for Those with Commercial Electrician Training
Installing and maintaining the electrical systems and components of a commercial complex can be a complicated task. During a typical job, commercial electricians will have a diverse range of responsibilities. Commercial complexes often have a greater need for efficient electrical systems due to the fact that businesses often use more electricity for communication and general operation. For commercial electricians, navigating the installation of these complex systems requires the ability to problem solve.
Commercial electricians will encounter unexpected challenges on-site, and must be able to come up with creative solutions to problems. Whether it’s determining how to install the number of outlets necessary to meet a business’s needs, or mapping out convenient placement of electrical wiring, professionals with commercial electrician training benefit from being great problem solvers.
2. Electrical Experience and Expertise
Typically, the electrical requirements of commercial complexes are much more demanding and extensive than those of residential buildings. These buildings are larger, consume more electricity, and have greater servicing needs than other structures. Thus, the electricians who perform installations and maintenance for commercial complexes must possess the electrical knowledge and expertise necessary to safely and efficiently meet a project’s needs.

At the North American Trade Schools, electrician college students have access to hands-on training in the lab, which equips them with valuable knowledge and experience in a variety of electrical topics. Their training qualifies them to move on to an apprenticeship, where they continue to build skills through experiential experience. When their training is complete, students will be equipped with the practical knowledge necessary to prepare them for a successful career as a commercial electrician, where they can apply their skills in the field.
3. Commercial Electricians are Dependable
Electricians in all industries have a large amount of responsibility. They are the ones relied upon to plan for and install electrical systems, conduct inspections, and determine the cause of breakdowns or other electrical issues. Businesses and contractors rely on commercial electricians to get the job done right–as a mistake could enhance the risk of electrocution or even fire.
The extent of a commercial electrician’s responsibilities requires that these professionals are extremely dependable. Commercial electricians must be responsive to the needs of the team they are working with, making themselves available to fix problems when they arise. Dependable commercial electricians are better informed about what’s happening on site, and their dedication is reflected in the quality of their work and the efficiency of a structure’s electrical systems.
Are you interested in attending electrician school?
Explore programs with the North American Trade Schools today.
HVAC & The Environment: What You Should Know If You’re Pursuing an HVAC Career
March 10, 2021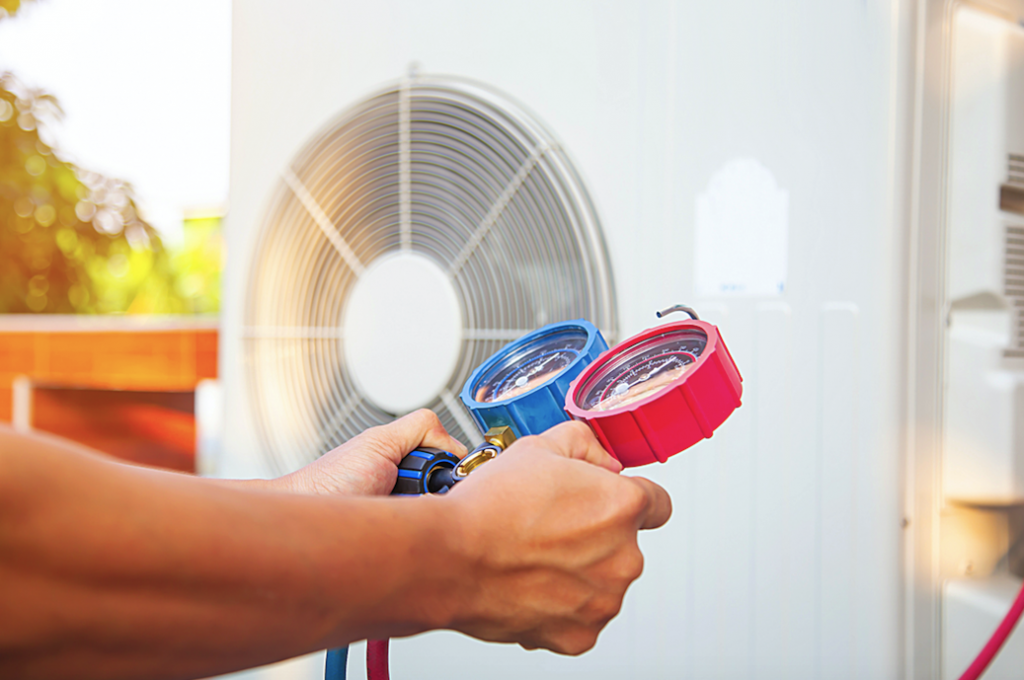
Heating, ventilation and air conditioning (HVAC) systems have an essential function. They keep our homes cool in the summer and warm in the winter, in addition to regulating the quality and movement of the air that we’re breathing indoors. While HVAC systems aren’t the home appliances with the most severe environmental impact, there are still a few ways that HVAC systems can contribute negatively to the environment. HVAC systems may use refrigerants that can damage the ozone layer, and they also use electricity, the consumption of which burns fossil fuels and contributes to ozone depletion.
While HVAC systems can cause environmental harm, there are many solutions offered today which have the potential to reduce the impact HVAC systems can have on the environment. Some of these solutions can be implemented by HVAC technicians themselves. If you’re interested in becoming an HVAC technician, here’s what you need to know about the environmental impact of these systems and the solutions available today.
Those in an HVAC Career Should Know That HVAC Systems Can Emit Harmful Refrigerants
Air conditioning systems rely on cooling agents, or refrigerants, to drive cold air into homes, but these cooling agents have a known negative environmental impact. Hydro-chlorofluorocarbons (HCFCs), hydro-fluorocarbons (HFCs) and chlorofluorocarbons (CFCs) are all refrigerants that have been reported to contribute to ozone depletion and global warming, as these compounds are greenhouse gases. In Canada, Federal Halocarbon Regulations, 2003, bans the release of halocarbons from air conditioning systems in quantities over 0.1 kg of halocarbon per 01. kg of air, but these refrigerants are still being released into the atmosphere in lower quantities. Freon (R-22), a commonly used HCFC, has been banned in Canada for use in newly manufactured HVAC systems, and Puron (R-410A), a less-harmful HFC, is now more commonly used. However, this refrigerant still contributes to direct and indirect greenhouse gas emissions.
While it is difficult to control the emission of refrigerants into the atmosphere due to the range of HVAC systems in use today, advancements in technology have the potential to reduce their environmental impact. If you want to become a HVAC technician, you’ll probably become familiar with R-32 as a possible solution. R-32, or difluoromethane, is an HFC refrigerant known to have a lower impact on greenhouse gas emission than R-410A, and is being explored by HVAC engineers as an option to reduce the environmental impact of HVAC systems. It has been found that R-32 can even be used to make these systems more energy efficient, as it has better thermodynamic properties. In the future, developments in the use of alternative refrigerants such as R-32 have the potential to reduce the amount of greenhouse gases in the atmosphere as a result of HVAC systems.
HVAC Systems Use Energy
It’s important to be aware that HVAC systems consume high amounts of energy. Depending on the type of system and the season, an air conditioning system can consume around 3000 to 5000 watts of electricity every hour. Electricity consumption results in the burning of fossil fuels and the release of carbon dioxide into the atmosphere, a major cause of ozone layer depletion. One way to determine how much energy an air conditioning system is using is by checking its SEER rating. Older air conditioners have lower SEER ratings and tend to consume more energy.
As a way to reduce the amount of fossil fuels released, HVAC products that harness renewable energy sources are also becoming a more popular option. Renewable energy sources such as solar and geothermal energy can reduce the environmental impact of HVAC systems by using sources of power that don’t burn fossil fuels. Solar energy harnesses energy from sunlight rather than from fossil fuels to power HVAC systems, while geothermal heat pumps convert natural energy stored underground for use.
Small-Scale Solutions to Reduce the Environmental Impact of HVAC Systems
The environmental impact of HVAC systems can be reduced on a small scale, and as a professional in an HVAC career, this is an area where your services are especially useful to clients looking to reduce their own personal energy consumption and greenhouse gas emissions. The efficiency of an HVAC system depends on the equipment being used. If a system’s equipment is outdated, chances are it’s using more energy or emitting a greater quantity of harmful refrigerants. Advising environmentally-conscious clients to replace old HVAC systems with an updated, energy efficient system can reduce the negative impact of older units.
Additionally, HVAC systems should be regularly maintained in order to prevent excess emissions. Air filters should be replaced regularly, ducts and pipes should be inspected for leaks, and valves and steam traps should be examined for efficiency.
If you want to be equipped with the ability to make HVAC systems less harmful for the environment, a program at the North American Trade Schools (NATS) could be right for you. Jason, a graduate of the North American Trade Schools HVAC technician program, says he chose NATS because of its reputation as a “hands-on school.” He notes, “They teach you what you need to know and then you apply your knowledge.” Practical, experiential training enables HVAC technicians to apply their newly learned skills in the field in innovative ways. That includes approaches that may help to reduce the environmental impact of HVAC systems.
Are you interested in attending HVAC school?
The North American Trade Schools program could be right for you!
If you’re considering a career in welding, it’s more than likely that you’ll be using the 7018 welding rod for various welding purposes. The type of welding rod used for a project depends on the material being used and the requirements of the job at hand. Welders must consider factors such as corrosion resistance, tensile strength, polarity, weld position, and more. A common type of welding rod is a welding electrode, a coated metal wire composed of materials that are consistent with the metals being welded.
There are many different types of welding electrodes, which come in different levels of coating and different sizes. Here, we’ll take a look at the 7018 arc welding rod, an electrode commonly used by welders for a number of purposes.
An Introduction to the 7018 Welding Rod for Welding College Students
The 7018 welding rod is a consumable electrode rod, and is typically used for welding carbon steel. The iron-based flux compound coating this electrode is characterized by a low hydrogen content, setting the 7018 apart from other welding rods. The 7018’s minimal amount of hydrogen allows for a weld that is both tough and resistant to cracks–making it a great option for a number of projects. When welding, its flux compound vaporizes, keeping moisture, hydrogen and air from contaminating the weld bead.

As those with welding technician training will come to learn, the 7018’s numbers can be used to understand its function, as with any welding rod. In the 7018, the “70” dictates its tensile strength, which is equal to 70,000 lbs per square inch. The third digit, the“1,” denotes the welding positions that the 7018 can be used for. The number 1 means that the 7018 can be used for any welding position. The “8” signals the electrode’s coating type–the kinds of current which can be used, and its penetration. In the 7018, the “8” shows that it’s composed of a low-hydrogen flux compound, which allows for a medium-penetration weld compatible with AC, DCEP, and DC currents.
When Do Welders Use the 7018?
The 7018 has a wide range of applications, making it a popular choice among welders for a number of projects. Not only can it be used in any welding position and with a number of different currents, but it produces a relatively steady arc with a low quantity of splatter. The 7018 is used mostly for structural welding due to the strong and ductile weld it produces, and its versatility qualifies this rod for a number of different applications. In addition to structural projects such as high-rise buildings, dams, and bridges— which benefit from the high degree of strength characteristic of the welds created by the 7018—this electrode can also be used to weld pressure vessels, pipes, boilers, and other powerful equipment.

If You’re in Welding Technician Training, Here’s How to Use the 7018
When welding with the 7018 electrode, it’s important to follow a few requirements. First, welding students should make sure to use the correct welding amperage. The right amperage depends on the diameter of the rod in use, which is determined by the thickness of the steel being welded. When using a 7018 welding rod, the welding pro should keep in mind that the strength of these welds tends to make them solidify more rapidly. This welding rod is a consumable electrode–meaning it gets shorter throughout the welding process. Thus, welders should be careful to continuously keep a consistent distance between the electrode’s tip and the metal while concentrating heat at the joint of the weld. The 7018 should be dragged along the metal to ensure that the filler material is secure. With experience, welders will be able to feel when the weld is firmly fixed.
Learning how to use the 7018 takes some practice, relying upon the level of knowledge that can be gained from the right type of welding college program. The North American Trade Schools’ welding program allows students to gain the hands-on training necessary to become skilled experts in the industry. For Welding Graduate Emily Harrison, her “favourite thing about the campus was the knowledge of the teachers and how much practical work you were able to do. It was very helpful.”
Are you ready to learn from the best?
Explore welding classes at NATS today!
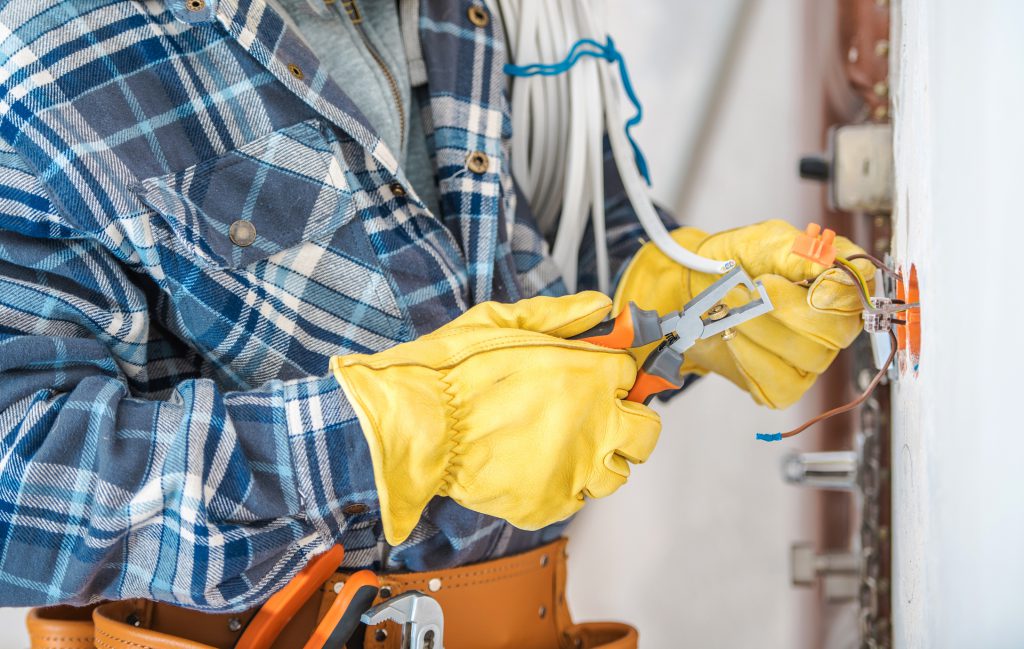
If You’re Considering Electrician Training, Here’s How Moisture Can Affect Residential Wiring
February 23, 2021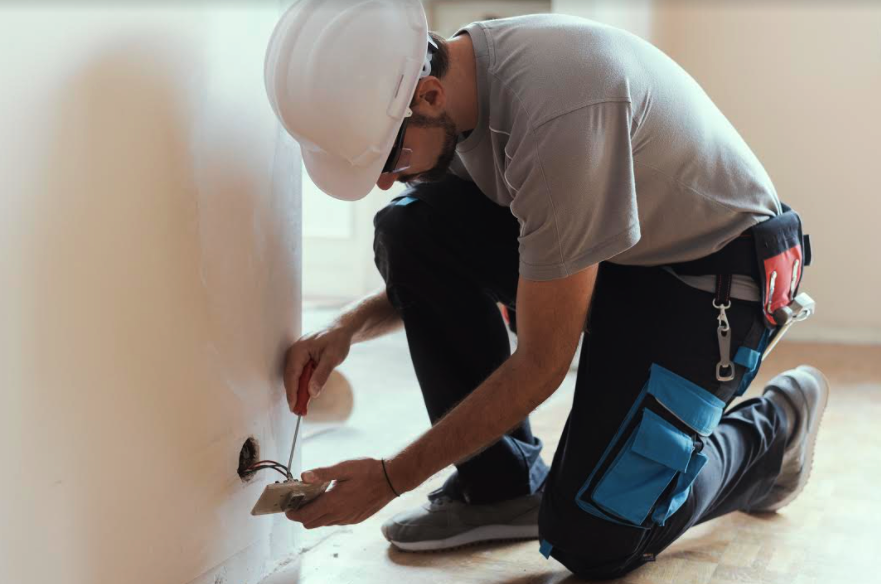 Water damage is a common occurrence in residential buildings. In addition to being an inconvenience, water damage can also be a serious safety hazard. When combined, water and electricity can be an extremely dangerous pair — sometimes even deadly. There are many different kinds of moisture that can cause damage to the residential wiring systems in a home or business, with varying degrees of severity depending on the form of moisture and the method of intrusion.
If you’re thinking about becoming an electrician, it’s important to be able to recognize the signs of moisture damage in order to address potential threats to the safety of a building’s inhabitants and the integrity of its wiring system. Here’s what future electricians should know about the effects of water damage on residential wiring systems.
A Look at Wiring’s Ability to Withstand Moisture for Those with Electrician Training
Most residences contain cables and wiring with different levels of insulation, depending on where they are located. Water exposure can have a varied effect on electrical wiring systems depending on their make and insulation type, as well as the amount of exposure. Wiring systems may consist of bare conductors, such as copper grounding wires, or conductors insulated with nonconductive material such as plastic or vinyl.
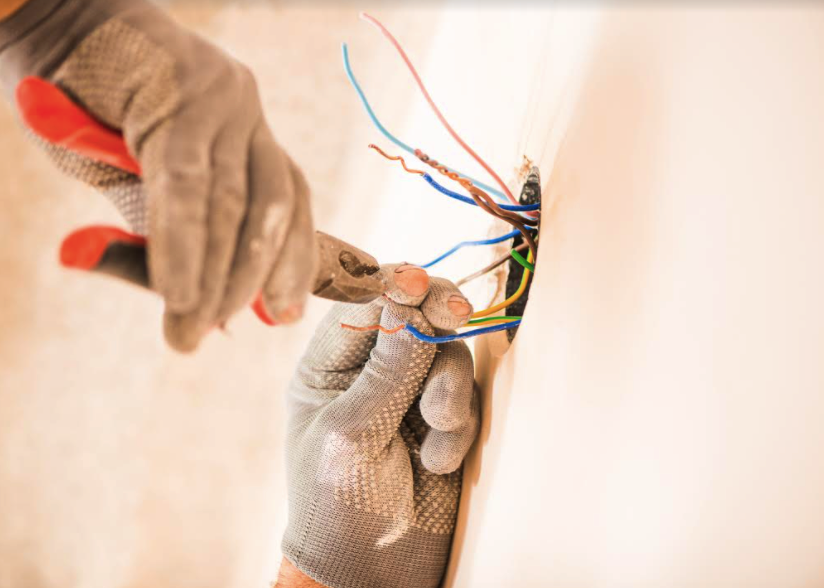
Professionals with electrician training can identify the level of insulation on a conductor by looking at the wire coding. If there’s a “W” in the coding, this means that a wire is suitable to withstand conditions of moisture. Some cables, such as UF-B cables, are manufactured specifically to withstand wet or damp conditions, protecting conductors in water-proof plastic vinyl. However, residences are commonly equipped with plastic-coated Romex cables–consisting of copper ground wire coated with paper and wrapped in neutral and live wires. This wiring is typically unable to withstand exposure to moisture due to its lower level of insulation.
How Moisture Can Harm Residential Wiring
Whenever water penetrates through the walls of a structure, whether in a liquid, frozen, vaporized or condensed form, moisture damage can occur to the residential wiring systems. Within indoor structures, many electrical components are not designed to withstand contact with water, and it’s important that electricians are familiar with elements vulnerable to water damage. Common causes of water damage in residences include burst pipes, leakage and flooding. Excessive moisture resulting from conditions such as a humid environment can also be a catalyst for milder cases of damage.

The most common effects of moisture on wiring include corrosion and mold growth. Over time, corrosion can lead to gradual deterioration of wiring components–leaving systems vulnerable to power loss or further damage. Interior electrical components are typically made more vulnerable to water contact due to the fact that they are often only protected by enamel, which is not effective in preventing water damage. As a result, moisture can cause mountings, conductors, or metal connectors to corrode. Additionally, moisture can increase the current of electrical circuits, leading to overheating and increasing the risk of a fire, or resulting in a blown fuse. When a fuse is blown, short circuiting will occur in the electrical system.
What to Do When Electrical Water Damage Occurs
For those who want to become a construction electrician, it’s important to know what to do in the case of potential water damage to a residential wiring system. If water damage is detected within a structure, it’s important to cut off electrical supply at a residence’s fuse box before inspecting any electrical circuits. Failing to do so could result in shock exposure. In the case of moisture damage, all vulnerable components should be inspected to check for areas of corrosion or mold growth. Depending on the extent of the damage, the affected area can be cut out — but it’s also possible that a new set of wiring will be required. The surrounding area should then be further insulated from moisture to protect against future harm.
In the event of flooding, all cable or wiring products that have been submerged in or exposed to floodwater should be inspected thoroughly to determine whether they can still be used. Floodwater can contain additional contaminants which can be harmful to electrical systems. With this in mind, electricians should be sure to check for foreign elements, as these can interfere with a wiring system’s ability to function.
Ready to enroll in electrician college?
Explore the North American Trade Schools’ program options today.
Look Out for These Common Roofing Problems if You’re Entering a Home Inspector Career
February 16, 2021
Home inspection describes a consulting service where industry professionals analyze the safety conditions of a home—helping buyers make informed decisions before purchasing or living in their chosen home.
A big part of home inspection includes assessing the roof for any signs of damage. Conducting a thorough visual inspection of the roof can reveal potential concerns and areas in need of repair to promote the safety of the home’s inhabitants. Those interested in home inspection can receive proper training, learning practical skills to ensure safe living conditions. Here’s a brief overview of what home inspectors can look for when investigating roofing problems.
Checking Gutters and Soffits When Inspecting Roofs
When searching for any roofing problems, home inspectors rely heavily on visual inspection. One of the most obvious signs of a roofing problem includes a sagging roof—which can indicate deterioration, improper installation, or difficulty supporting its weight. Acting quickly to replace a sagging roof is of utmost importance, preventing the chances of it collapsing.
Other problems can include dirty or clogged soffits (the bottom of house eaves or rafters). Dirty or clogged soffits can mess with attic ventilation, blocking airflow and promoting mould growth on the roof’s framing. Home inspectors will also want to check for any rusted gutters, which can lead to unwanted leaks. It’s also important to look for a well-installed gutter apron, typically used to stop water flows from rotting other parts of the roof (like the soffits or roof sheathing). If water stains are visible below the gutter, then gutter aprons should be installed for added protection.
Spotting Signs of a Leaky Roof after Your Home Inspector Training
Water damage can be a clear indication of a roofing problem. If the home’s ceiling or interior walls feature any water stains, then a leaky roof is likely the culprit. Addressing this problem quickly is extremely important, as doing so can prevent further problems from developing—like growing mould or damaging insulation. This can occur around bathroom fans as well, possibly indicating a leak from roof vents. It should also be noted that if mould is spotted on the exterior walls, a leaky roof should be considered as a probable cause.
Those with a home inspector career can also keep an eye out for any roofing problems when assessing the insulation. For example, a leaky roof can be responsible for interfering with the house’s insulation, affecting heating and cooling systems.

Inspecting Roof Shingles and Flashing for Signs of a Roofing Problem
Home inspectors will want to carefully look at the state of roof shingles and flashing in order to properly assess the living conditions of a house. Roof shingles are overlapping elements used to cover roofs, adding further protection. Inspectors should look out for any damaged or missing shingles, both of which increase the chances of leaky roofs. Roof shingles can also appear mismatched or uneven, allowing water to penetrate more easily.
Those who have started their home inspection training will know about roof flashing, used to protect areas where the roof intersects with other walls or structures (like chimneys). Flashing is important when inspecting water flow, preventing water from crashing and seeping into the sidewalls. If the flashing is loose or rusted, then this layer of protection is rendered inefficient—potentially rotting the roof’s sheathing and framing or leading to the growth of more mould.
Do you want to become a home inspector?
Contact NATS for more information!
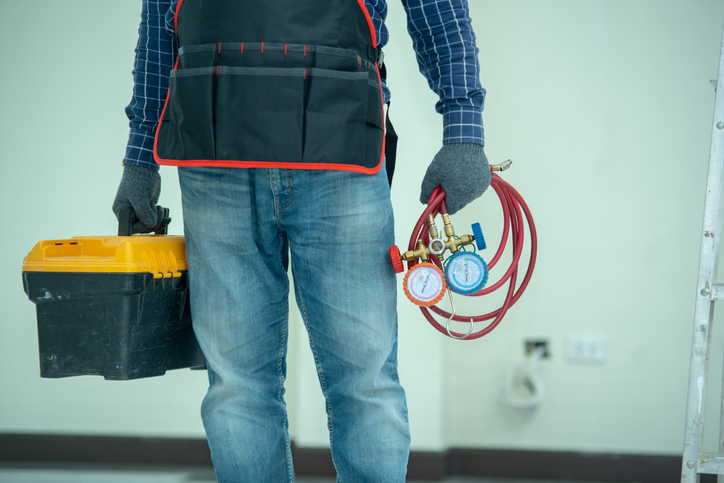
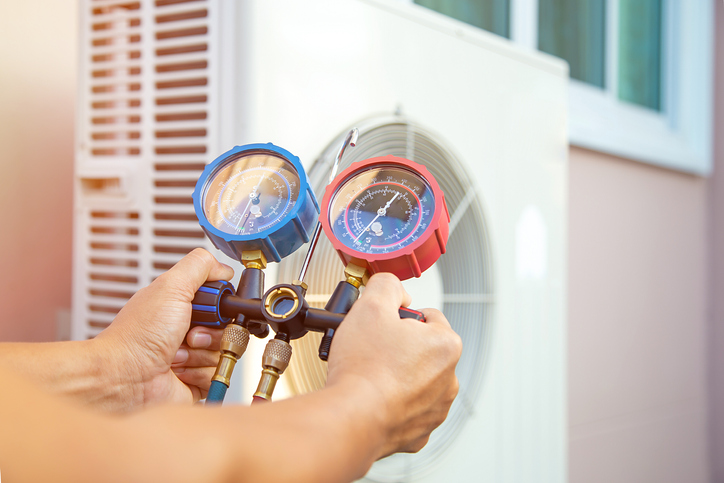
When you replace an old HVAC unit with a new one, there are certain things worth keeping in mind. For example, many people tend to only replace their HVAC unit on rare occasions. However, having those units replaced in regular intervals can ensure that their HVAC unit is keeping them safe, healthy, and sufficiently heated and cooled. Some homeowners may also want a new unit to help them save on energy. With the right tools and knowledge, you can complete an HVAC replacement job that accomplishes each of these things.
Although replacing an HVAC unit involves a number of steps to complete before, during, and after the installation, these are some of the more important phases to remember during this process. Read on to find out what you can expect with regards to replacing HVAC units.
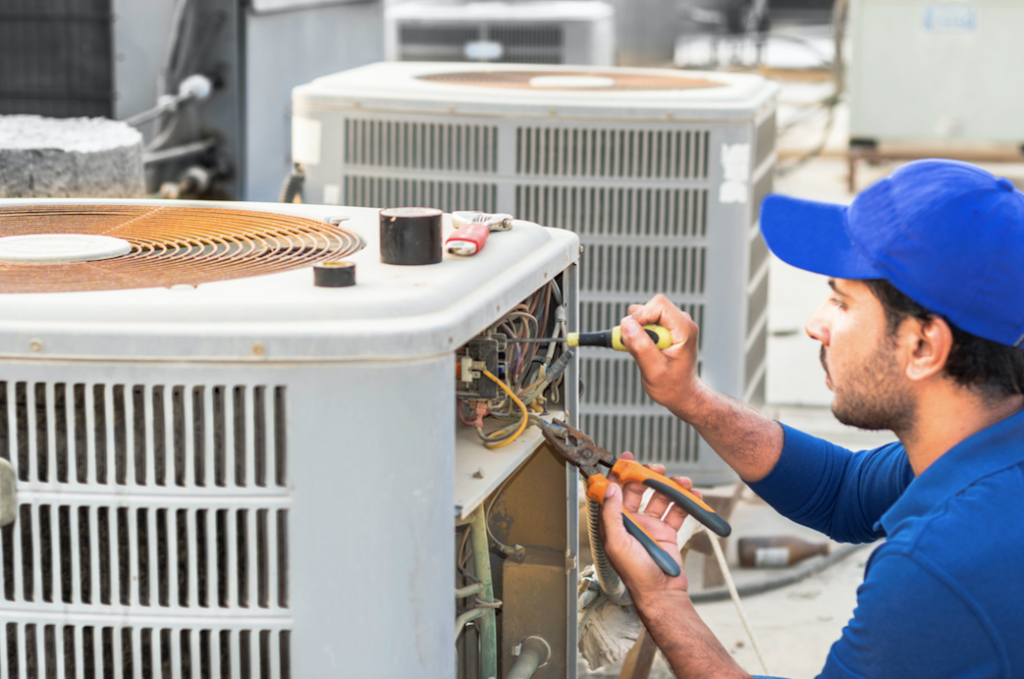
Preliminary Measures for HVAC Technician Training Students to Remember
Before the replacement process can begin, there are certain tasks to take care of. For one, you’ll need to assess both the home and the old HVAC system, and complete the necessary calculations and measurements. Once this has finished, you can determine how big the new HVAC system needs to be. Measure the square footage of the home to better understand how big the new unit will need to be, and how many tons of heat it can remove. You and the client will also need to determine how they will pay for the installation. Depending on the payment plan, they may put a down payment on the replacement prior to the installation.
Upon completing your cost estimate, replacing the HVAC unit can go ahead. Complete a ductwork inspection, if necessary, and disconnect the unit being replaced after powering it off. If any parts of the interior, such as furniture, are impeding your ability to get the job done, move them away from your working area. Since HVAC technician training students will learn about installing many different types of systems during their studies, it’s equally important that they learn what’s necessary for the pre-installation phase.
The Installation Process: Out With the Old, In With the New
Once these tasks have been completed, the installation of the HVAC unit replacement can begin. When installing, remember to use dust covers and wear protective gear to prevent any direct contact with debris. Even if only one component of the HVAC unit needs to be replaced, you should still replace the entire unit so that its capacity for efficiency is optimal. Be sure to also cut off power from the old HVAC unit, flush any remaining coolant, take apart the old equipment, and then remove those parts to make room for new ones. The HVAC unit replacement can often be done within the day of installation, but can sometimes go beyond that if complications arise.
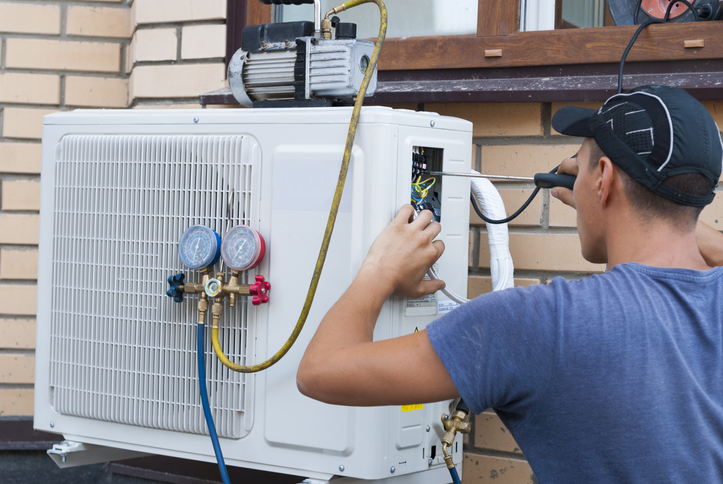
Students in HVAC college should also familiarize themselves with the parts that will be involved in the replacement. These parts include the outside compressor, thermostats, evaporators, air handlers, condensate pumps, and/or supply lines for coolant. Once the installation process is done, remember to put the new unit through a series of tests to make sure it works correctly and can sufficiently cool the home. Inspect the system to catch any possible issues, then add a new coolant and keep testing the unit until all systems look good. Lastly, remember to discard and/or recycle any old HVAC equipment being replaced. Explain to clients how the new system works, and recommend a timeline for their next replacement.
Want to get your HVAC diploma?
Contact NATS today for more info!
Taking Home Renovation Training? Here’s How to Handle Mold Discovered on a Reno
February 02, 2021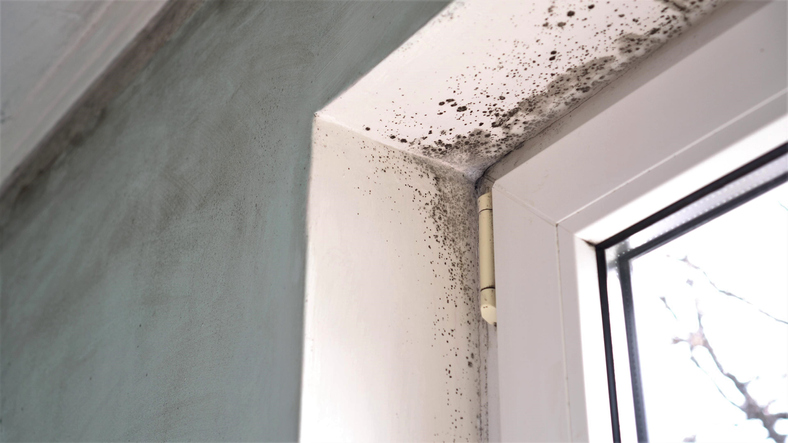
During a home renovation project, it’s not uncommon to discover a few “fun” surprises. Ripping up a floor or tearing down a wall is not only an opportunity to give a home a new look—it’s also a chance to make sure there’s no mold hidden out of sight and causing harm.
When mold is discovered, it’s important to address it right away. Left untreated, mold can become a serious health hazard to those who have it in their homes. In fact, it’s known for causing respiratory problems, immune disorders, allergies, and more. If you’re interested in becoming a home renovation technician, here are some tips on identifying and dealing with a mold situation, and how to prevent mold from occurring in the future.
If You Have Home Renovation Training, Here’s Where Mold Is Likely to Occur
Mold is most likely to grow in places where there is excess moisture. When renovating a home, make sure to check carefully for any leaks, condensation, or general moisture within the walls or floors, as these spots will be prone to mold growth. After your home renovation training, be sure to thoroughly examine a home for water damage or condensation during the renovation process, because where there’s moisture, there could be mold.
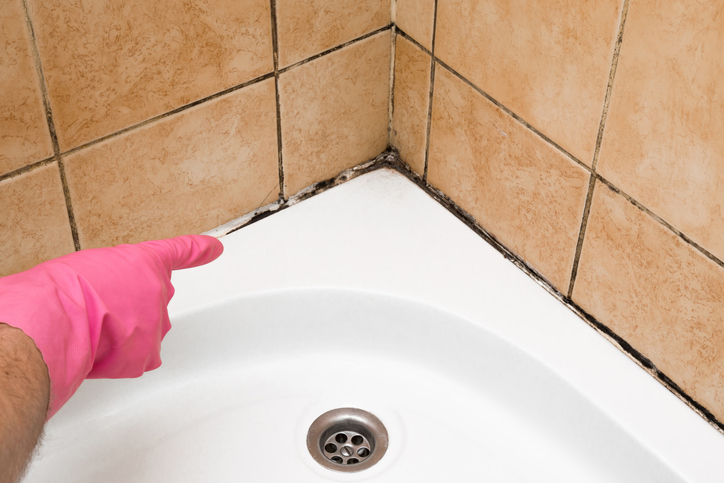
You Found Some Mold: Now What?
So you’ve discovered mold—what’s next? Whatever the quantity, mold should always be removed. While a little bit of mold might not pose a threat, there are certain types of mold that can be dangerous to our health, so it’s good practice to deal with mold as soon as it’s identified. Upon encountering mold, determine how much mold there is and what colour the mold is. If there are large spots of mold (bigger than your hand), the removal process may be more intense, and it might be best to call in a mold professional. Additionally, if the mold is black in colour, this could indicate the presence of black mold, which is toxic and should be removed by a professional remediation company.
Preventing Mold from Reappearing During Your Home Renovation Career
If you want to become a home renovation technician, remember that it’s a good idea to be prepared to encounter mold while on the job. Make sure to have protective equipment on hand, such as goggles, gloves, and an N-95 or P-100 respirator.
Of course, what’s even better than removing mold is preventing mold from occurring in the first place. Mold is sneaky, and preventing any possibility of re-growth is essential, especially while renovating a home. You wouldn’t want to put in a new floor over an area that has a chance of developing mold again. In order to remove the possibility of mold resurgence, make sure that the area is completely dry. A dehumidifier can be helpful here. Additionally, consider sealing off the area with a sealant such as shellac before continuing with the renovation, which will discourage mold growth.
Are you ready to enroll in home renovation technician school?
Explore the program options available at the North American Trade School today.


