Author: toppyhem
What Those with HVAC Technician Training Should Know About the Benefits of Preventative Maintenance
September 15, 2020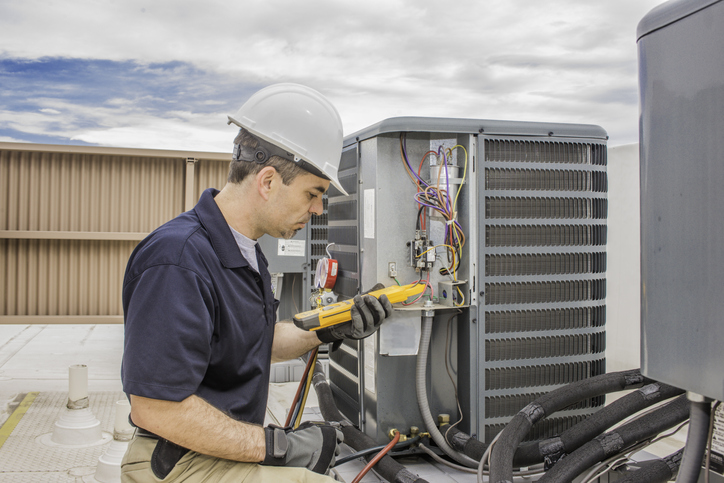 There’s nothing worse than the AC breaking down on a blazing hot day—apart from maybe the heating system fizzling out when it’s a frigid -30 degrees! HVAC technicians become very popular individuals at the height of summer and winter, serving to rescue home and business owners from uncomfortable temperatures by performing emergency repairs as they come up.
Keeping HVAC units in good working order through routine checkups is another important role of the technician. Here’s why routine maintenance practices are important for keeping these systems in their best shape all year round!
Routine Maintenance Helps Owners Breathe Easier
Respiratory problems like asthma and bronchitis can often be traced back to the living conditions of the home, with the dirty HVAC unit a prime culprit in many cases. The problem comes from condensation forming in the coils and ducts of the AC unit, which can lead to all kinds of harmful mold and bacteria growth.
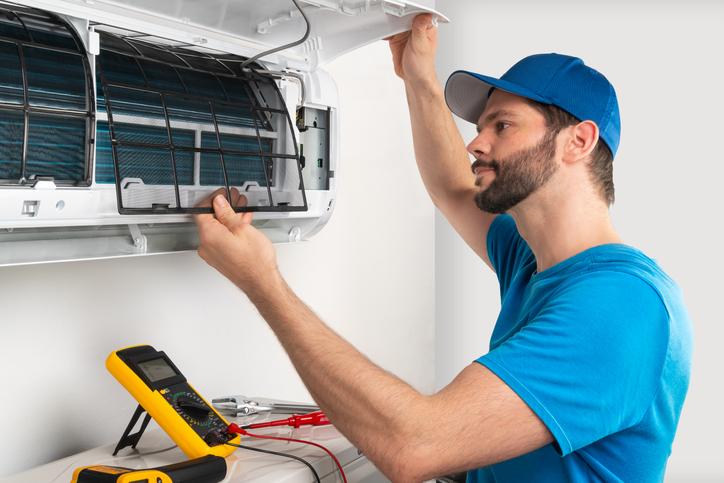
Customers who keep to a routine maintenance schedule for their HVAC units are ensuring that all of the harmful contaminants that may have built up inside the system are eliminated. A service technician is responsible for cleaning filters, coils, and other components of the unit on a routine visit, which leads to a cleaner unit, thereby improving air quality.
A Well-Maintained System Can Save the Owner Money
What would a home or business owner care more about than breathing clean air? How about more money in the old pocketbook! If you’re interested in HVAC technician training, you should know that keeping an HVAC system in good working order can help the owner save money by optimizing efficiency to keep energy costs down. A well-maintained HVAC system uses a lot less energy and puts less wear and tear on the machinery of the HVAC unit, running a good 20% more efficiently than a neglected unit.

Regular checkups in the fall and spring can keep efficiency strong, and help an owner get a good ten years out of their HVAC investment. Routine checkups also allow the service tech to catch a small problem needing a quick, inexpensive fix before it turns into a much more complicated problem requiring lots of work—and lots of coin to repair.
Fewer Emergency Breakdowns and More Warranty Opportunities
People run their HVAC systems pretty hard in the summer and winter months, which can lead to breakdowns. These machines are designed to handle the energy levels the owner demands, but only if the unit is being looked after properly. If you’re seeking your HVAC diploma, you should know that breakdown prevention during the hottest and coldest times of the year is reliant on keeping routine maintenance and inspection checks.
By keeping up regular twice-a-year visits, the owner may even be lucky enough to discover that a part that needs work or full replacement is still under warranty. Longer waiting times between visits reduce the opportunity to spot a problem before a warranty period has reached its expiration date.
What Are Some Maintenance Tasks Those Attending HVAC School Should Know About?
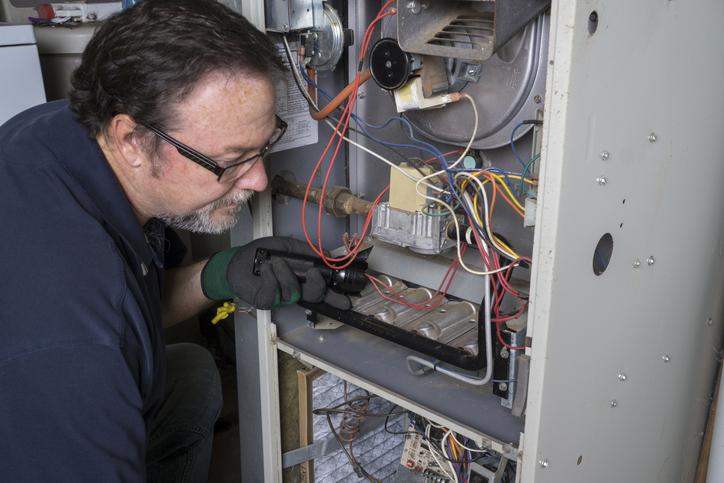
There are a few things to watch out for during routine maintenance checks. On heating systems, the tech will need to check: fuel lines and power sources, inspect combustion chambers, inspect the heat exchanger for cracks or other evidence of damage, as well as check for carbon monoxide leaks.
On cooling systems, the tech needs to take a look at the fans and blowers, thermostat, system controls, ductwork systems, evaporator and condenser coils, and condensate drains to ensure everything is clean, undamaged, and functioning properly. Additionally, fans and motors must be lubricated, and refrigerant levels must be filled.
All of these tasks need to be performed at regular intervals to ensure that systems keep running properly.
Are you interested in training at HVAC school?
Contact North American Trade Schools today to learn more!
The Most Sustainable Construction Materials for Those in Construction School
September 08, 2020
Plenty of work has been done over the last few years to make the construction of necessary buildings more sustainable. That includes taking a look at the construction materials themselves. There are different definitions of sustainability in terms of construction materials. It could refer to products that are locally sourced, how resilient a product is, or how much energy it takes to produce it.
Some professionals are looking at material sustainability as a concept that considers all the energy required to extract a material, produce it, and transport it. They also look at its appropriateness for the environment, the rate at which it degrades, and how often it needs to be replaced. Some construction professionals are also moving towards sustainability by incorporating recycled materials. Read on for a few examples of sustainable materials!
Bamboo Could Dominate the Construction Trades
Bamboo is a construction material with a lot of potential. It can be used in walls, flooring, or furniture, and its benefit is that it is extremely durable and strong. It has a greater compressive strength than even bricks or concrete. Its high strength-to-weight ratio means that it is relatively lightweight and takes less energy to transport than many other materials.

Bamboo is a perennial grass and can be found on several continents. Currently, it is mostly grown in South America and Asia. As a grass, its extremely quick rate of self-generation helps its sustainability. It continues to spread and grow without the need to replant it after harvesting it. Professionals with a career in construction should be aware of one potential downside to using bamboo: it requires treatment to make it resistant to insects and rotting.
Sheep’s Wool Is A Natural Construction Material
Sheep’s wool is a material that has been used for all kinds of things for hundreds of years. These days, it can still be beneficial for the construction industry. Sheep’s wool is naturally insulating. And, while it’ll still need extra treatment to make it properly safe with regards to fire risks, it is a material with a naturally high ignition temperature. As a result, it can be an energy-efficient insulator used in walls, ceilings, and attics.
One of the sustainable benefits of sheep’s wool is that it has similar properties to mineral wool or glass wool but requires less energy to produce. It is, of course, naturally regenerating. One of the potential downsides to using this material is that it requires treatment to prevent the infiltration of insects and fungi.
Cork Doesn’t Have a Significant Environmental Impact
Cork comes from the tree bark of the cork oak. After construction school, professionals can use this material as flooring or sub-flooring. It’s very flexible and resilient, a good thermal insulator, and efficient at absorbing noises and shocks, making it an effective construction material.

The benefit of this material is that it’s sourced entirely from natural sources. The cork oak will continue to grow and reproduce the material after it is extracted from it, making it a sustainable resource to use within the construction industry.
Do you want to make your entry into the construction trades?
Contact North American Trade Schools for more information!
2020 Cabinetry and Woodworking Trends Everyone in Cabinet Making School Should Know About
August 27, 2020 Whenever cabinets or woodwork need a fresh, modern update, there are several routes you can take. You can pick certain colours, or mix and match several of them. You can take a minimalist approach to a room’s design, or you can match traditional kitchen aesthetics with more open-concept designs.
Regardless of which route you take, your job as a cabinet maker is to bring these aesthetic decisions to life. If you want to keep it as fresh as possible, consider choosing from any of the trends we’ve listed below!
Here are some cabinetry and woodworking trends in 2020 you should be aware of.
Mixed Colours and Two-Tone Designs Are In for Today’s Kitchen Cabinets
While monochrome colour schemes for cabinets can tend to dominate certain kitchens, mixing them up is among the biggest trends for 2020. In particular, two-tone cabinets are seen as being on the rise, particularly since they can help make the room seem more expansive and dynamic-looking.
Creating a contrast between two different colours for cabinets can also add greater texture to the room and make the design stand out. A move away from traditionally-coloured kitchen cabinets is one that students in cabinet making school shouldn’t be surprised to see–whether it’s a combination of neutral, saturated or bright tones.
Finding Innovative Ways to Make More Storage Room is Another Hot Trend
If your cabinetry or woodworking project involves a living space that is smaller in size, the use of space becomes increasingly important. Therefore, finding ways to create a greater storage capacity and avoid wasting space is something else that should be at the top of your mind for 2020.
One way to do this is with custom cabinets, which can be used to make better use of tight spaces. Another is by getting creative with the cabinetry you’re working on in order to avoid overloading drawers unnecessarily.

For example, you could designate cabinets and drawers for garbage or recycling, have roll-out drawers and trays for varying purposes, or create dividers for kitchen materials such as utensils. With making better usage of space a hot topic in recent months, you have an opportunity to help homeowners do it in practical and clever ways.
Cabinet Making School Students Should Take Note of Open-Concept Designs
Those doing their cabinet making training will surely appreciate how open-concept designs are becoming more of a trend in 2020 as well. This is especially the case with open-frame cabinets and open shelving in kitchens, getting rid of upper kitchen wall cabinets entirely, or a mix of both.

These can look great from a design and aesthetic standpoint (for example, if you’re using rough-cut wood), as well as in helping make the room appear bigger. Better yet, it can put the house owner’s dishes on display for everyone to see, help them be more creative and productive with how they use space on their countertops, and also showcase their penchant for careful placement and organization.
Want to take cabinet making courses?
Contact North American Trade Schools for more information!
Electrical Power Systems in Buildings Explained for Those in Electrician School
August 25, 2020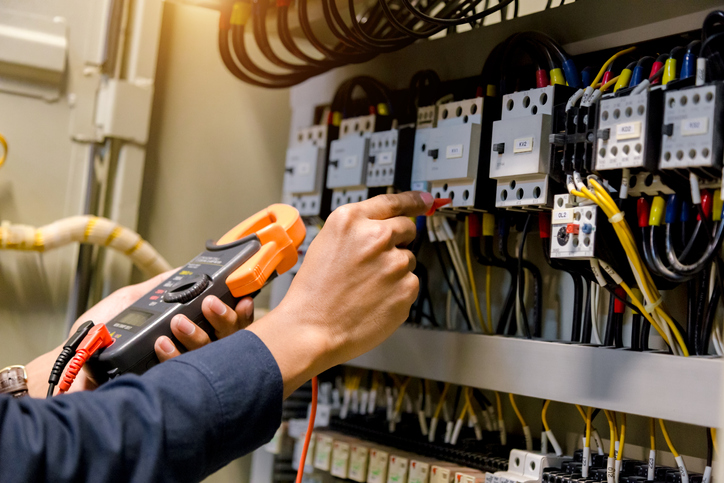
Have you ever wondered how electricity flows into buildings? An electrical power system helps make this into a reality. With electrical power systems and their parts and conductors, they can vary based on how big or small the building is. The processes used to deliver electricity into those buildings can also differ based on the size and nature of the building. Electrical power is delivered and converted to any load in the building using the electricity. The power being distributed within the buildings can differ depending on both the size of the building using it and the system itself.
Understanding how electricity travels towards outlets in rooms in a building is important to know for your electrician career, as well as the necessary procedures for it to travel efficiently within the building, regardless of size. Here’s what an aspiring electrician should know about electrical power systems in buildings.
Important Facts for Electrician School Students to Know
For any electrical power system, electricity is delivered via conductors, which brings power between two different areas of the building. Usually in electrical cable form, conductors deliver electricity to a load device from a generator, and are often made of copper. It’s typically at extremely high voltages that power is transmitted from the plant to buildings, as this is what is most effective. However, smaller buildings have electricity delivered through a meter with lower voltage numbers via a transformer. A switchgear will then be used to not only be an on-off switch for the circuit (with current flow being either automatic or manual), but also to protect equipment from the power supply. Lastly, a load device such as a heating unit is used to turn electricity into energy types like light or heat.

Larger-Sized Buildings: Bigger Spaces Need Bigger Systems
A big building needs an equally big load of electricity. Electrical equipment must also be proportionately sized for the power it would carry, and a transformer would be used to lower the high voltages coming through it. A switchgear—or multiple ones, if the building needs more than one transformer—then delivers electricity to various parts of the building, via either a bus or feeder. Students in electrician school probably already figure this is the case, but large-scale buildings need more power, and electrical systems for these types of buildings are used to study factors like load flow to ensure the conductors and equipment are sized accordingly. With taller buildings such as high-rise apartment complexes, high-voltage lines can be brought into the building in order to place different transformers in rooms on different floors.
Smaller-Sized Buildings and Residences: A Simpler Process for Power
Those in electrician training may already know that smaller buildings and homes do not have a very complex system for distributing electricity. In these instances, either a utility pole or a pad will have the transformer attached to it–reducing the voltage before power goes to the meter. About 13,800 volts from the utility is significantly reduced, with power later going from the meter into the building. It then travels to a panel board with a series of breakers. Various circuit-based components in a home, such as lights or electrical outlets, will have this power flowing toward it. Residential homes often use low voltages of electricity, ranging between 110 and 260 volts. Smaller buildings such as low-rises tend to use step-down transformers, which reduce voltage to various levels depending on the size of the device using it.
Do you want to start your maintenance electrician training?
Contact North American Trade Schools to learn more!

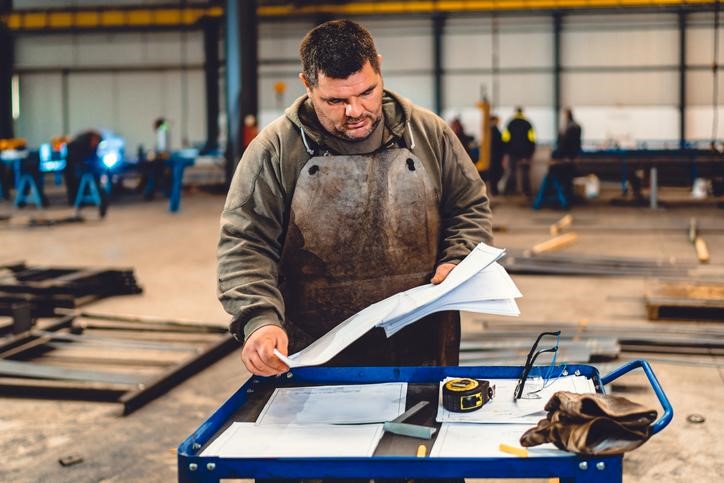
When you first look at welding symbols, you may be overwhelmed by the seemingly arbitrary shapes and numbers. However, despite what you initially think, these symbols do have deeper meaning—and knowing this meaning will work wonders for your future welding career.
These symbols are often found on welding project blueprints, and are used to communicate between the designer and the welder. Without understanding these symbols, you won’t know what specifications a weld requires.
If you’re interested in becoming fluent in the language of welding symbols, read on!
Welding Symbols 101 for Those in Welding Training
Welding figures generally consist of five main figures: arrow, leader line, reference line, tail, and weld symbol (not to be confused with the welding symbol, which represents the entire diagram). Confused yet? Let’s explain them figure by figure.
The arrow, for starters, points to the part of the diagram where the weld is needed. Attached to the arrow is the leader line, which intersects with the reference line. In the middle of the horizontal reference line is the weld symbol: this represents the type of weld required. Finally, at the opposite end of the reference line, you may find the tail—it is only required for special instructions—which forks off in opposite directions.
How to Interpret Welding Symbols
As you’ll learn in welding training, the location of the weld symbol vis-à-vis the reference line determines which area of the joint you should perform the weld.
If the weld symbol is under the reference line, you should make the weld on the same side as the arrow. However, if the weld symbol is located above the reference line, you should make the weld on the opposite side of the arrow. But if the symbol is on both sides of the reference line, then, as you can imagine, you must perform the weld on both sides.
Understanding Dimensions and Angles in Welding Symbols
In addition to shapes and lines, welding symbols can also include numbers that communicate the depth, diameter, and length of a weld–along with the beveling angle, if applicable.
In many cases, you will find the weld diameter (or width) on the left-hand side of the weld symbol. The length of the weld is found on the right. If the length is not indicated on the welding symbol, you should conduct the weld from the beginning of the joint to the end.
The reference line also plays a part in understanding the dimensions of a weld, just as it did for the weld type. Any dimensions indicated below the reference line pertain to the joint on the side of the arrow. Dimensions above the reference line pertain to the joint on the opposite side. If dimensions are indicated on both sides of the reference line, then you should weld both sides of the joint.
If these numbers, figures, and placements seem complicated, fret not—welder technician training is there to help you decipher these symbols with ease.

Do you want to get your welding diploma?
Contact North American Trade Schools to get started!

A career in home inspection doesn’t just involve understanding how the various systems and areas of a house work. You’ll need to have several other types of skills under your belt as well. You’ll want to be sure you’ve mastered these skills in order to make sure the home is in the best possible condition.
From understanding electrical systems and roofing, to effectively drafting reports and communicating to buyers, a successful home inspection career is made of many different things. Here are five skills necessary for success in your home inspection career.
Firstly, a Strong Understanding of the Craft Is Necessary
It goes without saying that understanding how home inspections work, as well as having a foundation in construction, is needed in order to succeed as a home inspector. You should be able to understand how various aspects of construction work, as well as the procedures of a home inspection and which tools are necessary for expediting the process. With any home inspection career, technical knowledge is key—whether it’s with structural components, heating, insulation, roofing, or any other area of a home.

Being an Excellent Communicator Is Also a Major Plus
The bedrock of any home inspection is the ability of the inspector to explain to the prospective buyer what the results of the inspection were, and how ready it is for the buyer. This is important not only for verbal communication, but for written reports as well. Anyone hoping to become a home inspector will need to be a great communicator in order to provide the most detailed report possible. Effective communication will help reassure potential buyers that they’ve chosen the right home, and that all systems are a go for them to move in.
A Good Eye for Problems Is Huge for Your Home Inspector Career
If you aren’t able to deftly identify and diagnose problems with the home, you’ll have a hard time finding success. The ability to detect issues in any kind of home, and know what is necessary to fix them, is crucial. It’s important to understand not only how each component functions, but what factors would make a repair or full replacement necessary. Alerting prospective buyers to any issues that could delay them moving in—or even make the home unappealing for them—is essential.

Understand the Importance of Time Management
Another significant aspect of your home inspector career is being able to manage your time effectively. Not only will you be trying to manage how much time you spend actually inspecting the home, but you’ll need to take into account how long it will take for you to travel there. You will also need to consider how much time you’ll need to get reports ready, and how much time will be necessary for all processes to be complete.
Problem-Solving Skills Are Also a Major Asset in This Career
Lastly, one of the other keys to success in home inspection is the ability to problem-solve. You’ll need to showcase these abilities throughout your inspection, especially when something is not quite right in the home. It’s important to analyze what issues may occur during the inspection, and be able to quickly come up with solutions. A strong attention to detail is also beneficial, as you’ll want to carefully go through each area with a fine-toothed comb so that all potential issues with the property are accurately identified.
Do you want to start your home inspection training?
Contact North American Trade Schools for more information!
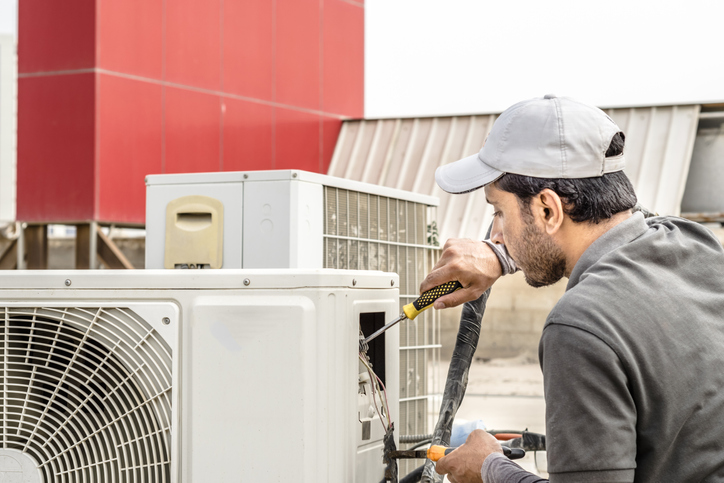
It’s not just the quality of an HVAC unit that counts, but how it’s installed. As an HVAC technician, your responsibility is to install these systems and detect any issues that can arise within their many different components and figure out how to correct them. However, there are several mistakes you can find yourself making if you aren’t careful with the installation process.
Since learning how to maintain and install HVAC systems are a significant component of your job, it’s just as important to know what not to do as it is to learn best installation practices. Here are some of the more common mistakes you may find yourself making after your HVAC training.
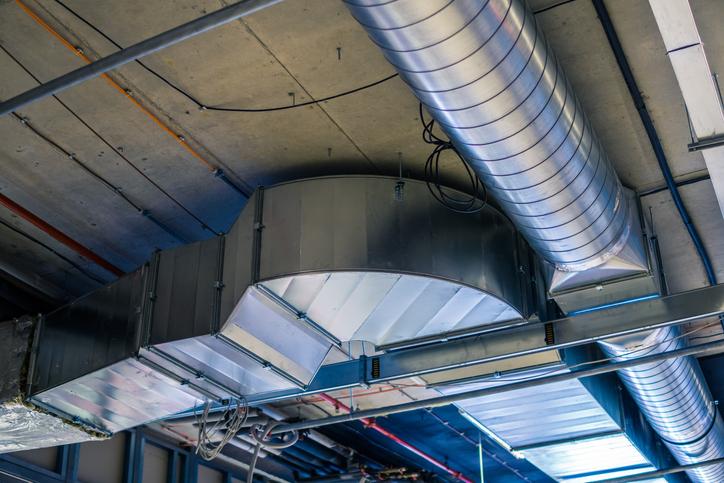
Ductwork is One of the Most Important Factors to Watch After HVAC School
It’s important to be sure you choose the correctly-sized duct for the HVAC unit you’re installing, and use high-quality materials in the process (e.g. using a heavy-duty sealant instead of tape, and adding R-6 insulation wrap).
If you don’t, it can create issues with both air flow and leaking, and potentially result in gaps, dust, loud noises, or an overheating furnace. As a result, the unit itself won’t function properly, and those living in the home will likely see their energy bills rise. Not only that, but up to 30% of the HVAC unit’s overall output can be compromised when not properly insulated.
When it Comes to the Furnace, Size is Everything
By “size is also everything”, we don’t mean they need to be as big as you can possibly get them. Rather, the important thing to consider after finishing your HVAC training is to find a furnace that is sized proportionately to the one previously in place, and is also a newer model.
This not only helps with the flow of air in the home, but with the system’s efficiency as a whole. Should you not pick a correctly sized furnace, problems could occur. This includes the unit overworking itself to provide better cooling or heat if too small, or uneven temperatures if too big. However, be sure to double-check that the size calculations are correct, even if it’s technically the same size as the previous furnace.
Make Sure Air is Properly Distributed at All Times
This is one of the most crucial parts of a successful HVAC installation, as it can otherwise lead to uneven cooling or heating. HVAC school students should be aware that proper air distribution design is a must, and that the ductwork is symmetrical in size to the unit’s output capacity.
To achieve this, apply new ductwork rather than the preexisting one, and be sure it’s distributing air evenly. Another of the more important aspects to keep in mind is proper ventilation. You’ll need to ensure the HVAC unit you’ve installed has a strong balance of both hot and cold air, and that the air is balanced and flows cleanly throughout the home.
Want to start your HVAC technician training?
Contact North American Trade Schools today!
3 Things Everyone in Home Renovation College Should Know About Home Remodeling for People with Disabilities
July 30, 2020
When someone has a disability and wants to live comfortably in their own home, it must be repurposed to accommodate their needs. Remodeling a home with accessibility in mind can be tricky, but there are ways it can be done. When prioritizing the needs of those with disabilities, you’ll need the right tools and an eye for design. Whether physical or cognitive, you can get creative with how you remodel homes and make a positive difference in their quality of life.
While different people will have different needs for improving their home’s accessibility, these are some general tips that can help guide you along with these types of projects. Here are three things you should know about home remodeling for people with disabilities.
Make Sure the House Is as Easy as Possible to Navigate
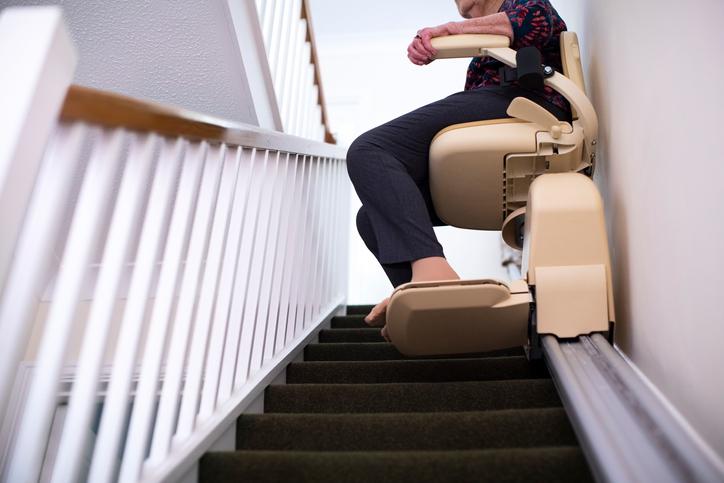
For any remodeling project with disability in mind, the top priority must be to ensure those living in the home can have optimal mobility within it. This means you must make it so that they can navigate all areas of the home with ease. For example, you can install a stair lift on flights of stairs, so that those with mobility difficulties can sit on the lift as it moves up and down. You’ll also want to make sure the home’s flooring is smooth and wheelchair-friendly, and that the kitchen is also re-designed for accessibility. Furthermore, make sure all doors in the home are wide enough for them to easily enter and exit (though this may be a time-intensive part of the project), and that doorknobs are low enough for those in a wheelchair to open them.
When You Become a Home Renovation Technician, Focus on the Outside Too
If you’re remodeling the home of someone with a disability after your home renovation technician training, keep in mind that the accessibility of both the interior and exterior of the home should be accounted for. Therefore, think about how outdoor areas such as the backyard can be remodeled, such as widening doorways. You can work on paths so they can be more friendly for those with reduced mobility, or you can try to make the ground more level so that those in a wheelchair can go outside without risk of falling. One of the easiest ways to make the exterior more accessible is to add ramps in the front and the back, so those living in the home can easily move in and out.

The Bathroom Is Also a High-Priority Area in the House, Especially for Safety
Perhaps one of the most crucial areas of the home to remodel is the bathroom, as not doing so can create safety hazards for the person living in it. After you become a home renovation technician, the most important parts of a bathroom to repurpose are: the doorways (to ensure they are wide enough for easy access), sinks and countertops (so that they’re low enough to be used by those in a wheelchair), bathtub (a roll-in or walk-in bath is likely your best bet) and the shower (installing a walk-in shower is ideal for safety and mobility reasons). Another feature you can add to the bathroom is grab bars, which improve accessibility for those living in the home, since they can grab onto them whenever necessary—for example, on the sides of the toilet.
Do you want to take courses at a home renovation college?
Contact North American Trade Schools for more information!
Ready to Become a Home Inspector? Here’s How to Inspect Homes Safely During the Pandemic
July 24, 2020
The ongoing COVID-19 pandemic has impacted virtually every industry, including home inspection. As a result, changes to how home inspectors approach their day-to-day responsibilities are necessary, leading to a re-think in how home inspections are performed.
Between practicing physical distancing and staying two meters apart from others, to limiting the number of people allowed in the home during the inspection, to wearing protective headgear at all times, there are many ways you can get around the circumstances surrounding the pandemic and successfully complete an inspection. Here are some tips for how you can safely inspect homes during the COVID-19 pandemic.
Make Sure Safety Precautions Are Taken by Those Living in the Home
Before starting any home inspection during the pandemic, it’s of the utmost importance that all parties are kept safe, healthy, and are not vulnerable to possible infection. Among the steps that should be taken include asking those living in the home a series of questions regarding the virus. These include asking whether or not they’ve been exhibiting COVID-19 symptoms within the past two weeks (or if they have previously tested positive), if they’ve been in contact with any suspected or confirmed cases of the novel coronavirus, or if they’ve been travelling anywhere in recent weeks. Other steps you can take include emphasizing the importance of physical distancing while the inspection is ongoing, signing inspection contracts online rather than in person, and restricting how many people can be in the home during the inspection.

During Your Home Inspection Career, Protect Yourself in Times of Crisis
Although it’s incredibly important to make sure people in the home protect themselves during the inspection, anyone wanting to become a home inspector should be certain that they’re maximizing their own protection during a crisis situation such as a pandemic. This includes wearing latex gloves, face masks, protective headgear, and any other clothing that can help shield from infection.

Additionally, you would be wise to wash your hands regularly, disinfect and clean surfaces you have touched during the inspection after it has concluded, and keep hand sanitizer with you at all times. Even if you are asymptomatic, you can still carry the virus and transmit it unknowingly to others, so protecting yourself and those in the home from any potential risks is a must. Should you exhibit any symptoms yourself, or be in contact with any suspected or confirmed cases, postpone the inspection and reschedule for when you will be healthy again.
Lastly, Consider Using Videoconferencing Platforms for Inspection-Related Purposes
As much as you may do your best to prepare yourself for circumstances like a pandemic during your home inspection career, there is a likelihood that some clients may not be comfortable with having inspectors in their homes due to fear of contracting the virus and the importance of physical distancing. If you have clients who are reluctant to allow new people into their homes even for an inspection, you can suggest that they not be present in their home for the inspection, and that any follow-up be done via videoconferencing. This can be done on an application such as Zoom, Google Meet, or FaceTime. This way, you can discuss matters related to the inspection and reviews/reports without needing it to be in person, and could be a creative solution given the crisis.
Do you want to start your home inspection training
Contact North American Trade Schools to find out more!
Considering Pre-Apprentice Maintenance Electrician Training? Here’s a Day in the Life of an Electrical Technician
July 21, 2020
Heading out on any new career path, it’s normal to have a level of curiosity about where that path will lead. You might wonder about what your responsibilities will be, or what kinds of environments you can expect to work in, or have other important questions as you look forward to your coming future.
If you find yourself in this situation while considering a construction and maintenance electrician pre-apprenticeship program, take a look at this quick guide to a day in the life of an electrical technician. It should give you some decent answers to many of the common questions regarding this career path, and get you excited for your future.
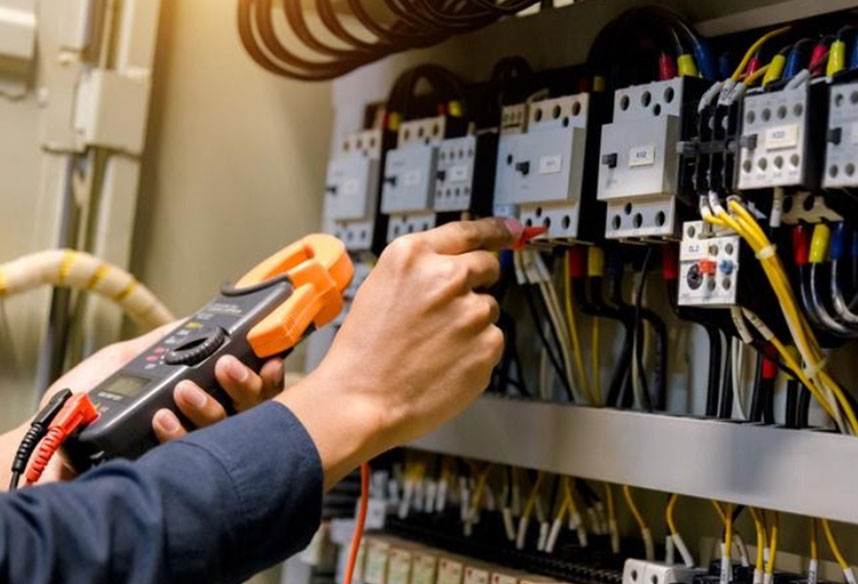
Pros With Pre-Apprentice Maintenance Electrician Training Use Diagnostic Tools to Find Problems
As much as modern electronic technology offers many benefits, it also has this habit of breaking down in a way where the problem isn’t obvious. This means electrical technicians often spend a part of their day using diagnostic tools to try and locate where the problem lies in a faulty machine or electrical setup, so that it can later be fixed.
A couple examples of tools commonly used in this work include: voltage testers, which verify whether voltage is present in wires, outlets, switches, or other electrical components. Another tool is circuit breaker finders, which identify which breaker controls an outlet. Several variants on these tools also exist, with each having slightly different capabilities and applications. You will get to learn about many of these different instruments, and how to correctly use them, when you begin your pre-apprentice maintenance electrician training
Electrical Technicians May Do Repair or Maintenance Work on Electrical Systems
Once a problem has been identified within an electrical system, electrical technicians are frequently the ones called upon to fix it. The scope of this work can be quite wide, with many interesting challenges for qualified professionals to tackle.
After your pre-apprenticeship program, your electrician career in construction could involve everything from fixing or replacing light fixtures, to redoing faulty wiring, maintaining, or repairing motors in equipment, and many other interesting tasks.
Needless to say, there’s a lot of skill that goes into performing these tasks well, not the least of which is knowing how to complete the work safely. Attending a pre-apprenticeship program like the one at North American Trade Schools will give you the opportunity to learn repair and maintenance techniques hands-on. This can help ensure that by the time you enter the workforce, you know exactly how to keep yourself and others safe when working with electrical equipment and components. It’s a foundational skill that offers benefits to last a lifetime.
You May Have to Perform Inspections as a Maintenance Electrician
One of the most important parts of many electrical technicians’ days is performing inspections of electrical equipment and systems to ensure they are working as they are meant to. Any deficiencies that are noticed in the process of these inspections are typically noted down, and likely lead to diagnostic and repair work later on.
Inspections of this nature are critical. They might mean the difference between catching a problem early on, versus being confronted with an unexpected breakdown or scrambling to get it fixed. In Ontario, electrical inspections are mandatory for renovations, new construction, and in many industrial and business settings. This means there is no shortage of this type of work out there.
Want to get your electrician diploma?
Contact North American Trade Schools for more information about how to become a construction electrician by enrolling in a pre-apprenticeship program!


