Author: toppyhem
3 Steps to Starting Your Own Business after Construction School
April 07, 2020
If you are business-minded with an entrepreneurial spirit, you might be considering starting your own business after graduating from a construction program. Business owners can enjoy a flexible schedule, ample learning opportunities, and competitive remuneration.
However, starting a business is far from simple. Even the best construction worker in the world will need to conduct market research, have a basic understanding of finance and accounting, and learn about law and marketing.
Read on to find out more about what it takes to start your own business after construction training.
Step 1: Do Your Research
Before even thinking about launching your own business, you will need to conduct in-depth market research to establish demand and rates. Is there demand for another construction business in your area? How much are people paying on average for typical projects?
If you have any friends or acquaintances working in the industry, make sure to ask them for any insights. You could also do some research online and use social media to identify your main competitors, or even conduct surveys and organize small focus groups.
Use this research to form your business plan and identify your unique selling point (USP). What can you offer customers that no one else can? Is it a better price point? Or expertise in one particular area? Whatever it is, use it to your advantage in a career in construction.

Step 2: Prepare an In-Depth Business Plan for Your Career in Construction
Once you’ve done your research, you’re ready to write your business plan. Make it as detailed as possible,marking out your goals for each month and including estimated annual turnover and gross profits. This will be particularly useful if you need to apply for funding from a financial institution.
This should also give you an idea of how much money you’ll need to get started. After studying at construction school, you should have a good idea of all the tools and equipment you’ll need to work as an independent construction worker.
Calculate how much you’ll need to invest in these, as well as in vehicles, marketing, and software. It can take a while for any new business to start making money, so make sure you have a cushion for the first few months.
You’ll also need to decide who you want to work for. Do you want to work for residential property owners or businesses? Are you looking for small jobs or bigger, long-term projects? As well as this, how many staff will you need to hire? Or will you choose to work with contractors? Thinking about these things early on will help you form a clearer picture in your mind of what your business will look like, and what you need to do to get it off the ground.
Step 3: Check the Paperwork
As with any new business, you will need to make sure that you’ve completed all of the necessary paperwork correctly. You will need to register your business for an EIN, and have all the right licenses and permits. You will also need to get insurance to protect yourself and your business.
If you’re concerned about legalities or taxes, it might be a good idea to hire a lawyer or an accountant. You could be the best construction worker in the world, but if you can’t take care of the administration of your business, it won’t go far!

Do you want to learn more about construction trades?
Contact North American Trade Schools for more information!

To the untrained eye, all wood types may appear somewhat similar, apart from slight variations in colour. However, cabinet makers know that not all woods are created equal. Each has its own grain, texture, and density that makes it well-suited for a particular purpose – and it’s up to cabinet makers to discover what that purpose is.
Generally speaking, hardwoods like maple and hickory are great for projects requiring sturdy framing, whereas softer woods like fir and spruce are ideal for pieces like baseboards and wall studs. But even within these two overarching categories are a wide variety of wood types with unique characteristics.
If you’re interested in cabinet making school, read on to learn all about the popular types of wood you’ll encounter in your studies!
Pine: A Popular Wood Type for Construction
This lightweight softwood is an excellent choice for structural projects such as roof trusses and joists because it is unlikely to swell and shrink. Couple that with its amber colouring and knotty characteristics and you’ve got a wood type that adds a rustic effect to cottages, cabins, lodges, and more. If your pine project is exposed to the elements, however, it’s important to treat it beforehand to prevent it from rotting over time.

Maple: A Durable Wood Cabinet Making School Graduates Will Love
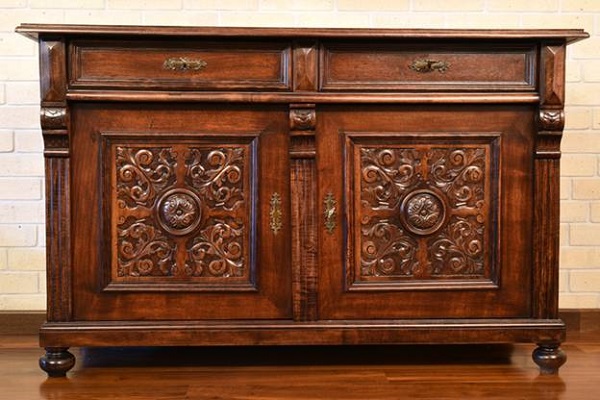
With a smooth, even wood grain and an ability to work well with a variety of finishes, maple is a popular choice for home decor pieces. It is also one of the hardest types of cabinetry wood, making it great for durability as well as design.
Maple cabinets usually come in a creamy white hue, but a cabinet door panel may feature some reddish-brown colouring. You will also find yellow and pink tones in the wood, along with tan coloured mineral streaks that darken with stain.
Oak: A Common Wood You’ll Encounter in Cabinet Making Courses
If you’re interested in cabinet making training, you’ll quickly learn about the power and popularity of oak. This versatile wood has been used in fine furniture for years and offers numerous variations to suit a wide variety of projects.
Red oak – especially selections with complex flame or arched grain patterns – is one of the most popular hardwoods for cabinets. White oak, in contrast, offers straighter grains but tends to be more expensive.

Spruce: A Sturdy Wood Selection for Cabinet Makers
If you’re looking for the perfect wood type for economy or utility purposes, spruce fits the bill. When it comes to softwoods, spruce is more dense and solid than pine. However, its straight grain exhibits less character than other softwoods, so it’s used more for its strength than its style.
Curious to learn more about cabinet making courses?
Contact NATS for more information about our programs.

Heating, ventilation, and air conditioning (HVAC) technicians specialize in keeping houses and the people that live in them warm in the winter and cool in the summer. Read these tips and tricks to make your customer’s home a firelit haven, sheltered from the icy elements outdoors.
Seal Any Gaps When You Become an HVAC Technician
One of the main causes of a cold house is gaps around the doors and windows that let hot air out and cool air in. When you become an HVAC technician, the first thing you should do when you get a new client is examine their home for any unsealed gaps.
They can use an acrylic-latex caulk to seal any gaps around the window frames or a spray foam that will expand into any unfilled crevices. This will also help clients to save on their energy bills, as they will need less energy to heat their homes.
If the house has a fireplace, the chimney pipe could be letting cold air in,too. When the fire is not lit,advise clients that they should close the damper. However, make sure they know to check that all embers have fully burnt out – otherwise, smoke could fill their home.

Reverse Any Fans
You might assume that fans are only useful in the hot, summer months when you need to cool down. However, fans can also keep a house warm. If you reverse the direction of the fan so it’s spinning clockwise, it will stop the hot air from rising, and push it back down to warm the room. This can be a very useful tip for many clients.
Look After The Furnace and Outdoor Unit
The majority of HVAC systems have an outdoor unit attached to the outside of the house. Even though this is built to withstand cold temperatures and heavy snow, it is still a good idea to shelter it in someway. You could build a small, temporary shelter out of wood, or use a plastic cover. This will protect the fan from freezing so that your house stays warm all winter.
At HVAC college, you may also learn the importance of checking the furnace filter. This can become dirty over time and needs to be regularly cleaned and replaced. A dirty furnace filter will not be as effective, and will mean that the house needs to use more power to generate heat.
Thermostat or Portable Heater? It Depends
Both thermostats and portable heaters have an important role to play during winter. To save energy, it’s recommended that clients program the thermostat so that it automatically turns down when they are asleep or at work. The recommended temperatures are 20 degrees Celsius in the mornings, evenings, and weekends when at home, and 10 degrees Celsius when at work, asleep, or out of the house.
If a client needs to heat up their house fast,you should advise them that turning the thermostat to max is not the answer. This will drain energy and could damage the thermostat. It also won’t be effective, because the thermostat is designed to maintain a constant temperature.
In these situations, it’s better to use a portable heater. These can generate a lot of heat from electricity in a short amount of time. However, clients need to be sure to switch them off when they are not in the room, so as not to create a health and safety risk.

Do you want to find out more about HVAC certification?
Contact North American Trade Schools today!

Have you ever found yourself staring at the properties on sale in a real estate agency’s window even though you’re not looking to buy? Do you love troubleshooting problems around your own home? Are you passionate about property in general? If so, then a career in home inspection could be for you!
Home inspectors offer a consulting service to anyone looking to buy a residential or commercial property. They evaluate a home by inspecting its roofing, structure, electrical, heating, air conditioning, exterior, insulation, and interior.
Qualified home inspectors can benefit from competitive salaries and a flexible schedule. Read on to find out whether you should consider becoming a home inspector!
1. There is Steady Demand for Home Inspectors
For as long as people and businesses continue to buy property, there will be demand for home inspectors. A home inspection is always recommended, if not required, before purchasing a property.
There are millions of properties across Canada and real estate transactions are always taking place, meaning that a home inspector is unlikely to ever be out of work! The demand for home inspectors in Canada is predicted to remain steady over the next few years. This makes it a great career for anyone looking for job security.
2. Become a Home Inspector to Earn a Competitive Salary
Home inspectors can earn well above minimum wage, especially as they become more experienced. The average salary for a home inspector in Canada is more than $32 an hour, which equates to around $66,500 a year. This is significantly more than the average salary in the country.
3. Help People with One of the Biggest Investments of their Lives
If you’re a people person and are looking for a rewarding career that involves helping others, a home inspection career might be for you! While it might not be the first job that comes to mind, home inspectors help people with what could be the biggest investment of their lives.
Buying a home is not a small decision.As a home inspector, you are helping others to make the right choice, and your advice could help to save your clients hundreds of thousands of dollars.

Because home inspectors need to have strong interpersonal and communication skills in order to work with the public, it’s also a great career for anyone who is good with people. In home inspection training, students will learn communication skills as well as practical knowledge about homes to help equip them for both of these aspects of the job.
4. Enjoy a Flexible Schedule and Start Your Own Business
One of the other great things about being a home inspector is the flexibility that it offers. You can choose to take on work and schedule inspections when it works for you, making it easy to balance around your other commitments. You also have the option to start your own business to give you even more flexibility.
5. Don’t Break Your Back!
A home inspection career is hands-on without being physically demanding. If you’re interested in construction, for example, but not keen on the physical aspect of it, or want something that you can do as you get older, home inspection could be a perfect fit.
Additionally, if you’ve spent a lifetime working in construction or HVAC and are now looking for a new challenge, home inspection could be for you. It will allow you to put your knowledge and practical background to good use.
Do you want to become a home inspector?
Contact North American Trade Schools today!

Since heat pumps are such a common tool in the heating, ventilation, and air conditioning (HVAC) industry, aspiring technicians should expect to become very familiar with them throughout their education and future career. Read on for an introduction to heat pumps to get you warmed up!
Learn How Heat Pumps Work With an HVAC Diploma
Heat pumps are not a new technology. In fact, the first heat pump was invented in 1948 by Robert C. Webber. Since then, the technology has been developed to resemble the air conditioning and heating units we have in our homes and offices today. HVAC technician courses will give you the opportunity to learn hands-on how this technology works.
Heat pumps can provide both heating and cooling services. In heating mode, heat is absorbed from outside by the condenser coil and transferred to the interior space via air vents. Even on cold winter days, heat pumps are able to collect warm air from outside. However, if there’s not enough warm air outside, heat pumps can use electric energy or an additional gas furnace to provide extra heat.

In air conditioning mode, the cycle is reversed. Warm air inside the house is pulled into the system with a motorized fan and transferred outside, usually behind or underneath the condenser coil. Cool and dehumidified air then enters the home through the air vents.
Heat Pumps are Energy Efficient
Eco-conscious homeowners will be relieved to discover that heat pumps are incredibly energy efficient. As you will learn in HVAC technician training, heat pumps generate 4 units of thermal energy per 1 unit of electricity used – that’s an efficiency rating of 400%!
In contrast, electrical heaters are 100% efficient, meaning that they generate 1 unit of thermal energy for every 1 unit of electricity. As well as this, heat pumps generate zero emissions, so are a great option for people that want to warm or cool their homes without damaging the planet.
Air Source vs. Ground Source Heat Pumps
As an HVAC technician, you will need to know about two main types of heat pumps: air source and ground source. Air source heat pumps are the most common type and absorb or reject heat from the outdoor air.
As the name suggests, ground source heat pumps get heat from the ground or from water. These are sometimes referred to as geothermal heat pumps and are actually slightly more efficient than air source systems. However, they are more expensive and complicated to install as the systems will need to be built into the soil around a home.
What are the Main Heat Pump Parts?
Air source and ground source heat pumps are made up of a number of components. These include:
- Compressor– to move the refrigerant through the system
- Control board – to control whether the system is in cooling or heating mode
- Condenser coil – to transfer heat outside in cooling mode
- Evaporator coil–to transfer heat inside in heating mode
- Refrigerant – a chemical substance that moves heat through the system
- Thermostat – to choose the desired temperature
Are you interested in a HVAC diploma?
Contact North American Trade Schools to find out more!
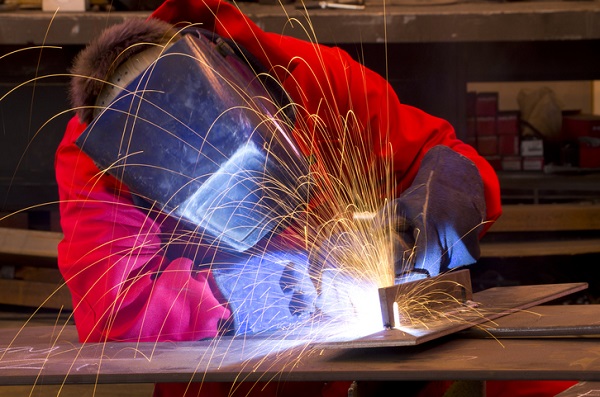
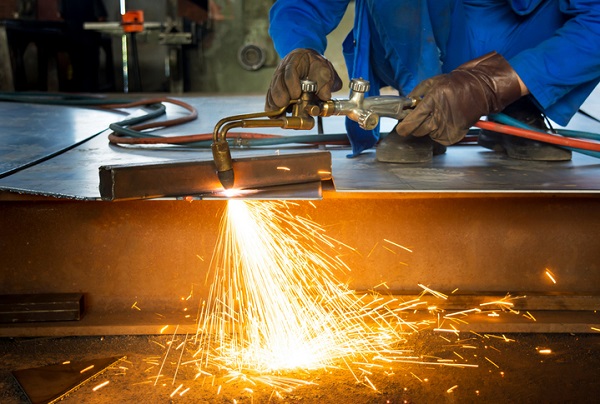
A professional welder is able to master multiple welding techniques specific to different metals and industries. Flux cored arc welding (FCAW) is a variant of arc welding and is often used to join heavy steel plates together.
FCAW differs from other welding processes as it can be done outside with minimal equipment and produces impressive results. It is one of the fastest manual welding processes and can produce more than 25 lbs of welded metal per hour. By comparison, gas metal arc welding (MIG) generates substantially less.
Read on to learn more about FCAW before practicing it for real in the workshop!
Learn How Flux Cored Arc Welding Works at Welder School
Similar to MIG, FCAW involves joining two pieces of metal together using heat. An electrode is continuously fed through a welding gun onto the joint. The electricity short circuits to generate heat, or an ‘electrical arc’, that causes the electrode to melt. This forms a molten puddle that joins the metal together when it cools.
Flux cored differs from other welding processes as the electrode contains a flux compound and shielding gas, which is released when heated. Shielding gas is normally made up of carbon dioxide or argon carbon dioxide, which protects the weld pool from contamination by oxygen or water vapour. This is normally added externally, however, in FCAW it is released automatically in a process called ‘self shielding’. Taking welding classes will teach you even more about these different aspects.
The Difference Between Self Shielding and Dual Shielding
There are multiple versions of FCAW, including self shielding and dual shielding. In self shielding, no external protective gas needs to be applied, as the gas released from the electrode is enough. This means that welding can be performed outside without concerns about windy weather contaminating the heated pool.
By contrast, dual shield welding uses an external shielding gas as well as the inner shield for extra protection. At welding school, students will gain practical hands-on experience performing these processes in the workshop.
The Advantages of Flux Cored Arc Welding
FCAW is a highly productive arc welding method and can weld large volumes of metal in a short time period. The electrode is continuously fed through, meaning that the operator does not need to stop and start to introduce a new electrode. Because of this, it is a common technique for welders working in the construction and maritime industries and who usually work with large, heavy metals.
FCAW is one of the only welding processes that can be completed outside. It is less easily contaminated by dirt or rust because of the flux compound, and requires minimal equipment. You do not need a heavy gas bottle, meaning that welders can move around and work outside of a workshop if needed. As well as this, FCAW can be used on mid- and low-alloy steels, stainless steels, and some high nickel alloys.
…and the Disadvantages of Flux Cored Arc Welding
However, there are some disadvantages that come with flux cored arc welding. FCAW produces high levels of noxious smoke, which can make it difficult for the welder to see their work. There is also a risk of the finished metal being porous as gases escape through the metal as it cools.
In addition, the wire and filler in FCAW is more expensive than in other arc welding processes. Lastly, FCAW cannot be used on non-ferrous metal likes aluminium, meaning that it is less flexible than other welding processes out there.
Are you interested in welder school?
Contact North American Trade Schools to find out more!

However, many of the tools and techniques that are still used today are rooted in history. For example, many hand tools are variations of those used in Ancient Greek, Roman and Egyptian traditions.
Read on to discover more about the history of cabinet making and its lasting impact on the trade today.
Earliest Examples of Woodwork and Cabinet Making
By definition, cabinets are furniture used to store things and usually feature doors, drawers and/or shelves. It’s thought that early human civilizations used wooden cabinets to protect food products and fire wood from rain and vermin. Archeologists have found evidence that Neanderthals used stone and bone to work wood over 300,000 years ago – which is probably how the first ever cabinets were made!
In the Renaissance era, cabinets became more prestigious items, and would be made of precious wood and feature intricate detailing like marquetry. The cabinet was no longer just a simple storage unit – it was a work of art.
André Charles Boulle was one of the most famous cabinet makers of this era, and his work remains on display at museums and galleries across Europe. It’s well worth seeking these pieces out at some point in your cabinet making training if you want to see the work of a true master of the craft.
Around this time, cabinets were used to store paper and valuable possessions. Cabinet makers started to introduce writing areas, which led to the invention of bureaus and desks with cabinets.
Cabinets were made larger and larger, and were often the most dominant piece of furniture in a room. All of this combined meant that cabinet makers were one of the most highly regarded woodworkers.
The Industrial Revolution and Introduction of Power Tools Used in Cabinet Making Training
The industrial revolution in the 18th century impacted almost all trades. Electricity was then invented in the mid-19th century, and these two factors changed the cabinet making trade forever.
The industrial revolution changed the cabinet making industry forever
The circular saw was invented at the end of the 18th century, and meant that cabinet makers and carpenters could cut wood much faster. And in 1895, the first ever electric hand drill was invented. Variations of both of these inventions are still used in cabinet making courses today.
Cabinet Making Post-World War 2
In the 1950s, cabinet making became a popular hobby. People would spend time designing and building their own bespoke cabinets.
For professional cabinet makers in the 1950s, technical advances were continuing to transform the trade. The invention of numerical control machines meant that cabinet makers could now ensure that they were cutting all wood the same length and dimension without having to spend time measuring and double-checking.
The Cabinet Maker Today
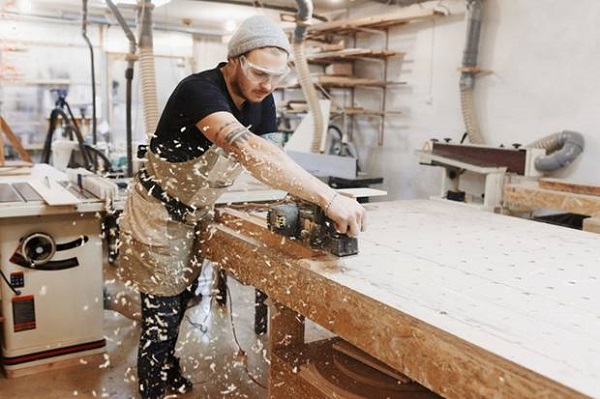
Nowadays, cabinet makers need to know how to cut, shape, and join wood, and they need to be familiar using hand and power tools. Cabinets themselves have also changed. A cabinet is no longer the centre of the room, but often refers to built-in kitchen and bathroom cabinets.
While the cabinet making trade has changed throughout history, it remains an in-demand profession worldwide, and a very rewarding one.
Are you interested in cabinet making courses?
Contact North American Trade Schools to find out more!
4 Things Electrician School Students Should Know About Roughing In Electrical Wiring
February 04, 2020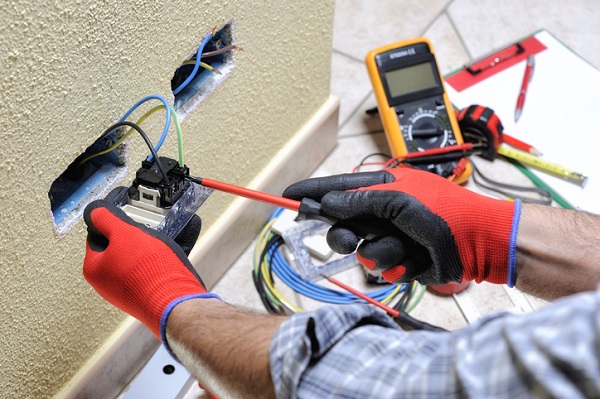
If you want to become an electrician, this is a tool you’ll definitely want under your belt.
Roughing in electrical wiring is something any construction electrician will want to get right, regardless of which part of a house they’re working on. After the framing and initial wiring has been done, you’ll want to make sure the rough-in — the part of the process where the cables are pulled through framing members and studs before going into boxes — is completed before ceilings and walls are closed.
There’s an art to doing it the right way, and any aspiring electrician can do well to keep a few tips in mind. Here are some tips for getting roughing in electrical wiring right if you’re studying to become an electrician.
Before Pulling Wires, Be Sure to Straighten Them Out
Straightening out wires will make the process of pulling cables through holes much easier. To do this, straighten the cable between your forefinger and thumb while you’re walking along its length.
After pulling it through the holes, push it back so that there’s still some slack, just in case the cable gets cut too short and more length is necessary. Also, make sure cable protection plates are installed before pulling anything, and that they are drilled close to the edge of a stud. They will need to be set back at least 1 to 1 ¼ inches away from the edge of a wood-framing part.

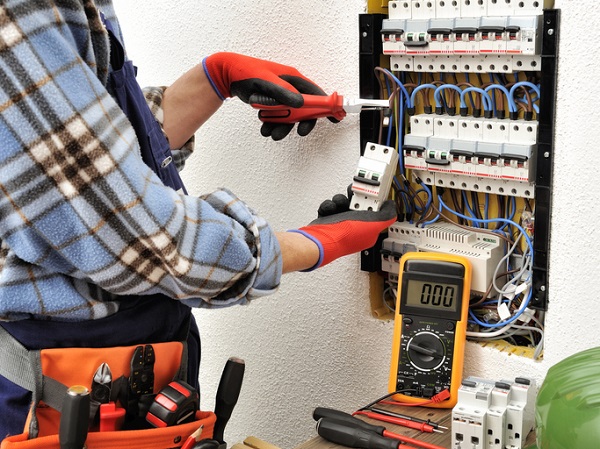
Picking the Right Electrical Box Will Go a Long Way
During your electrician career in construction, you will have a choice of electrical boxes to use for different projects.The most common ones are made of fiberglass or plastic.
Depending on the size of the wire gauge, they can be used for large appliances, living spaces, bathrooms or kitchens. Plastic boxes are typically less expensive than fiberglass models, although they aren’t as tough.
Be sure to pick a box with a minimum volume of 20 cubic inches. Larger boxes will make the wiring process easier, so you should pick one large in size that is made with the right materials for the project.
If you’re working on a ceiling fan, you’ll need a special type of electrical box attached with a brace, so that it can make the fan more stable and absorb its vibrations.
Make Sure All Holes are Well-Aligned and Straight When Drilling
You’ll want to be sure that holes are straight and symmetrical in height, so that pulling cables is as easy as possible. If they are pulled at varying heights or angles, it can cause cables to snag on sharper edges.
Once ¾ inch holes are pierced into the framing members above the boxes, centre the part on the stud before bracing the drill. Use your thigh to put pressure on it to make drilling the studs easier.
Ensure the holes are consistently kept at the same height, so that you can more easily fish cable through. You’ll be able to pull cables and drill holes once all boxes are nailed correctly.

After Electrician School, Don’t Over-Bend Any Cables
While bending cables, make sure they are not bent at more than a radius of 2½ inches. You can avoid over-bending them if you drill holes at a range of 8 to 12 inches above or below boxes, so that the cable can go upwards or downwards into them.
This is important for students at electrician school to remember, because the conductors and sheathing can be weakened if the cable is bent incorrectly or too sharply, resulting in a fire hazard.
In any case, it’s important to remember that you’ll need to be as gentle as possible when wiring, to avoid damaging the conductors, as they will carry the electricity. Conductors are also vulnerable to stress and fatigue from overbending, or bends that are too sharp.
Want to get your electrician diploma?
Contact North American Trade Schools for more information!
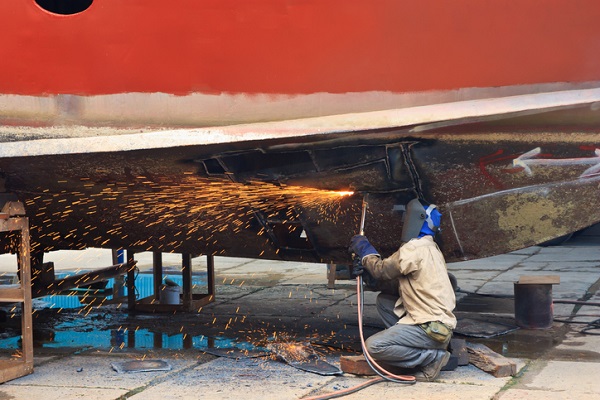
Acetylene torches are to HVAC (heating, ventilation, and air conditioning) technicians what calculators are to mathematicians: an essential tool with many uses. Providing one of the most powerful methods of welding and cutting metals, this tool is widely used in the industry to fix leaks and solder line sets.
But like any gas-powered tool, if you want to use it properly, there are a few key things you’ll need to know and some safety regulations you’ll need to follow. Read on to learn all about acetylene torches and the role they will play in your HVAC career.
What is Acetylene & How Can You Use it?
As one would expect, the basis of an acetylene torch is the hydrocarbon compound called Acetylene. What you may not know is that this element can get really, really hot. In fact, acetylene produces the third hottest chemical flame, and can reach an astounding 3,300 degrees Celsius when mixed with oxygen.
Acetylene is a highly unstable compound. However, once you combine it with another chemical, you can use acetylene safely and easily while still benefiting from its thermal capabilities. Oxygen is the substance most commonly combined with acetylene – but it’s important to note that the term “acetylene torch” can also be used to describe any type of oxy-fuel torch where other gases such as propane and propylene are used.
Regardless of which chemicals are involved, the two gases are present in two separate gas tanks, which are connected to the torch by two metal hoses. The flame is produced when these two gases are passed through the hoses and combined. When this flame contacts metal, it produces a chemical reaction that initiates a process known as oxyfuel cutting.
Acetylene Torch Safety Regulations
As with any power tool, it’s important to know how to safely handle an acetylene torch before you put it to use. One advantage of HVAC school is learning the safest ways to handle the equipment you’ll encounter in your career. Graduates of North American Trade Schools will learn the safety regulations and precautions they need to take to operate an acetylene torch.

One procedure you will need to learn is how to check your acetylene torch before using it to make sure it’s functioning properly. Firstly, you should check that the torch is closed, and ensure that the pressure adjustment screws are blacked out. Then you can separately open the gas cylinder valves and adjust the regulator p/a screws to change the pressure settings. Next, you can open and close valves separately and make any other changes to the pressure settings on the regulators.
HVAC Technician Training 101: Using an Acetylene Torch
HVAC technician training will allow you to learn how to use these power tools through a hands-on approach, but it’s good practice to know a bit about the steps in using them before you begin your studies.
To use an acetylene torch, you’ll first have to light it by purging the oxygen and fuel gas lines – separately – and opening the fuel gas valve slightly. Next, using a striker, ignite the flame. You can then adjust the gas flow to make the flame form a sharp tip. Now your acetylene torch is ready to use.

Once you’re finished with the torch, you can shut it down by closing the oxygen and fuel gas torch valves. If you don’t plan on using the torch for a while, make sure that all the regulator gauges read zero.
Want to earn your HVAC diploma?
Contact North American Trade Schools for more information!
4 Tips for First-Year Apprentices Working Towards Electrician Certification
January 22, 2020
After you complete a pre-apprenticeship program you can seek out an electrician apprenticeship, where you get paid while learning on the job. In Ontario it can take up to five years to complete an apprenticeship during which you will learn the tools of the trade from professionals. An apprenticeship also includes some more time in the classroom and is a necessary step to becoming a licensed electrician.
Before you start your apprenticeship, you may have an idea of what it will be like, but there are a few points that may help you adjust to on-the-job training. Also, depending on which province you apprentice in, there might be loans to buy tools as you start and grants to support you during your classroom hours. In the meantime, here are a few tips to help you during your first year as an apprentice.
1. Ask Questions
While it is true that you are doing a job and you are getting paid, an apprenticeship is still training and it is a great time to ask questions. Professionals know that you are learning to become a maintenance electrician and should be prepared to explain tools and procedures to you. This may be as simple as asking “what’s next?” and “why?” Electricians have experiential and sometimes highly specialized knowledge that goes beyond the classroom. This is why they may have special insight and it is worth asking for as much information as you can get.
2. Record Your Hours
When you are on your way to electrician certification it will be necessary to record your hours and ensure that they are counted toward the completion of your apprenticeship. The same way you will have to keep up to date with electrical codes and regulations as an electrician, you should stay up to date on your progress as an apprentice. Not only is this necessary, it also helps you keep track of how much you’ve learned.

3. Stay Healthy
You will get a sense of the physical demands in the first year of your apprenticeship and many electricians say it is important to stay in good shape. Electrician work can involve a lot of movement, stretching and lifting. You will be able to work longer and better in your career if you are healthy. The first year of your apprenticeship is a great time to work exercise into your routine, and make sure you are having nutritious meals.
4. If You Want to Become a Maintenance Electrician, Take Your Work Seriously
Electricians are highly respected skilled trades people and play an important role in construction and maintenance. When you begin your apprenticeship, remember that you have a big responsibility. It is important to do basic things like show up on time for jobs, but it is also important to remember that you are responsible for maintaining safety standards in whatever setting you work. The more seriously you take your work during the first year, the more you’ll develop good habits in your career that can help you land additional work in the future.
Want to know more about maintenance electrician training?
Visit North American Trade Schools today!


